Modeling topic

Airbrush Recommendations
Hello, all!
I'm looking for recommendations on equipment to get started with airbrushing (For weathering and eventually custom painting). I am currently looking at this starter set from Micro-Mark:
https://www.micromark.com/ULTIMATE-AIRBRUSH-OUTFIT
It looks like the various components can be had seperately from other manufacturers at lower prices though. Is this a quality set to get started with? Any recommendations for other places to start? Thanks!

Diorama Live Stream
I have been working on a logging diorama that I will be live Streaming on my Facebook page for the remainder. (The Scenic Factory) We will be building Pine Trees Live Stream on Sunday that may be of interest
Connect wiring to board
I built over 15 years ago n gauge train set within a coffee table. I have included all the wiring for street lights etc but I don't know how, or know anyone who can connect wiring to board so I can run the trains can anyone help me I am in Kapiti, Wellington, New Zealand.

Sketchup no longer free?
Sketchup is no longer free?
Sketchup Make is all I can find & it's only a 30 trial for the Pro version.
Google sold it to "Trimble"
Trimble claim it's free, but it's not.

To cork or not to cork, that is the question
I am planning right now to have mostly switching track serving an urban industrial area and also a small yard. I want that cinder ballasted look of yards and old misused industry trackage. It doesn't make sense to me to use cork roadbed. Subroadbed will be sheet plywood by the way. Should I simply lay track on the plywood? Would there be any profile and if so what would I use? I have heard of using N scale cork but that would leave a gap in the middle which would eat ballast would it not?

Peco Streamline & Setrack turnouts, Fleischmann Pro-Track turnouts
Yesterday I found many of my Peco turnouts, and and their 'Streamline' versions label their turnouts as 'small radius", medium radius, and large radius. Peco's small radius appears to match the Fleischmann Pro-Track small radius.
But I also discovered an even smaller radius turnout from Peco. I have a paper template of it, but not an actual turnout itself. It was termed a Peco "Setrack" ST-240,241 left or right hand turnout. Do they still make such an item?
Are the Fleischmann turnouts DCC compatible??
Cut Levers, quick and dirty style
Details are nice to have. Very nice details are great but take quite a bit of time to add and are not always visible at layout operating distances so I usually make some "utility" cut levers and add them to my cars at the same time I add basic air hoses. From a distance something approximating a prototype detail looks about as good as a proper detail so I take advantage of the illusion. First thing to consider is the size of wire to use, scale size wire helps the appearance, make it a bit thinner than scale if you want as paint will make it look thicker.
What is this?
Okay fellow railfans. I have never seen this type of car before. What is it?
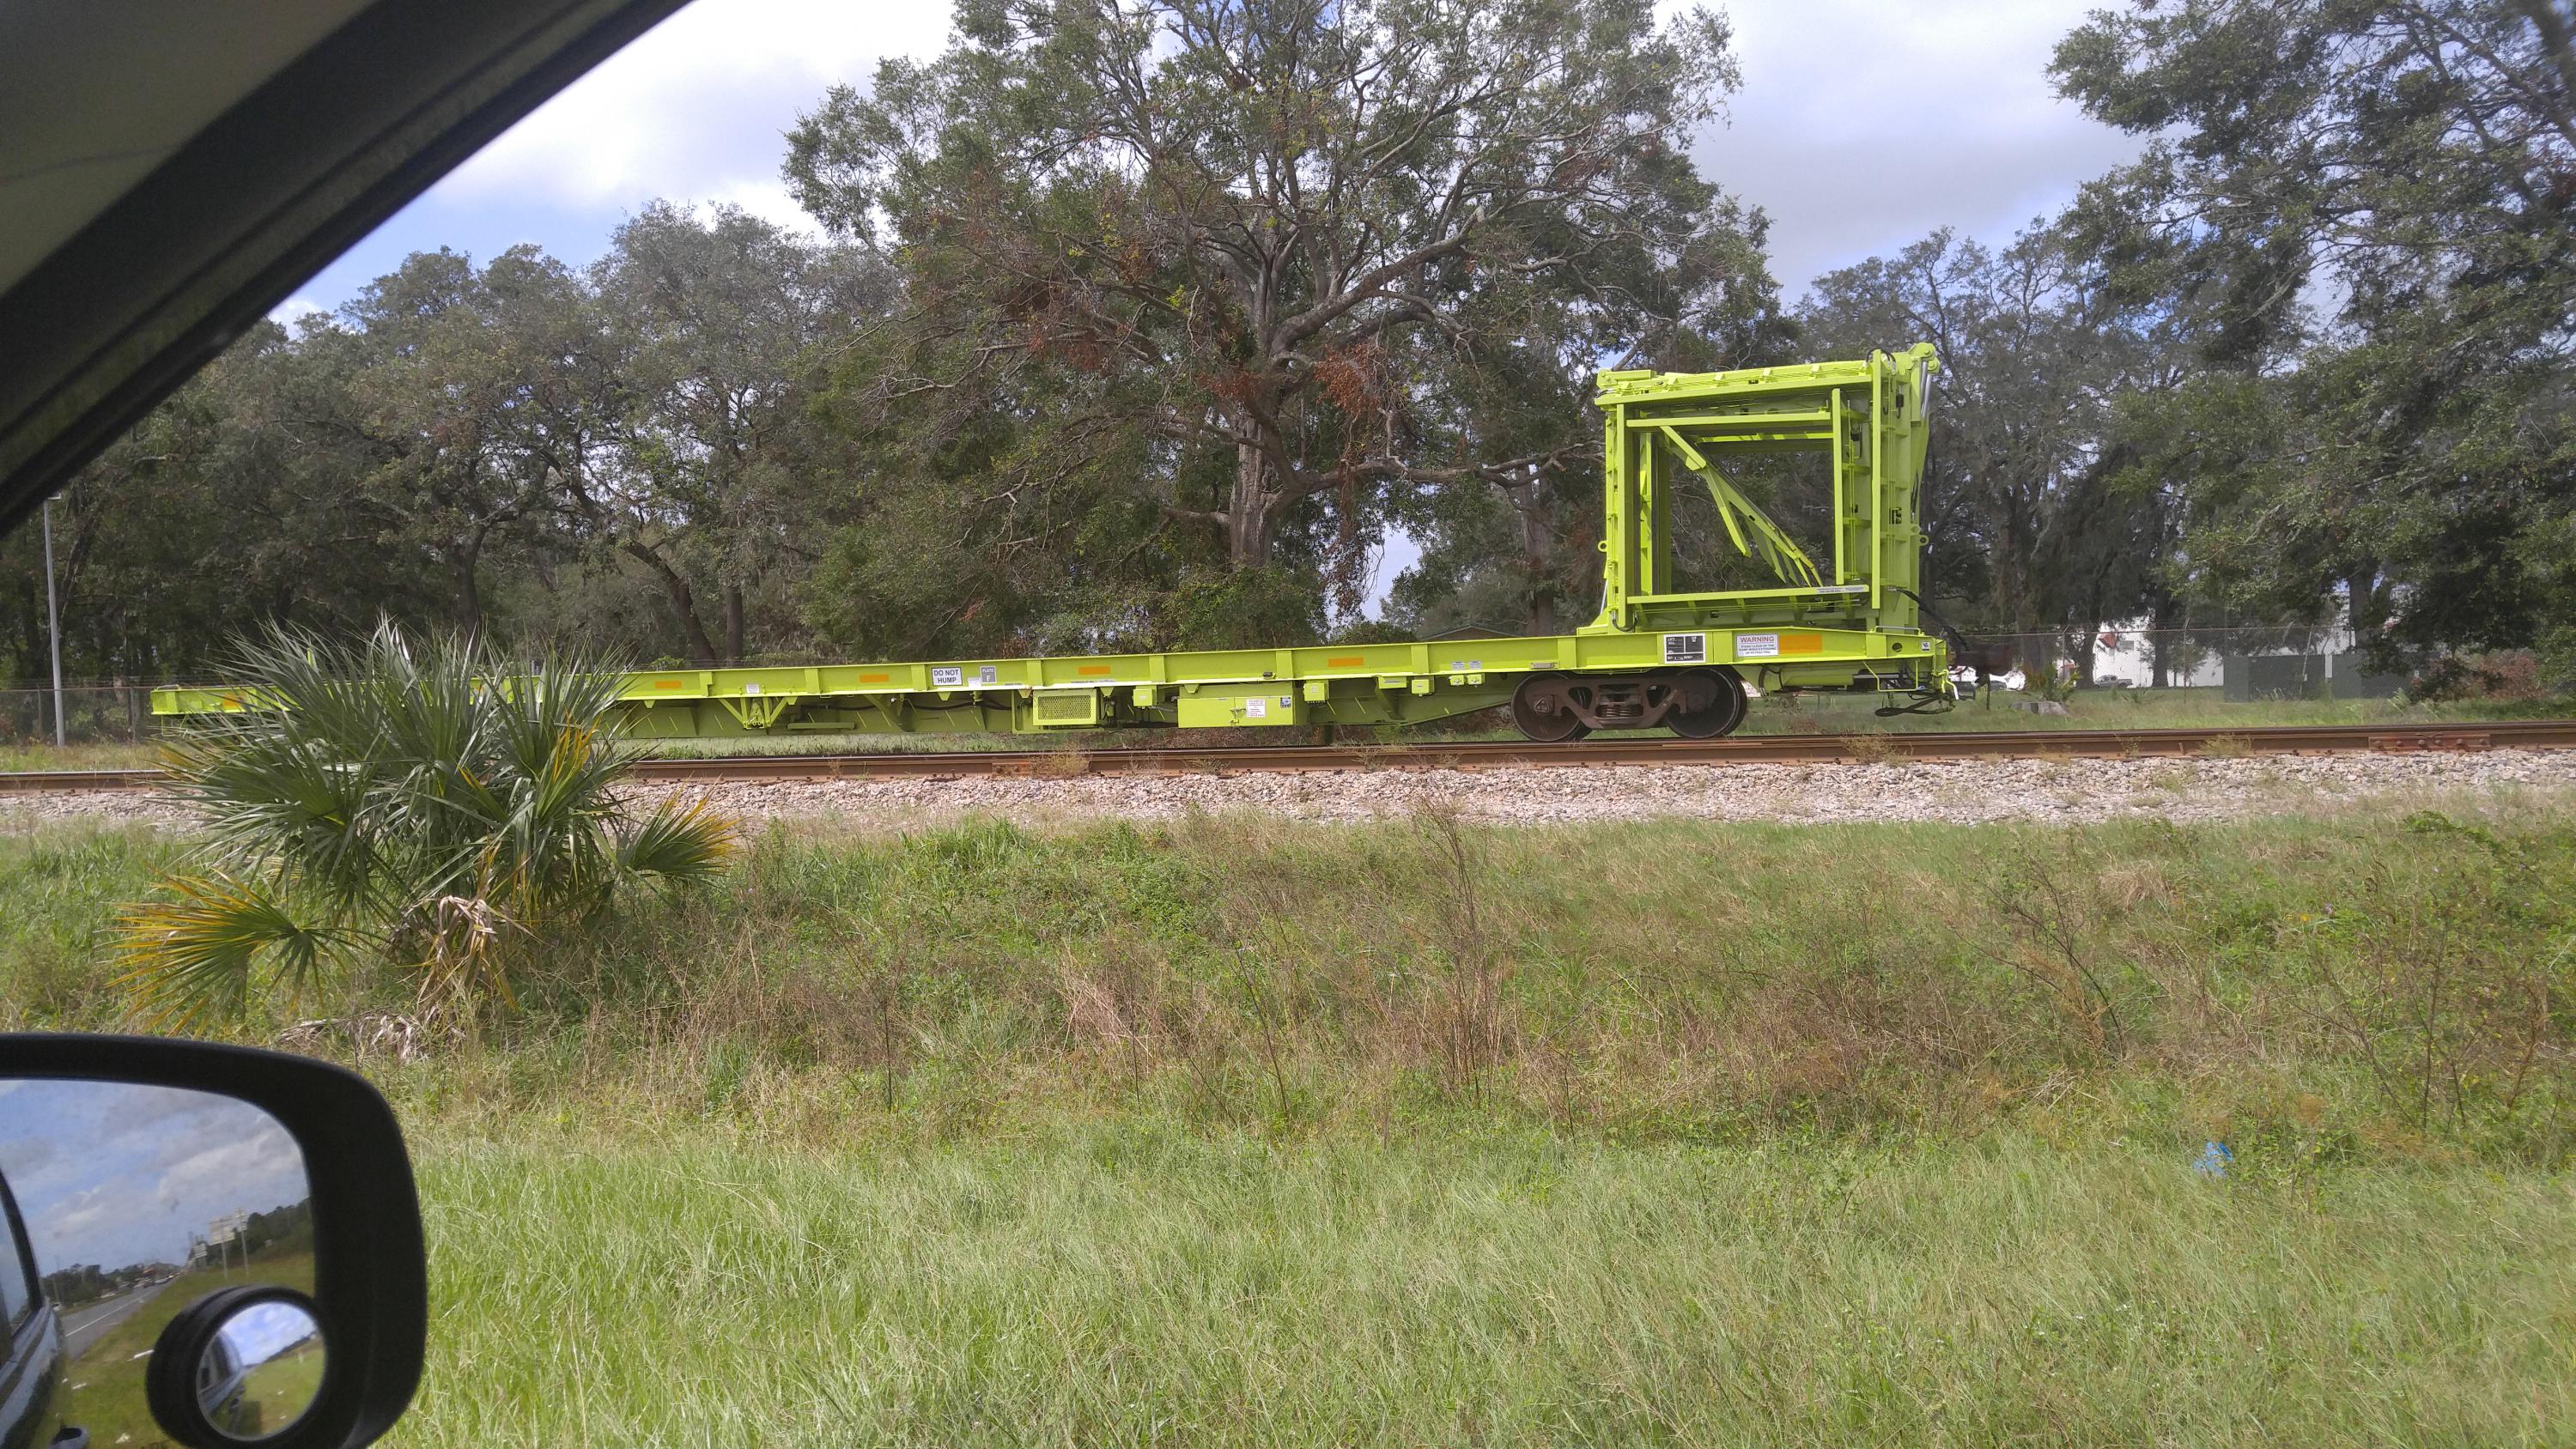
Moderator note: embedded photo.
Scratch built pine tree method
Some asked for “how-to” info on the scratch-built pine trees. My first attempt was an epic fail. I tapered a dowel and drilled holes for individual caspia branches. I figured drilling holes in the trunk would be the tedious part, but that’s not the case. I have a drill press and a V-block, so I can drill the holes in the trunk in under 10 minutes. I takes me about 5 minutes to taper the trunk, using the drill press & sand paper. The time consuming part was the branches. Not attaching them, that only took about 20 to 30 minutes. The caspia turned out to be more trouble than its worth. Selecting an appropriate looking piece, cutting and trimming the buds off the tips, shaping it, etc., and trimming to length. And once it’s on the trunk, you really can’t trim the length of the branches and shape the tree without ruining the appearance of the branch. It became apparent right away that the branches were wrong....not enough secondary and tertiary shoots off the main branches. The result looked like Charlie Brown’s Christmas tree. I put it out of its misery and tossed it. I (and photobucket, thanks you) have deleted all photographic evidence of it.
Then I saw a thread on therailwire Scenery Techniques forum (since killed by photobucket) with awesome trees. This lead me to a youtube video (with English & German graphics), which I believe is by the same author from therailwire forum. He wrapped a wire around a tapered trunk forming branches by extending loops outward from the trunk, clipping the end of the loop and spreading the branches. I tried this method, but I couldn’t wrap it around the trunk tight enough, it would always uncoil. So, I had a little brainstorm and decided to combine the 2 methods. Sort of.
I tapered and drilled the trunk as before, drilling 0.040” thru holes. I use floral wire, insert 2 thru each hole for branches. Some holes need to be opened a bit more with a drill in a pin vise and I need to add a drop of CA glue at the trunk to keep some of the loose ones from spinning. Then spread the branches, trim the wires and shape the tree. Much more flexibility and margin for error than the caspia branches. Spray with adhesive and cover the trunk with fine-sifted sawdust. Then I spray-paint it a brownish gray (or a grayish brown?), let it dry of course, then spray with adhesive and applied long (1/4”) static grass to form the secondary and smaller branch structure. (The first few trees I spray painted after the first static grass application, but the paint didn’t get thru to the trunk in some areas and there were bare sawdust in some spots.) Apply static grass only from above or below, this keeps it off the trunk. Next was another coat of brown/gray spray paint. Then I applied shorter static grass in the same manner for the needles.
I work in steps.....taper some dowels, drill holes, cut/insert wires, etc. All of this can be done a few minutes at a time, when I can only get to the train room for a few minutes. Being able to make such incremental progress, 10 or 20 minutes at a time, keeps it from becoming tedious. I estimate if I worked on a single tree from start to finish, it would take 45 to 60 minutes, excluding glue/paint dry time of course.
General purpose factory 2 build
Here is the build thread for the General purpose factory 2. It is an easy build and I just followed the directions in the Scratch sketch set (http://www.nscale.net/forums/showthread.php?39028-Sss-General-purpose-fa...).
>> Posts index
Navigation
Journals/Blogs
Recent Blog posts: