Hand Laying Track

As part of the next stage of my testing before the big layout build, I want to lay a bunch of track by hand to see how much work it entails, and evaluate it from cost, performance, and appearance standards.
First up though, is a small mini-test section. Here's what I've gotten done so far.
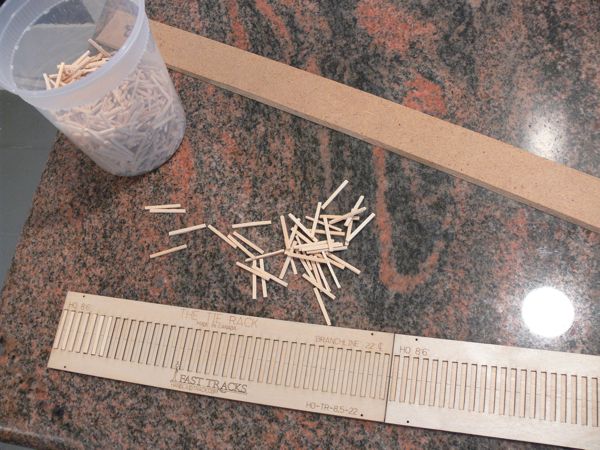 |
Materials/Tools in this picture
|
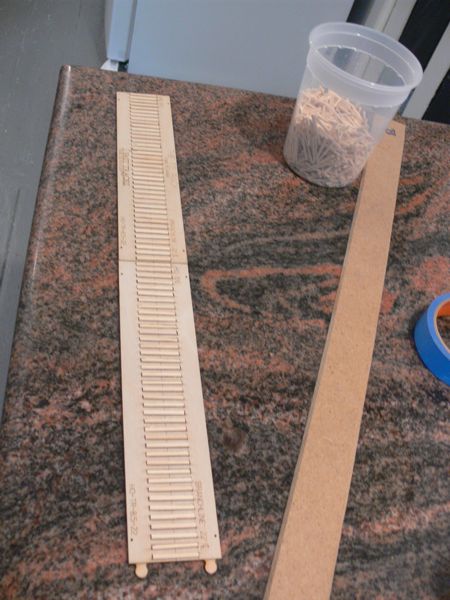 |
Ties go in the jig. |
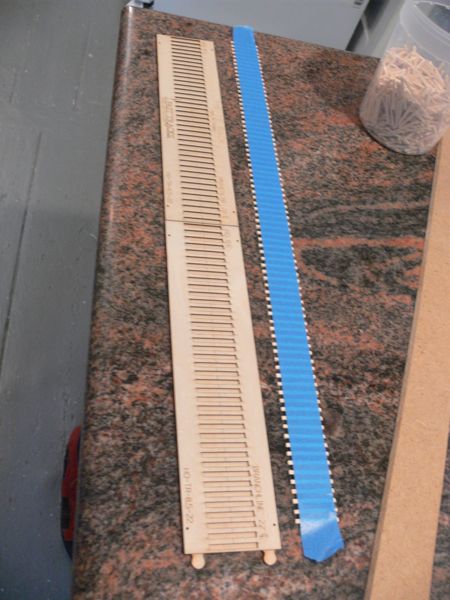 |
and a piece of painters blue tape is applied, than the whole thing gets pulled carefully out. |
 |
just a little (as you can see) yellow carpenter's glue is applied |
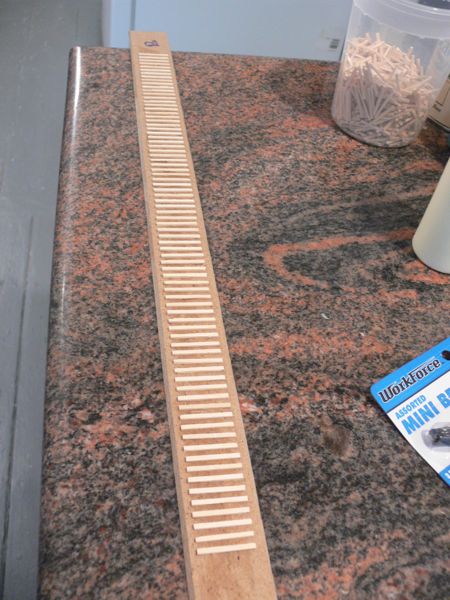 |
And then the ties go down. After the glue had set for an hour, I carefully pulled the tape off. |
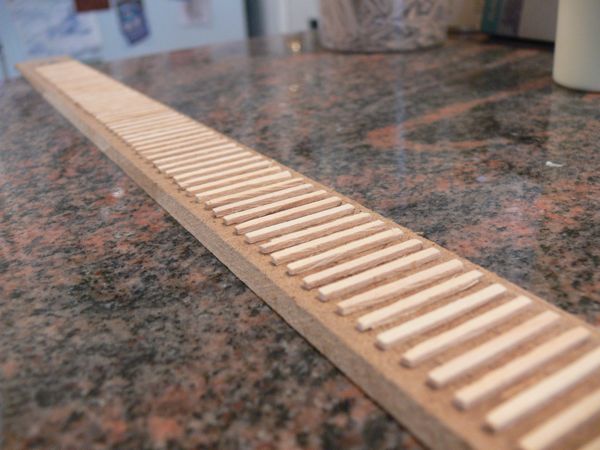 |
Ok, this is looking pretty good so far. |
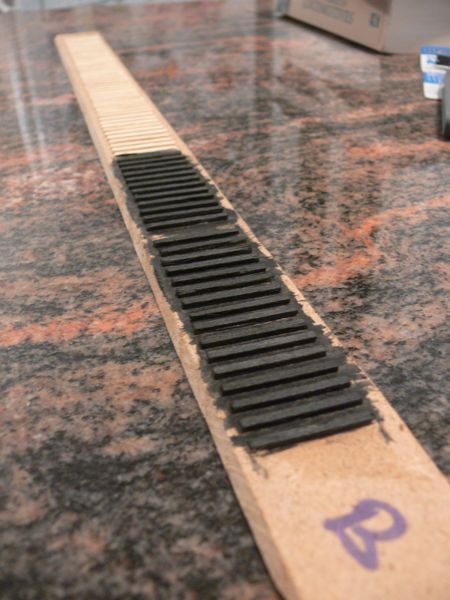 |
Some people recommend dipping the ties in advance, others say to do so after they are glued down. I thought I would try the latter. This picture shows some of the ties after just one coat of the Minwax stain. Materials added:
|
So I'm not satisfied with the tie color, I think it's too black.
I removed one tie to show myself where the "break" is - the first set I'm leaving untouched, the second set I want to drybrush brown over.
The next set of ties will be stained with a black/brown mix. I want a bunch of sections to determine what looks best.
>> Posts index
Navigation
Journals/Blogs
Recent Blog posts:
Comments
tie color and detail
The color looks good if you are duplicating newly-laid ties.
Older looking ties you need lighter colors and color variation from tie to tie. Since you're probably going to sand the tops of the ties before laying the rails, you'll need to stain individual tie tops by hand with different color shades, although it may still be worthwhile using two or three color shades when you prestain the ties in batches before laying them.
Some people don't like the looks of track which doesn't include tie plates and spikes on every tie. Nevertheless, I don't miss it when operating. I suppose it is essential if one wants contest-level, close-up photographs. I've never applied such detail to handlaid track. It is too expensive and time consuming for something not usually noticed. Perhap's Central Valley's tie strips is the way to go. At this time I'm undecided but leaning towards not. I like the texture of individual real-wood ties.
If you're not into close up photos
If you're not into closeup photos and you can sleep at night knowing your trackwork is missing detail (or has hopelessly out of scale detail like the cantalope-sized spikes on Atlas code 100 HO track) - then yes - do what ever's simple and inexpensive.
Trackwork that's nicely ballasted and weathered but missing tie plates and spikehead detail or has grossly out of scale detail looks fine at typical standing distance when running trains in an op session. As long as the model track is nicely weathered and ballasted, it all looks pretty much the same from the "500-foot helicopter view" when standing and looking at the layout.
But the minute you get down close and take a scale railfan view, the difference will be *very* obvious!
Joe Fugate
Publisher, Model Railroad Hobbyist magazine
Read my blog
Handlaying Trackwork
What's given here is good but there is plenty more including Handlaying Switchwork
I give a clinic on Handlaying Trackwork. There are samples of materials and a handout. It has been given a number of times at National and regional conventions.
Have the ties dried in the
Have the ties dried in the picture? I am curious if maybe they will lighten. I think your project is a great way to find out what color works. In the pic they look like a freashly creosoted tie.. so maybe good to mix in some here and there. I did a similar thing with painting my flex track where I took a length of track and painted ties with different mixes along its length. Unfortunately, I took lousy notes and am not quite sure what it was that I liked!
I have studied N-Scale flex track up close and found there is not much detail to be lost if I hand-lay. Just a little sanity. This has encouraged me to try in the near future.
Chris
“If you carry your childhood with you, you never become older.” My modest progress Blog
Going to be giving your clinic any time soon?
J Paul:
Going to be giving your clinic again any time soon? Going to be at Hartford?
Would you be interested in an article and/or some video of your clinic in MRH? We pay upon acceptance for all content we use in the magazine, and would love to see your info get in front of 30,000+ modelers - that's equivalent to a lifetime of conventions!
Joe Fugate
Publisher, Model Railroad Hobbyist magazine
Read my blog
More to come
Thanks J Paul. Please note that this is not the end all, but merely a blog of my progress, and this whole thing is very much still a work in progress. I'm not covering this as a "how to" as much as a "here's what I did".
Per turnouts, I've invested in the Fast Tracks package, and I'm going to get my hands wet with that.
I am going to stain the tops again after sanding, so well see how that goes to add variations to the color.
Chris, the stain has dried over night, so this is it. I hope to be able to try some color varations tonight or tomorrow on the next few ties.
I don't miss the tie plates
All of our visible track on the Sudbury Division is handlaid, most of it old-school scratchbuilt turnouts. Members recently purchased a couple of Fast Tracks turnout jigs and I have been using the frog and point jig to speed construction of those parts, but only one jig-built turnout is in a visible location.
We have some commercial turnouts in staging yards. They are Shinohara, Atlas and Peco. The Peco haven't been used as they are in part of the mole yard which isn't operational, but the Atlas and Shinohara turnouts are scheduled for replacement because they function so poorly compared to our scratchbuilt ones. They are a source of horrendous noise and constant derailments, not to mention unreliable electrically.
Here's a shot of some of our trackwork:
I suppose it may be apparent if you are looking for it that there are no tie plates or joint bars (we sometimes consider putting joint bars on; I think they are far more obvious than tie plates). If there's anything I think that detracts from our track. it's some inconsistancies in things like frog and guardrail size and placement, but these things are a matter of care and practice. We are getting better as we go.
One thing is for certain: if you know what you are doing, handlaid track performs much better and looks finer than stock commercial track. You can control the size of frogs and flangeways to make them closer to scale size than commercial turnouts and this will at the same time make things run through those parts more smoothly. You do need to make sure your wheels are NMRA spec, though. We found that every set of Kato trucks we had wouldn't go through our turnouts because each wheelset was about half a millimeter narrow in gauge.
Jurgen
HO Deutsche Bundesbahn circa 1970
Visit the HO Sudbury Division at http://sudburydivision.ca/
The preceding message may not conform to NMRA recommended practices.
Tie colouring
The colour of the ties look like they have just been dipped in creosote to stop the white ants.
When I have been handlaying track I use a very simple recipe. 100 ml of rubbing alchohol and six drops of black raven oil leather colouring solution. It goes on dark black but as the alchohol evaporates it goes a very nice weathered grey colour. You can also apply it once more if it is too light for you.
If you want to have a different colour then use a dark brown raven oil. One bottle of this will outlast you and you can leave the rest to a family member in your will.
Nice Picture!
That's a pretty nice picture Jurgen.
But when the camera gets lower ME track starts looking pretty nice. I've not had trouble with it for operations (nor with Atlas). But I'm with you and scratch building turnouts!
Here's a piece of newly ballasted ME flex on my layout.
Cheers,
Charlie
Superintendent of nearly everything
Raven Oil
Tom,
Do you have any pictures of how those ties look? I'd love to see the effect.
Secondly, where do you get your Raven oil? My initial google search only ended up with suppliers in Australia, and I'm in North America.
Third, do you dip or treat them after they are down?
Thanks!