Static Grass Applicator

(Please forgive the layout of this post, I have a hell of a time with this site getting images to simply align in the order I want. It may be a Firefox thing. You can find a more organized post here on my site).
I've been playing with scenery, and wanted to move my testing onto the static grass. The applicators seem the way to go, but I'd rather spend $200 with one of the advertisers here before buying a Noch version.
Thanks to this website that had a great break down of items to purchase, I got the parts, and started whipping my homemade version into shape.
The key, it seems, is the negative ion generator. I know some folks have had luck with a electronic fly swatter, but in the middle of winter they're kind of hard to find, so I went ahead and ordered one of these. As an added bonus, it is 12 volt.
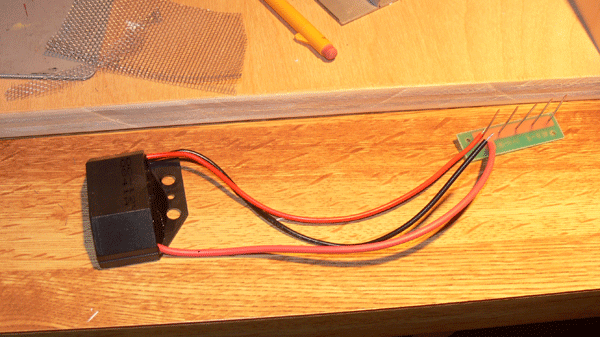
First up was a rough approximation of the tutorial.
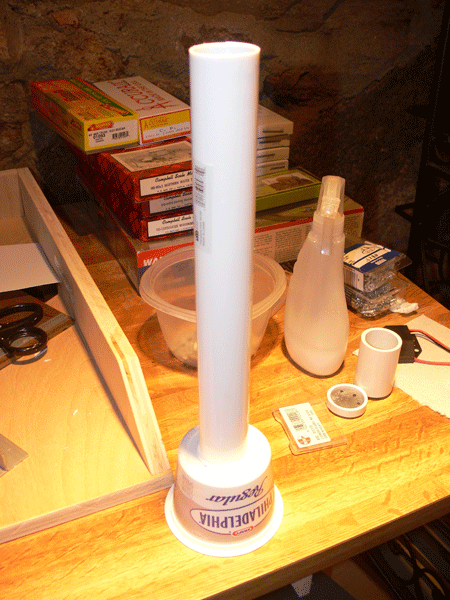
I realized after beginning construction that the shape isn't relevant to the function (or at least I believe). What is important is that the wiring is sound. The package is in some degree not material as long as the grass passes through the screen that is receiving the charge.
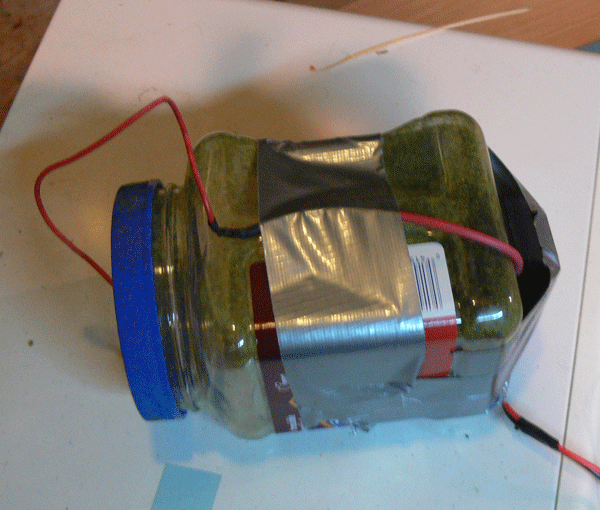
Based on that, and that I was having a hard time getting the two parts above to adhere, I went with a simpler model. It is smoked almond container, with the screen not glued in, but just pinned by the cap and the top of the jar. I liked the thicker plastic, and duct tape seemed to hold the electonics pretty securely.
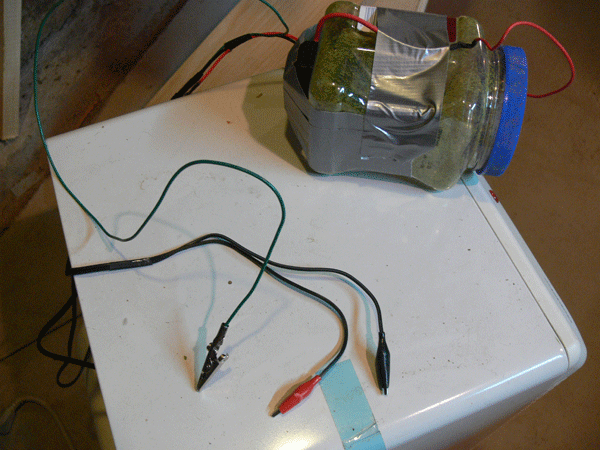
This ion generator is from the automotive world, and is 12 volt, which is the same voltage i realized as my MRC 12 volt powerpack. I have that powerpack on a toggle switch so I can go between DC and DCC on my layout; I figured why bother with another power source? The Red and Black alligator clips attach to any rail section, the green is for the ground. I just clip them on and fire up the powerpack to 80/90%.
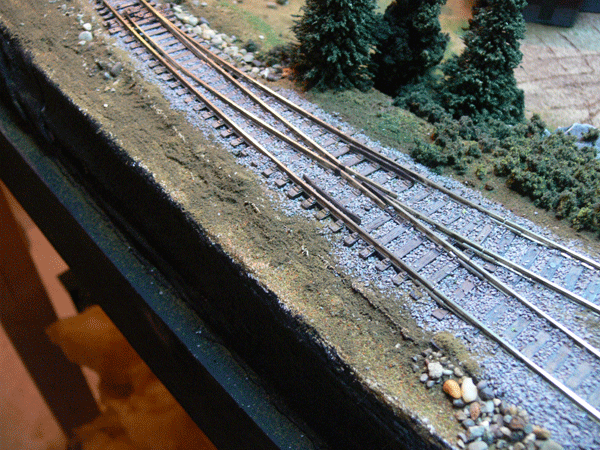
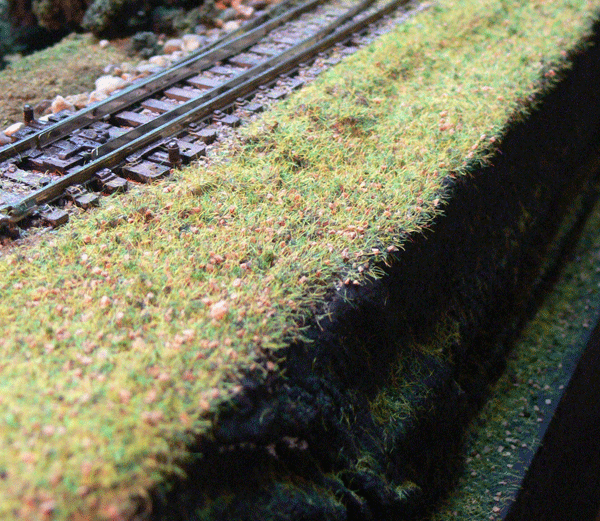
My question for this educated audience is the results. I am 98% sure the wiring is right as it makes a noise, and static electricity increases as the mesh gets close to the ground, but does the end result look right? As I haven't seen any in person, I'd like you to evaluate the before and after, just to confirm if I'm on the right track, or if I need to return to the drawing board. At the end, please find a before and after picture of the test area.
>> Posts index
Navigation
Journals/Blogs
Recent Blog posts:
120v version
Where do you put the ion generator on the jar?
I looked on the electronic goldmine website. They have a 120v ac version of the same ion generator that looks intriguing too.
Chris
“If you carry your childhood with you, you never become older.” My modest progress Blog
It's not
I don't - at least not yet. I just hold it in my other hand. I intend on making a velcro strap so I can strap it to the jar.
I chose the 12 volt as I have a ready supply of 12volt DC everywhere on my layout.
120V Version
I think I would err on the side of caution on that one and stick to 12V model.
If you have some peel n' stick velcro you can just stick the ion geneator to the jar too.
Thats a simple solution you have there, and it works.
I agree - 12V version's safer
I agree - you should stick with the 12V version - it's safer. Unless you know what you're doing with 110V house wiring, I'd stick to the low voltage negative ion generator.
Joe Fugate
Publisher, Model Railroad Hobbyist magazine
Read my blog
Its the Amps that will kill
Its the Amps that will kill you ;)
---------------------------------------------------------------------------------------------------------
Benny's Index or Somewhere Chasing Rabbits
Closing the Door
I think it's time to put this topic to bed, suffice to say that the effect of the static grass I find preferable. For the cost of a $15 negative ion generator, the application is not cost prohibitive, and as I've shown, doesn't require any fancy electronic footwork to get it working.
I'll leave this off with a before
and after picture as I work around the layout.
Static grass applicator.
I realize this is an old topic, but would you post your plans for your static grass applicator.
It looks like you are getting fantastic results.
Thanks Jay