Static Grass Applicator

(Please forgive the layout of this post, I have a hell of a time with this site getting images to simply align in the order I want. It may be a Firefox thing. You can find a more organized post here on my site).
I've been playing with scenery, and wanted to move my testing onto the static grass. The applicators seem the way to go, but I'd rather spend $200 with one of the advertisers here before buying a Noch version.
Thanks to this website that had a great break down of items to purchase, I got the parts, and started whipping my homemade version into shape.
The key, it seems, is the negative ion generator. I know some folks have had luck with a electronic fly swatter, but in the middle of winter they're kind of hard to find, so I went ahead and ordered one of these. As an added bonus, it is 12 volt.
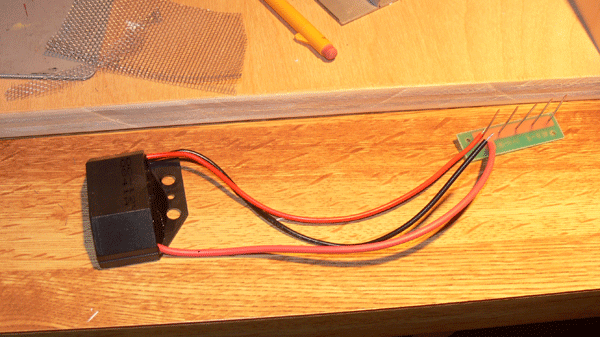
First up was a rough approximation of the tutorial.
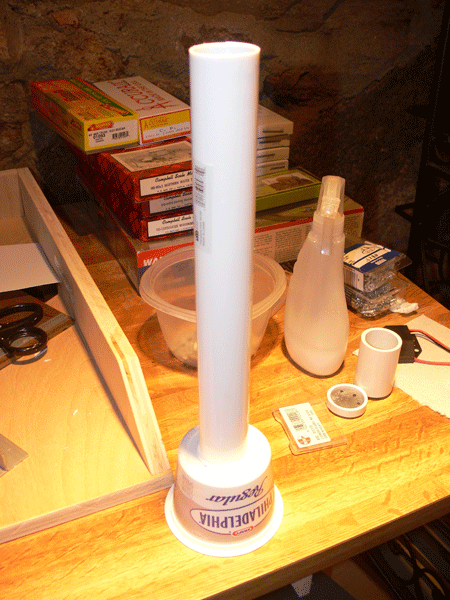
I realized after beginning construction that the shape isn't relevant to the function (or at least I believe). What is important is that the wiring is sound. The package is in some degree not material as long as the grass passes through the screen that is receiving the charge.
Based on that, and that I was having a hard time getting the two parts above to adhere, I went with a simpler model. It is smoked almond container, with the screen not glued in, but just pinned by the cap and the top of the jar. I liked the thicker plastic, and duct tape seemed to hold the electonics pretty securely.
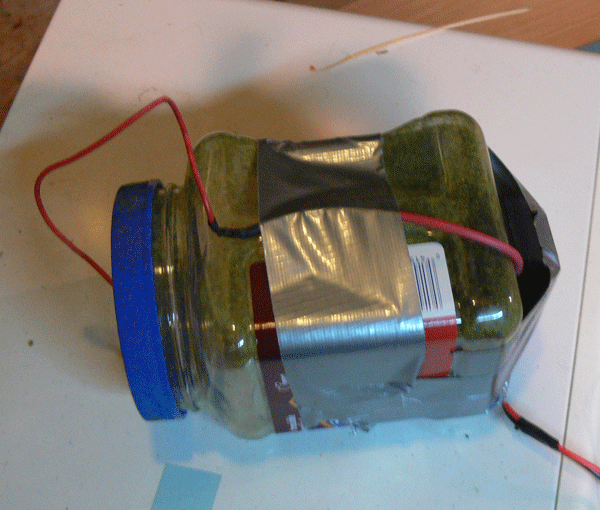
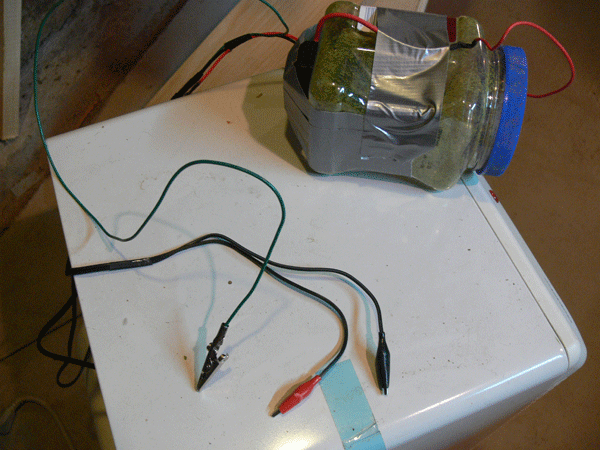
This ion generator is from the automotive world, and is 12 volt, which is the same voltage i realized as my MRC 12 volt powerpack. I have that powerpack on a toggle switch so I can go between DC and DCC on my layout; I figured why bother with another power source? The Red and Black alligator clips attach to any rail section, the green is for the ground. I just clip them on and fire up the powerpack to 80/90%.
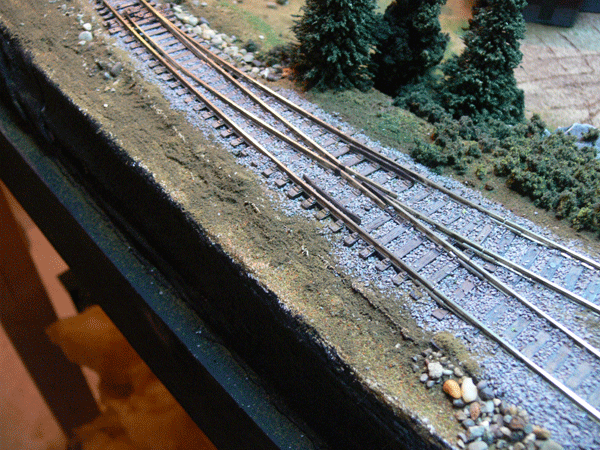
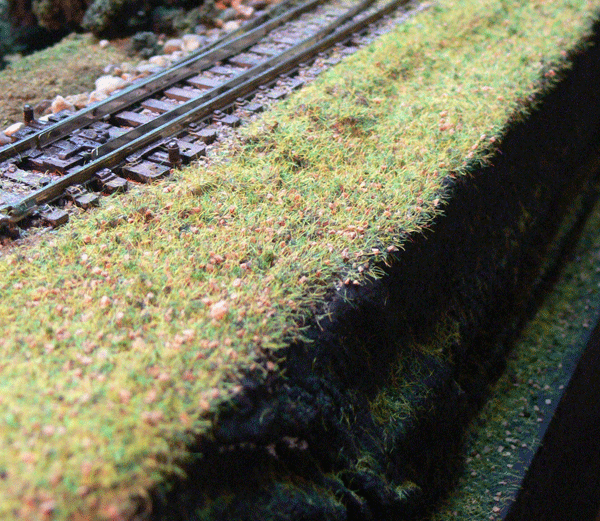
My question for this educated audience is the results. I am 98% sure the wiring is right as it makes a noise, and static electricity increases as the mesh gets close to the ground, but does the end result look right? As I haven't seen any in person, I'd like you to evaluate the before and after, just to confirm if I'm on the right track, or if I need to return to the drawing board. At the end, please find a before and after picture of the test area.
>> Posts index
Navigation
Journals/Blogs
Recent Blog posts:
Grass
Well, I have only seen the Static Grass Joe did in his scenery video but your's looks pretty good to me.
It looks like Red Green has
It looks like Red Green has discovered model Rialroading...;D
But hey, if the women don't find you handsome, at least they'll find you handy?
Ahahahahahaha!!!!
If it works, pride yourself on your scavenging skills!!!
---------------------------------------------------------------------------------------------------------
Benny's Index or Somewhere Chasing Rabbits
Ok, thanks
Ok, Thanks. again, I haven't seen the final product other than online, so I wasn't sure how it was supposed to look. The one tutorial I saw had much longer material than what I have - I'll have to shop for some.
Grass Applicator
As well as showcasing great scenery techniques, Joe's 2 DVD scenery videos include a tutorial on building the grass applicator. When finished his looks very much like the Noch retail product that sells for $120 or so. It looks like your scenery is coming right along but Joe demonstrates some great techniques in the videos, IMO.
You may want to check them out, I thought they were a great deal.
model-trains-video.com
Videos
You know, I'll consider them. I have to admit I don't have a big interest in how to videos; I'm more of try and fail 5 times kind of guy, but I try to keep an open mind.
Per the applicator, I was well on my way to making one that looked like the (now) $200 one, but I stopped and asked myself why? The looks do not seem to matter much, and I prefered the idea of a screw on lid as opposed to a snap on one, hence the almond container. Now that it's working, I was going to make a narrow area lid using a plastic funnel glued to the front of another lid.
Thanks again!
Peanut butter jars
Could one use a peanut butter jar as the container? These have screw on lids?
I have a Noch that I picked up on sale from Scenic Express for an almost reasonable price a while back. It works pretty well but the current prices seem more than a bit steep.
Charlie
Superintendent of nearly everything
Peanut Butter
A peanut butter container might be ideal actually. The cost of the retail applicator is just not worth it if you can build one like Joe does in the video for around $30
I think I have everything I need in my parts drawer/recycling bin, except the negative ION generator and the pvc tail piece.
The only thing about the "Noch like" applicator that I like better than the "Red Green" version is the long handle where the guts can be housed.
BTW Scarpia, being considered a graduate of the "Red Green Institute of Duct Tape" is a compliment.
No honestly, I really do
No honestly, I really do think you did a stellar job in advancing this idea. Some have said the teastrainer has little control to it, and I think the cut shape of the opeing will help a lot. And you are also gettin gus unweened form the ion generator and turning us back to a simple regular Power supply - GREAT!
---------------------------------------------------------------------------------------------------------
Benny's Index or Somewhere Chasing Rabbits
Unweened?
Benny said:
"And you are also getting us unweened form the ion generator and turning us back to a simple regular Power supply - GREAT!"
I was wondering what you meant by this? From what I got out of it Scarpia is using the 12Volt negative ion generator to generate the static field, just like the prototype.
Noch vs Duct Tape
I had actually cut down the ion generator to fit the drain pipe; i just didnt' see the need for it. Having used the almond can, I find little difference between the two shapes (the almond can has hand cut outs).
Peanut butter jars don't have the hand cut outs, so those might be uncomfortable.
Another thing to consider is that the ion generator does not need to be in the device at all - just the one wire, and the ground wire are needed "on site". The battery pack version eleminates all extra wiring, but if you're going to wire to an extermal power source like I did, the generator could be 3 feet away. This could provide for a very small hand held device; even a spice jar could work.
As I type this, I am planning on doing just that - putting the ion generator off tool. Why? Well the static grass I got from Scenic Express comes in those 32 ounce shaker bottles with the screw top lids. With the generator off tool, I can simply use the same piece of screen cut to fit, and a velcro strap, and simply use the original shaker bottle without any other container necessary. I think it may prove convenient for changing "flavors" of static grass. I may even put the generator in a box car, and use the wheel sets to provide pick up power from the track......
Be sure to use braded, and not solid wire though for flexability.
I think Benny meant using a reglar power supply instead of a dedicated one, as the the Ion Generator is an absolute must for this. Unless you rubbed a lot of balloons against your hair....
I'll post up my next iteration once I get it worked out.
Cheers!