NejcR

Hello!


Last year I had to dismantle my previous layout, Steam Era. You can see it here:

http://model-railroad-hobbyist.com/node/19034

Well, a few months ago, my new project started. I've always been a fan of the narrow gauge railroad, specially logging and mining facilities. After having quite a few problems with previous layout (briefly described on deep linked topic), I decided to dedicate almost all of the new layout to logging. It will have short part of the H0 tracks (only 2 tracks beside Victorian city), everything else will be H0e (009 mm). Layout will be L - shaped, with three modules in line and one perpendicular to it (see below). First module will be approx. 120 cm x 100 cm, second and third 150 cm x 100 cm.

More details in the next post, below.


Best regards, Nejc


Follow detailed progress of my work on Instagram: steam.era.layout.h0

Reply 0
NejcR

More details ...

I think that the best idea now is to show you my sketch of the new layout. Some small corrections have been made, but all in all it will look something like this:


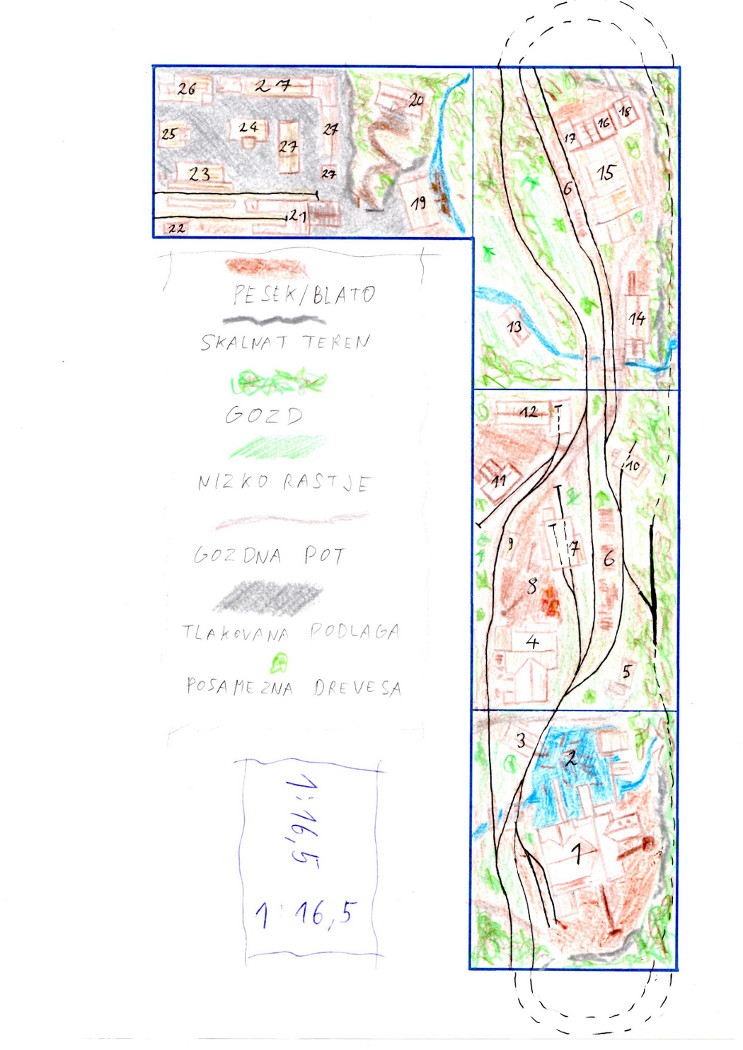
If you're interested, here is everything explained by the numbers you see up there:

1. Big sawmill (Sierra West Twin Mills kit). This complex will take over the whole module. Sawmill will include 2 slopes for log hauling and visible machinery (more than it's included in the kit)

2. Lake, about 3 cm deep, filled with logs

3. Steam log unloader

4. Big machine shop with belt driven machines. Basic kit will be SW kit, but will be twice as big and with different machinery (Rio Grande, Scale Structures etc.). Machine shop will be driven by 2 steam machines and will include mostly metal processing machines

5. Small logging hut (scratchbuilt)

6. Logs

7. Small machine shop with belt driven machinery. Everything will be driven by one steam engine. Mostly wood processing machinery will be held here

8. Constructing yard, where logging machinery will be assembled

9. Small saw

10. Boiler house

11. Small house for loggers (part of SW kit)

12. Repair shed. Mostly for locomotives and traction engines (scratchbuilt)

13. Venetian sawmill, water driven, it was very common in my country Slovenia and this part of Europe (http://www.tms.si/index.php?m_id=venecijanka&lang=2) (scratchbuilt)

14. Water driven sawmill. Machinery will be belt driven from waterwheel (scratchbuilt)

15. Big steam driven sawmill (scratchbuilt)

16. Unloading deck for logging cableway

17. Unloading deck for logs brought by traction engines

18. Valley station of the 2 roped gravitational cableway (telpher line) . Model will be based on our Golobar cableway (http://kraji.eu/slovenija/zicnica_golobar/eng). It's valley station can still be visible as a museum piece near Bovec, Slovenia (scratchbuilt)

19. Blacksmith workshop driven by 3 waterwheels. Interior will be based on a real structure, that's on displey in Technical museum of Slovenia (scratchbuilt)

20. Gothic house (Grimm's funeral home, Downtown Deco). I'll add some details to it

21. Warehouse (Chippy Hollow Hardware, FSM)


And Victorian era town:


22. Signal tower

23. Railroad station

24. Post office

25. Fire station

26. Town hall

27. Several different buildings from Vollmer, Kibri and Faller that will fit in this era


I must say that every machine will be visible without having to remove the roof...


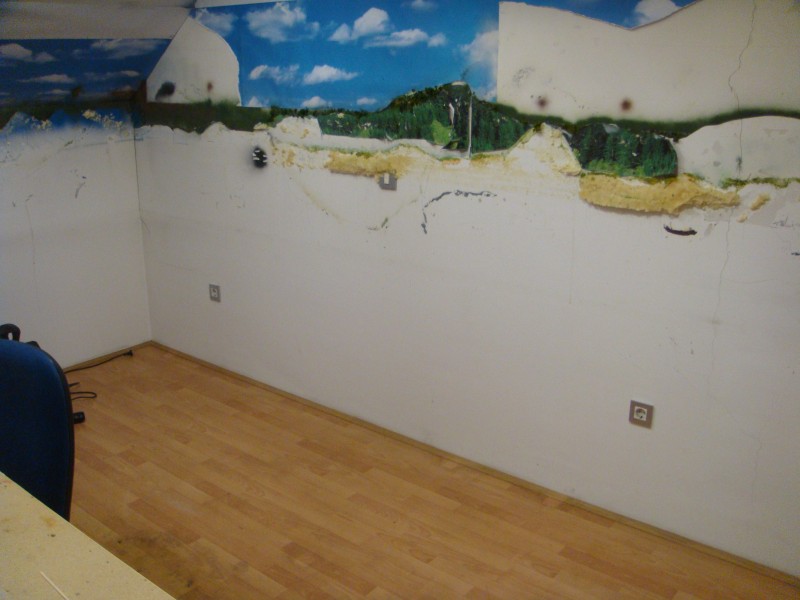
After about 2 months, layout was dismantled. Leftovers:


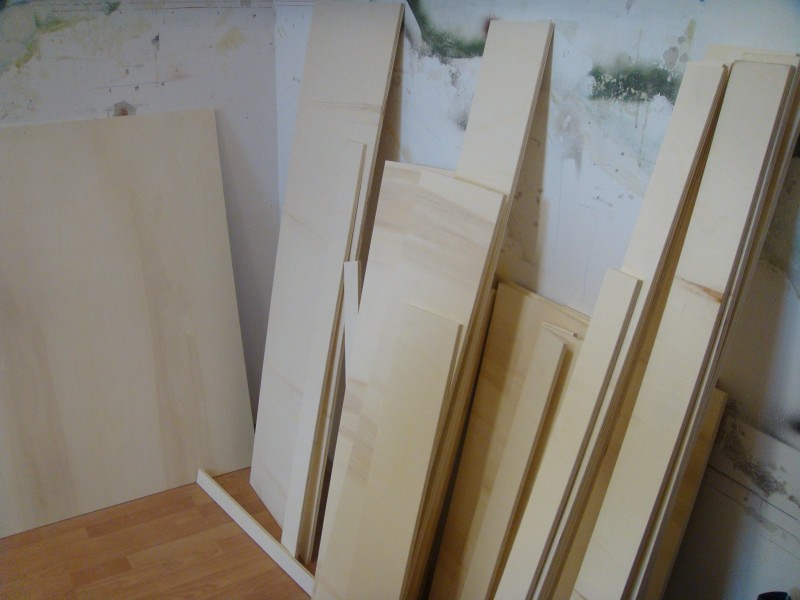
You can see what I meant under ''BUILT INTO THE ROOM''. Wood was supplied:

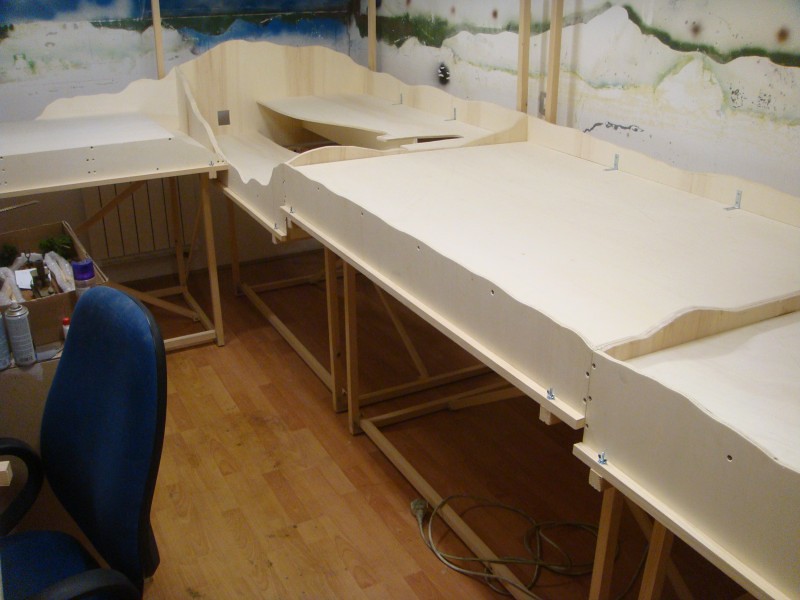
Work begun shortly after:


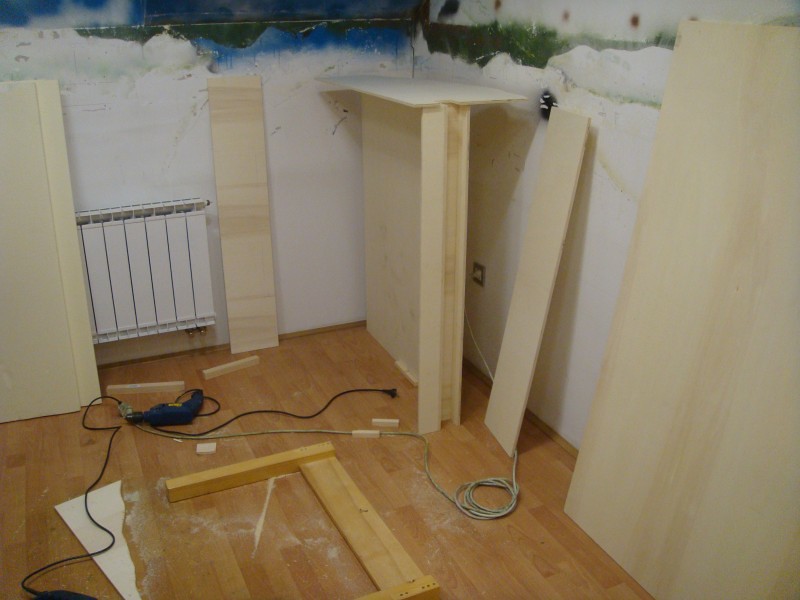
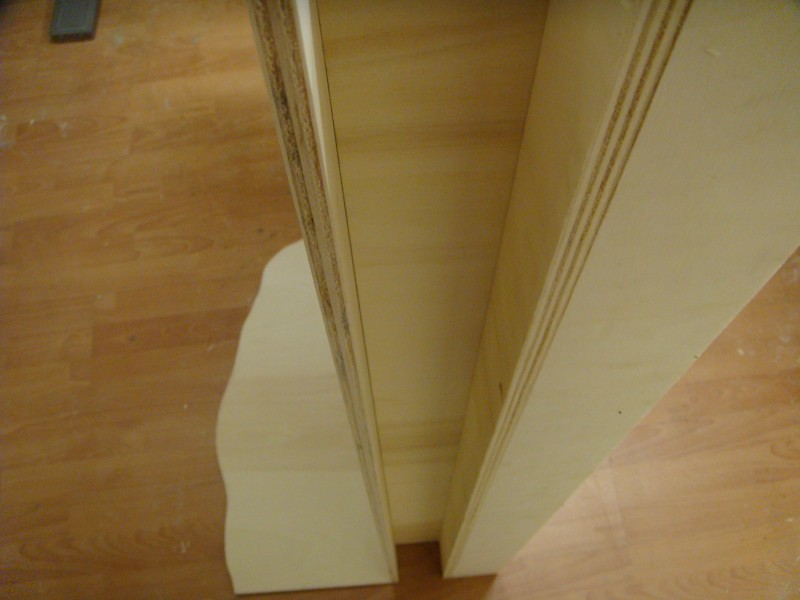
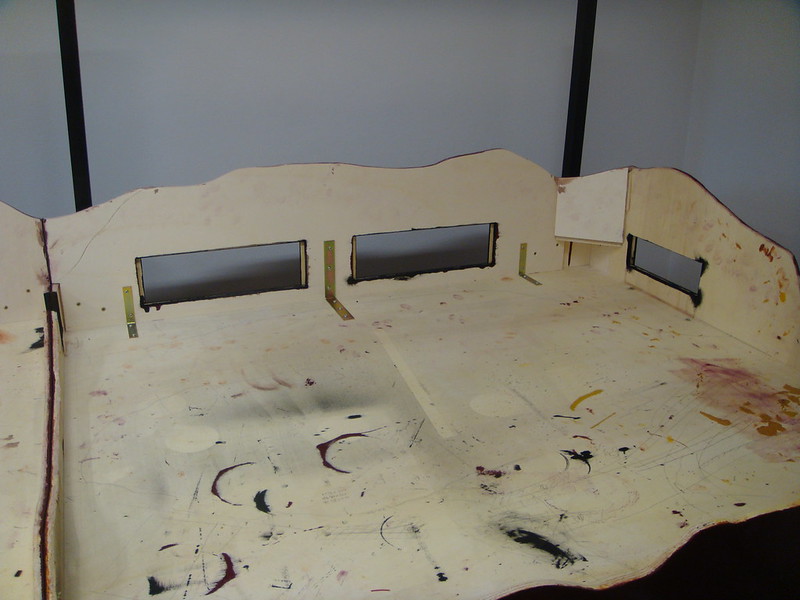
''Tunnel'' on the back of the modules. As you can see, track there will be highly accessible.

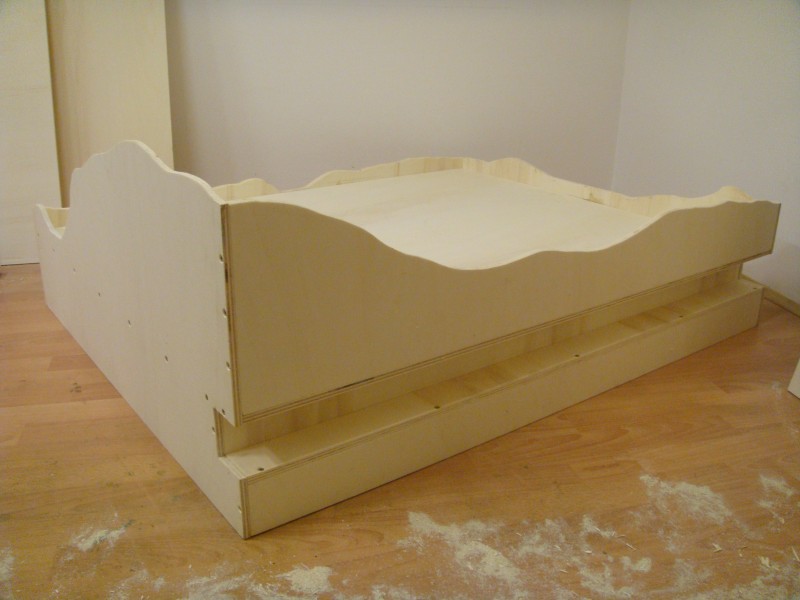
First module from behind:


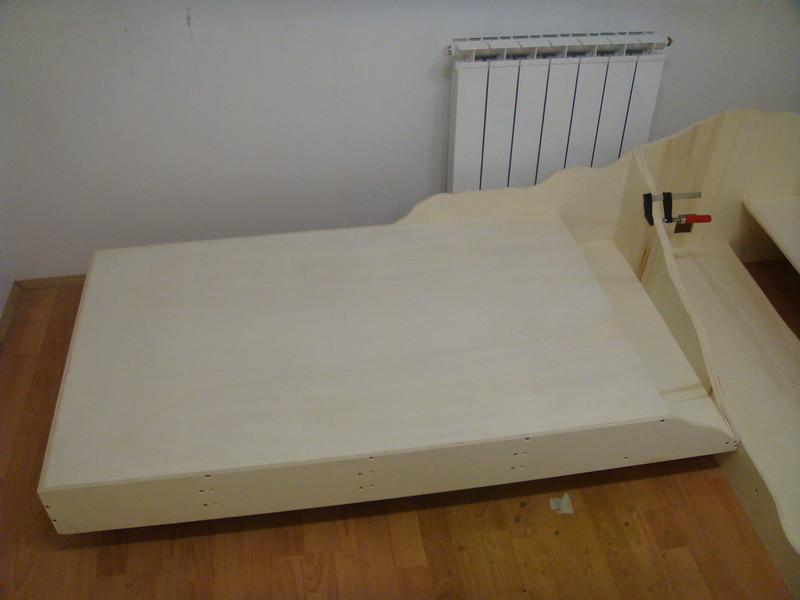
Fourth module, for Victorian city:
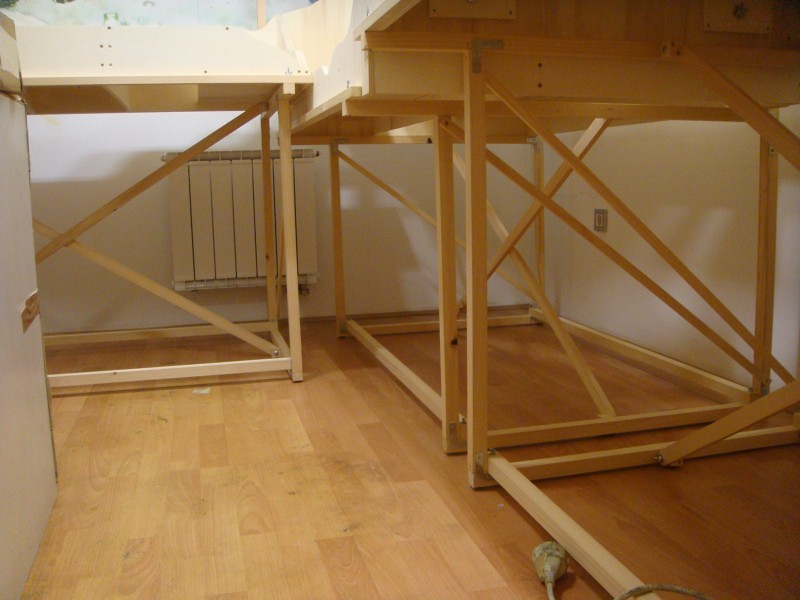

Wooden framework:


Everything together:


Back sides of the straight three models were different back then, because track along backside of the modules were not yet planned. Later I added it, because I have to have 2 main lines instead of only one (through backside tunnels).

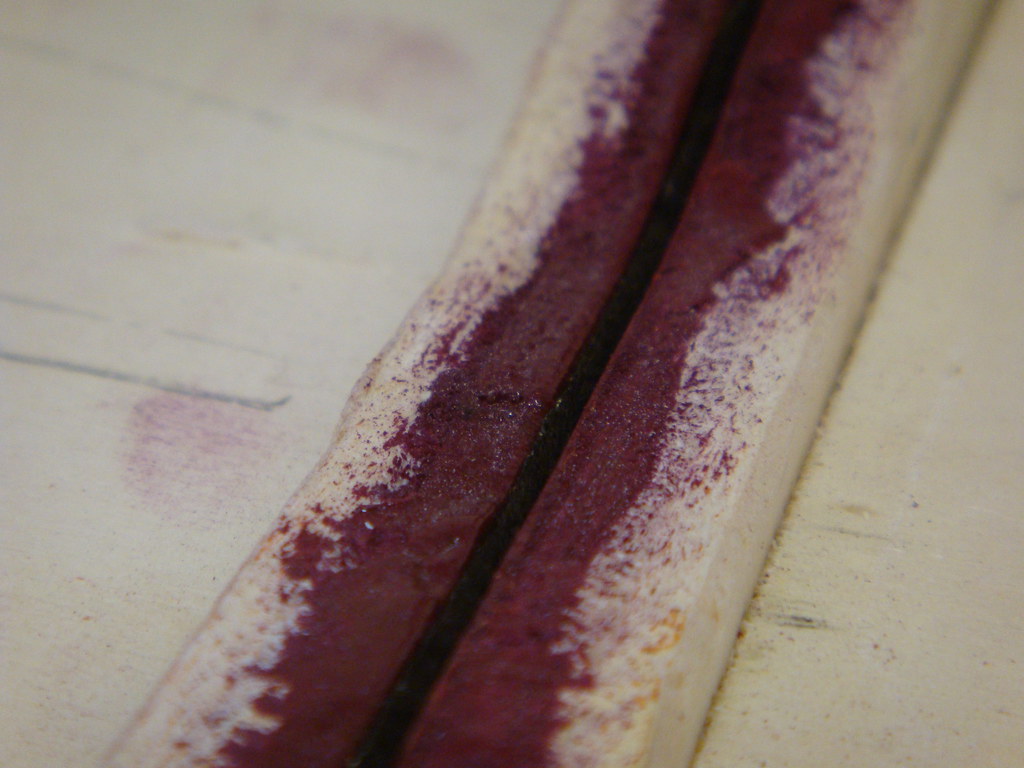
First module after some finishing touches:


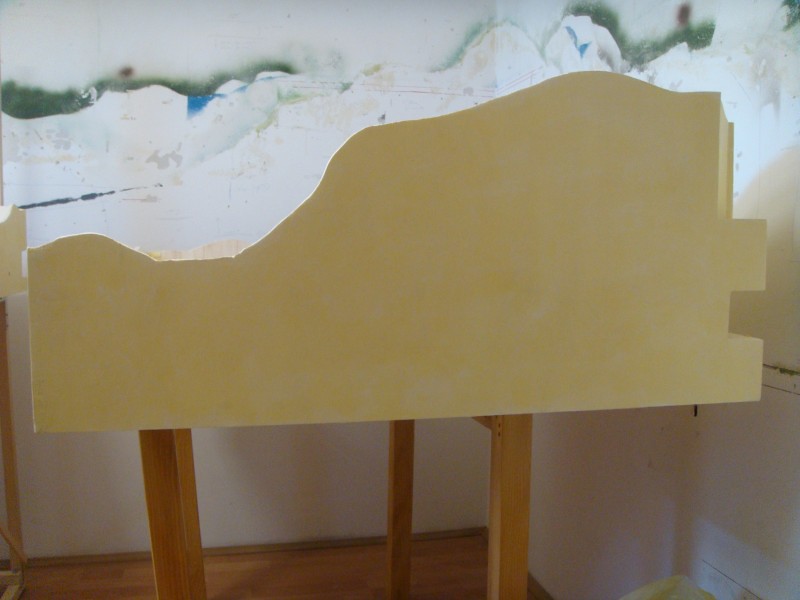
Part of the wood on the right side is cut out, due to background which will later be added. I don't want 90 degree corners on it.

I decided to paint it bordo red, with black framework. Here are a bit altered backsides of modules already painted:


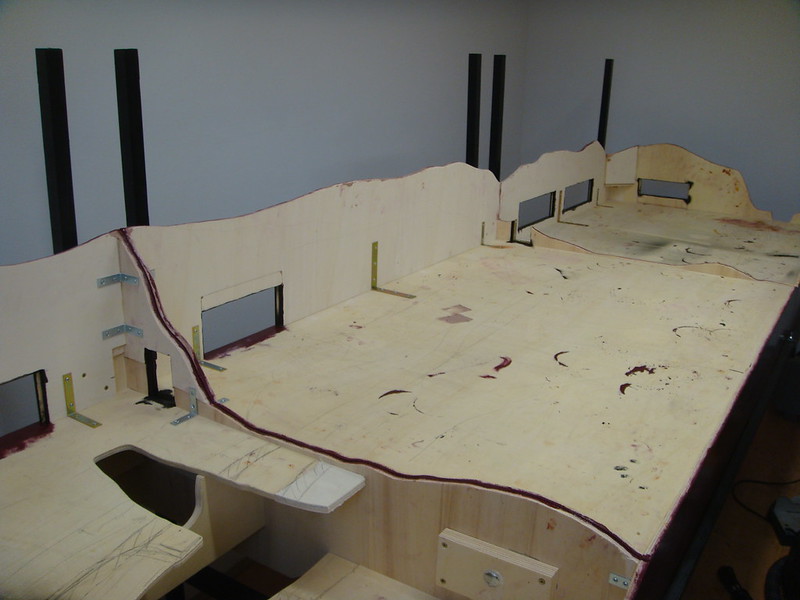
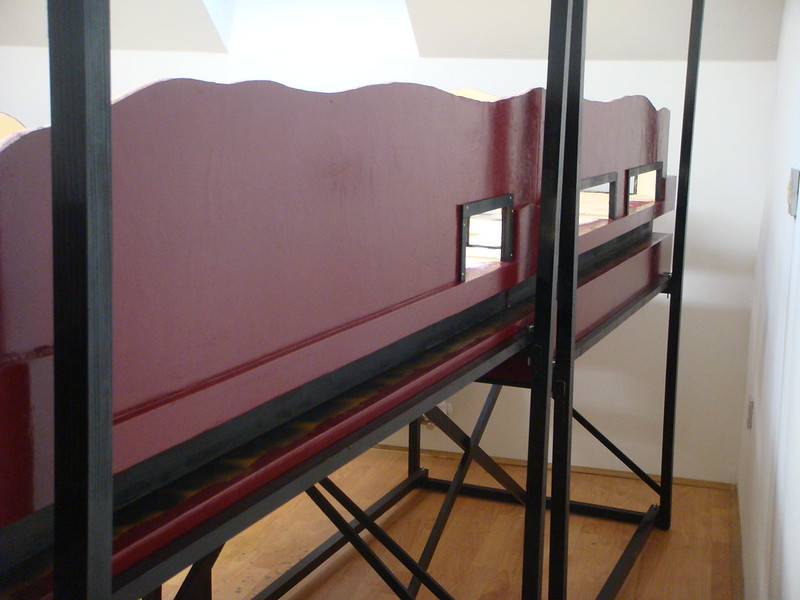
You can see openings for easier access to the track along backside of modules.

Back of module 1:


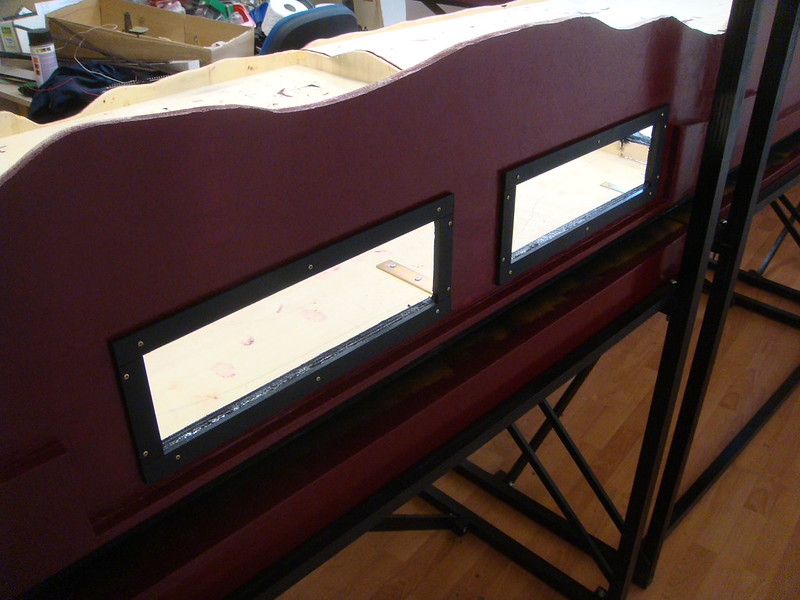
Openings for first main line are above, tunnel for second main line is bellow.

Module 1 from the front side:


Connection:


That's it for now  :D


I'm almost done with track laying and wiring, so another update follows shortly 

As always, any comments/questions are very welcome...


Best regards, Nejc

Follow detailed progress of my work on Instagram: steam.era.layout.h0

Reply 0
Prof_Klyzlr

Why no Interchange?

Quote:

Why don't you bring a spur by the mainline so you can have an interchange ?

Nick Biangel 

Dear Nick,

...because Logging ops were usually self-contained standalone affairs (from stump to sawmill).
Speaking excessively generally, logging RRs like Cass W.Va (which interchanged and crossed the C&O directly over C&Os own tracks) were the exception, not the rule...

Happy Modelling,
Aim to Improve,
Prof Klyzlr


Reply 0
ctxmf74

" Logging ops were usually

" Logging ops were usually self-contained standalone affairs (from stump to sawmill).
Speaking excessively generally, logging RRs like Cass W.Va (which interchanged and crossed the C&O directly over C&Os own tracks) were the exception, not the rule..."

    I would expect them to have a spur run over to the mill from the standard gauge connection so they don't have to carry the lumber over there by hand?  Most mills don't just serve their local town so they need mainline rail access..DaveB

Reply 0
Prof_Klyzlr

They would, if the entire process was shown...

Dear Dave,

Rechecking the OP trackplan, there appears to be no stated location for:
- timber outbound off the breaking-down and rip benches
- timber drying stacks
- timber seasoning stacks

Ergo, there appears to be an "airgap" in the log> timber-milling process,
before we even start thinking about how it gets from the mill "to the outside world"...

As an example, check the survey drawing of Kurchebel's mill, a small-by-US-standards dual circular + 2x rip-bench mill in Victoria, Aust.

Inbound logs are dumped off the train at top right into the log yard. (NB that Aussie species do not float, so a log pond is useless).

They are skidded and ordered in the log yard by crab-winch, and trewhela and "kangaroo" jacks.

As required the logs are rolled down onto the breaking-down carriage, and then run thru the breaking-down (dual-circular) saw, resulting in flitches of defined thickness.

NB that the length of sawmill building can be directly calc'd to/from the intended length of log.

From the Breaking-down bench it's accross to #1 Rip, and again accross to #2 Rip if required.
The resulting dimensional lengths are docked if required, then slide onto the stacking skids for drying/seasoning.

Once dry, they are then loaded (in this case) into NG log bogies for outbound shipment to town and wharf...
(for onward shipment to "big city and rest-of-world").

NB how if one models only the "inbound and breaking-down saw" side of the mill,

the entire drying/stacking/seasoning,
and "where the timber goes next" parts of the process

are completely hidden.

Build a half-sawmill up against the backdrop and one can entirely-validly justify not modelling any of the aforementioned "post rip-bench" processes, or the outbound shipment of the end-product timber...

Happy Modelling,
Aim to Improve,
Prof Klyzlr

PS here's another Aussie hardwood mill, FH Drain's mill from the Rubicon Forest
(Respect to Peter Evans for his work in researching, bushwalking, and documenting the logging ops of SE Australia, and his book "Rails to Rubicon" which includes the pics shown here)

From the pic shown, pop quiz:
- size of the mill shed?
- designed log-length to be handled?
- size of this mill as shown in 1/4" scale?
- does this drawing inc Log yard and Drying/Seasoning stacks?
- trace the path of a log thru the mill
(NOTE! a piece of timber may need 2x rip-saw processes applied, 
or may be able to get by with only 1... How?) 

Reply 0
NejcR

Hi guys

Hi guys,


I forgot to describe a few things. I mentioned in my Steam Era layout thread, that I'm not modeling one specific area, but rather different machines/techniques/styles from all over the world (mostly USA and Europe). The same is here. Some sawmill techniques will be from USA (dragging the log from the pond into the sawmill for example) and some from Europe (Venetian sawmill, logging cableways, etc.)....

Now let me explain how did logging here in Slovenia look like. Mostly they built simple narrow gauge tracks, just to get logs from the woods to the sawmill. Often they used horse drawn carriages too. Once cut, lumber were carried by horses, sometimes traction engines and sometimes another narrow gauge railroad to town. NEVER by standard main line, because those sawmills were usually deep into the woods, so there was not even a slight possibility to build mainline there.

So my logging TRANSPORT is designed after European (Slovenian) styles. Logs are carried from woods with narrow gauge railroad to the big sawmill (1) and to the water driven sawmill (14) (track there will be a little bit different than it is on the sketch up there). Later, cut lumber will be transported to town via traction engines and horse drawn carriages. Gravel/dirt road will be connecting all those sawmill for that purpose. You can see 2 narrow gauge tracks by the side of the big sawmill. It will be used for supplying machine shops and repair shed...

Best regards, Nejc


Follow detailed progress of my work on Instagram: steam.era.layout.h0

Reply 0
Prof_Klyzlr

Dear Nejc, Thanks for the

Dear Nejc,

Thanks for the clarification, always good to remember that there are different logging techniques in play worldwide...

Happy Modelling,
Aim to Improve,
Prof Klyzlr

Reply 0
NejcR

After one and a half month

Hi!

After one and a half month of hard working on my track laying, I finally got to the final shape of the track situation. I use Tillig H0e tracks (9 mm).

I had to modified ALL visible flex tracks, because logging railroads here in Slovenia and near had been pretty simply built and as such, didn't have perfect spaces between ties. Modification:


Difference (upper track is original):

Passage from the front to the back had to be built (in a way, that it's easily removable):

Pictures of the track:


Temporary switch panel:

Pasta di Italia! :D

Picture of the train:

Next step is to get all of the cables underneath the layout in order. Then I'll start to shape the scenery...


Best regards, Nejc

Follow detailed progress of my work on Instagram: steam.era.layout.h0

Reply 0
Logger01

Great Progress

Looks like you are making great progress and are running trains. I like the idea of using old track for an electrical bus. Looking forward to seeing the scenery develop.

Ken K

gSkidder.GIF 

Reply 0
NejcR

Hi! After more than 2 months,

Hi!

After more than 2 months, a little progress can be seen. Right from the start, my main concerns were two things: lighting (I couldn't get satisfying light from room-mounted lighting, with neither fluorescent, nor any other lights for my previous layout, Steam Era)) and backdrops. I knew it'll take a lot of effort, because these things can get very time consuming, so I thought to build it later on. But then I suddenly decided to go for it, and get it done ASAP...

So, two big updates has been done:

LIGHTING:

I built wooden framework for lighting, which I only added to the existing frame (which support modules). For better strength, I tighten every frame with steel wire. I have 120 cm long fluorescent lights, which are perfect for this purpose. I addopted the position of the lights from John de Frayssinet and his book in which he describes the effort of David Zelly to get perfect lighting. One should have 2 rows, front row with daylight lighting (temperature 5600K) and back row with warm white (I found out, that 3000K works best for me and 2700K is too low and therefore too yellow). It's best to get front row approx. 30 cm in front of the layout, if possible ofcourse. It wasn't the case with me, because the layout is very wide. So I positioned the lights as good as I could, but position will be probably changed a bit when scenery is finished...

BACKDROPS:

I spent A LOT of time working on this. After many photo shootings (more than 15 times outside), I decided which clouds are perfect. I had to join 2 panoramas, because I need fully cloudy skies on one part of the layout, and partialy cloudy on another. After more than 12 test prints (RGB to CMYK problems and finding perfect brightness), I finally got the clouds, which are mounted onto alu sheets.

Let's go to the pictures:

Light frame:

Backdrops before mounting to the layout:

Ofcourse, edges aren't at 90 degrees:

Bolts:

Backside:

Alltogether

[url=

Tree under partially cloudy part:

And under dark, rainy clouds:

I have experimented a bit here, for now I'm using 2 rows of equal light, 6400K.

Let me add that lights aren't mounted to the final hight, due to angled wall. You can see that left two modules have a little bit lower lights position than right two parts (I didn't want to have a big difference in hights). When finished (and with layout on another location), ALL the lights will be on the same hight, at least 20 cm higher than thay are at the moment.

That's it for now

Follow detailed progress of my work on Instagram: steam.era.layout.h0

Reply 0
NejcR

Hello again! I have quite a

Hello again!

I have quite a lot to show you this time, because I was a bit lazy with the updates here

I've decided to build an early 20th century electrified logging railroad, as it was here in Slovenia in Mislinja and Jelendol. You can see the example on the picture from T. Brate's book Gozdne železnice na slovenskem (Slovenian logging railroads):

I'll have to scratch build all the rolling stock and catenary by myself and here is the first locomotive (lack of detailed pictures or plans will result in similar locomotives - not the same):

I'm presenting my progress in the town part. If you look at the first plan in this topic, you'll find out, that things are drastically changed on this part. One of them is, that I'll build tram within the town streets. I've recently finished building the tram tracks. Let's go to the pictures:

Plan of the town part (which was altered a bit during building):


Soldering of the tracks is advised, but I don't have enough experience with it, so I glued most of it. As it turned out, it's perfectly satisfying.

Turnouts came as a kit out of 9 parts. Already assembled:

You need one of these :

On the top, you can see a part of the rail, that will disapear into the city tunnel, so the end won't be visible.

Front side is cut out, because of the steam town electric plant. It will be built in a way, that all the interior (steam engines, dynamos, boilers, pumps etc. will be fully visible)...

I've built the scenery part of the town module too. This right part of the module was very unstable for the long time (from a mansion, to just forest etc.) but then I've decided to build a village like Kropa (Slovenia) on this part (I was planning to build a separate layout for this village, but now I've managed to built it into the existing one). Kropa is known for a very interesting history in nail making and blacksmith crafts in general (and many houses with waterwheels):

https://www.google.si/search?q=kropa&safe=off&biw=1600&bih=763&source=lnms&tbm=isch&sa=X&ei=NWFSVc2IJun4yQOG_4D4Dw&ved=0CAcQ_AUoAg

At the bottom of the stream, there will be a big forge with three big waterwheels. Similarly to electric plant, all the interior will be fully visible:

Stream comes out of the woods, there are three buildings with waterwheels alongside:

Next big update is finished scenery on the other three modules. I've carved the stone walls from DAS clay by hand, similarly I did the rocks, which are carved out of Moltofill. Here's how it looks from the distance:

Close up on the walls:

And here we are - at the toughest (nerve wracking) job so far: carving the cobblestone streets of my Victorian era town from Moltofill. I had to carve every single cobblestone by hand and when it partially dried, again (to individualize them). It still didn't look perfect, so - when fully dried - I got over every single stone at least twice more. Here are some pictures of the progress:

After first carving:

It looks better after second (when partially dry), but still not perfect:

Final step, with sidewalks already built:

Here's my reference, from book PANORAMAS OF LOST LONDON, Work, Wealth, Poverty And Change 1870 – 1945, P. Davies:

And finally, pictures of the finished streets (ready to be painted):

Place for the statue:

Any questions and comments are as always very welcome

Follow detailed progress of my work on Instagram: steam.era.layout.h0

Reply 0
STEPHEN

Wonderful street track

Wonderful street track work-equally incredible stone work in the streets.

S

Reply 0
Graeme Nitz OKGraeme

Great....

.....cobblestones!! Looking forward to seeing them painted.

I see you have no gaps in the trackage so from this I am assuming your tram wire is going to be powered?

Graeme Nitz

An Aussie living in Owasso OK

K NO W Trains

K NO W Fun


There are 10 types of people in this world,

Those that understand Binary and those that Don't!

Reply 0
Ray Dunakin

Wow! Nice work!

That little electric loco looks great! I love the rustic, kind of "homemade" look of it. Your cobblestone streets and trackwork look good too, very well done. 


I don't think I've ever heard of an electrified logging railroad before, that's a very interesting subject to model.


Visit http://www.raydunakin.com to see pics of the rugged and rocky In-ko-pah Railroad!

Reply 0
NejcR

Thank you all!  I see you

Thank you all! 

Quote:

I see you have no gaps in the trackage so from this I am assuming your tram wire is going to be powered?

Look closely at the picture with the turnout. You'll see gaps there. I prefer track powered systems

Quote:

I don't think I've ever heard of an electrified logging railroad before, that's a very interesting subject to model.

Well, I don't know for any other logging railroad than these two in Slovenia. And although these locomotives may be very ugly to most, I find them extremely interesting

Follow detailed progress of my work on Instagram: steam.era.layout.h0

Reply 0
NejcR

New updates

Hi!

After a long time, here are some of the updates

Rocks and landscape are painted:

What took me most of the time: overhead system posts - I had to make nearly 80 of them. They are not exactly the same to each other, because it was like that in real life too. Loggers built those in a very short amount of time, hence the simplicity. If you look at the pictures on the previous site, you'll see what I'm talking about (some of the posts are pretty sideways ). Pictures:


Most of the tracks will be covered in dirt and sand, so sleepers won't be visible (or they'll be barely visible). But at some sections, I wan't to have a clear tracks with ballast or something. And here's the problem - plastic look of the sleepers. You can paint them to look very realistic, but I wanted a step further. So I built those sections by myself. Wooden sleepers + plastic plates with bolts (cut out of the plastic tracks). Same here, as with overhead system posts - plates with bolts aren't on exactly the same spot as the next to it. Building process:

Nearly finished tracks (some wash/dry brush still required):

Now I have to attach every post on the layout and then I'll be able to move towards structure building. Stripwood (a lot of it) is already painted (note that there is only approx. half of it on the following picture):

More updates soon! 

Follow detailed progress of my work on Instagram: steam.era.layout.h0

Reply 0
Virginian and Lake Erie

I am sending the link to our

I am sending the link to our die hard trolley guy so he can see this excellent work you have done.

Reply 0
Jackh

Cobble Stones

Pretty amazing work, maybe I should say artwork. Your cobblestones look like what I remember from my 2 years in Germany.

Jack

Reply 0
cruizer219

great craftsmanship!

I look forward to seeing more of your work as the layout progresses! Thoroughly enjoyed all your posts to date, thank you very much for sharing! Cruiz
Reply 0
NejcR

Thanks guys!

Glad to share it with you!


Best regards from Slovenia...

Follow detailed progress of my work on Instagram: steam.era.layout.h0

Reply 0
NejcR

Update

Firstly, I would kindly ask the moderators to split my first post into two (for example, first post should be over after first picture, which is the layout plan (although it is quite changed now )). Thanks!


Well, Isomething's happening all the time, but I was a bit lazy with posting stuff on forums

I've finished planning approx. two months ago and finally started building structures. I have quite a few SierraWest kits, but will use only the biggest one, Twin Mills, which will be on the first module. Other structures will all be scratch built, but those fine castings from other kits will come handy.
I've started building Twin Mills at the beginning of December and I came quite a long way. A lot of things had to be changed, for example:

- adjusting sawmills to smaller logs
- fully detailed interior of the old mill
- lighting in both, old mill and new mill
- scratchbuilding and modifications on the new mill machinery
- adjusting to smaller space for the diorama as predicted

Kit contains closed old mill and open new mill, see here:
https://www.sierrawestscalemodels.com/105.html

A lot of machinery will be scratchbuilt, some just modified. Steam engines are kits too.

It's best to go to the pictures...

Old mill is boarded up, weatheredg to achieve peeling paint effect:

Boiler house walls. Doors and openings fully changed, because boilers will be visible through open doors:

New mill floor:

...scratchbuilt old mill floor:

Log haul:

...slightly modified front dock:

Slab bin:

New mill sorting platform, with one more speed reduction and slightly changed log deck machinery (similar to SW O scale one):

I scratch builded main saw (among others, using a lot of SW castings from other kits). First, the difference between new and weathered saw blades (using the same technique as Kevin O'Neal (I think he first posted it), with dremel tool). I wanted it only slightly weathered:

Bottom saw during construction (note the sawdust conveyor for bringing sawdast to the boilers):

Finished bottom saw (husk), smaller top saw will be attached to the ceiling:

Log carriage machinery is based on Phillips Brothers Sawmill carriage, see here from 5:23 on:

Model:

If someone wants to know how machinery looks like builded directly following instructions, see here (bottom half):

http://www.craftsmankituniversity.com/vanforum/index.php?p=/discussion/84/twin-mills/p3

...that's it for now, I'm building with full steam, so expect next update soon!
Any comments are very welcome!

Best regards, Nejc

Follow detailed progress of my work on Instagram: steam.era.layout.h0

Reply 0
ChrisS

Beautiful work on the mill! 

Beautiful work on the mill!  I'll definitely be watching your progress - I just acquired this kit myself and someday want to include it on a 1907-era layout.

valley20.jpg 

Freelancing 1907 Southern Utah in Sn3

http://redrocknarrowgauge.blogspot.com/

Reply 0
NejcR

Thank you!    

Thank you!  

Follow detailed progress of my work on Instagram: steam.era.layout.h0

Reply 0
NejcR

Update

Here's another update:

Non of the following equipment is a kit.

Old mill carriage:

The hog/grinder:

Live rolls system. Direction of rotation can be changed via friction cones:

Another live rolls system:

The edger:

Machinery on the new mill floor:

There's a driven conveyor belt leading into the hog. Same wheel that drives the hog also drives the conveyor up to the slab bin:

Close up of the endless chain drive:

I had to change the bottom husk a bit - at first i didn't take the falling (freshly cut) lumber at the back of the head saw into account:

Live rolls behind the main saw:

Better look to the carriage cable drive:

With stairs added:

Old mill floor:

Same conveyor that drives off the excess sawdust from the bottom husk of the new mill, drives off the sawdust from the edger too:

Old mill carriage:

There will be only bottom husk here. Cable drive for the log buggy and slightly different carriage drive are visible here:

Live rolls in the old mill:

Pond, as it looks like at the moment:

Old mill and new mill floors:

Lumber flow:

Green one isn't a regular one, lumber is carried over to the live rolls that eventually lead to the edger only if really necessary...

More coming soon

Follow detailed progress of my work on Instagram: steam.era.layout.h0

Reply 0
bkivey

Cobbles and Clouds

Very nice work on the cobbles. I wouldn't have the patience. I've wondered if anyone has used a 'modular' method for making cobbles similar to rock castings. Use various types/sizes of molds for different street situations. 

Also liked your backdrop. I don't think I've seen could photos used in quite that way. It'll be interesting to see how the look of the backdrop evolves as scenery goes in. 

Great work!


Reply 0
Reply