HObbyguy

I never started a blog before but here goes... I am going to use the blog just to throw stuff out there, and see what sticks.  Sort of my own "build progress thread".  Comments and suggestions are welcome.  And happy to answer any questions- can't say I am doing things right but willing to share anything and everything.

A bit of background.

I've been working on my RR on-and-off for three years now.  I built a rather unsuccessful 4x8 when in my 20's, which is now 30+ years ago.  I learned a bunch back then and carried the learnings into this layout. Still a "newbie" compared to most here but along the way I restored classic cars, got deep into R/C warbirds, and did all sorts of major home projects that helped develop my hands-on skills.  Also I am an engineer and worked in both manufacturing and design which I think helps.  There is no local model railroad help around here- during the whole of the last three years I never ran across anyone at the local Hobbytown that actually had a layout, and Hobbytown is the only hobby shop in the area.  And there are no local clubs.  But that's OK.  I am doing it my way- with the help of internet resources like this one.

Our house has an 80's style walk-out basement, complete with a big L-shaped finished room, a separate unfinished shop area, and adjoining bath.  It is on the central air/heating system and there is a small patio outside the door.  So a pretty ideal area to work with.  The section of the basement that I decided to devote to the RR is 13-1/2' x 14-1/2'.  Not huge, but enough to keep me busy for quite a while.  And the railroad can be expanded further into the room if I ever get the urge.

I am not a railroad buff or a railfan- much more of a builder/modeler.  I enjoyed designing and building big scratch R/C warbirds more than I actually liked flying them, and my railroad design reflects this.  It had to have continuous operation without a duck-under, elevation changes with numerous bridges and tunnels, and opportunities for dramatic scenes.  I chose the coal country of W Va. because I wanted to model mountain landscapes.  And the big steamers that ran there "back in the day" always fascinated me.  So I settled on a plan that gives me an excuse to run big steam from both the C&O and B&O.  I am not sure that there really was a juction at Huntington, but I found out here (thanks Rob!) that both railroads ran mainlines through the town.  Surely the tracks had to meet somewhere... anyway, Huntington Junction is definitely freelance, but with a bit of factual basis.

Here is what I worked up using XtrackCad, designed to be built in phases.  Phase 1 originally featured a temporary loop which was broken to connect to phase 2 once it was built.  Phase 2 is also essentially complete now, with all of the track down and operational.  I just built the basic benchwork for phase 3 last weekend.  The room is open to the bottom and lower right.

A few completed scenes from phases 1 and 2.  Some of these pics have been shared in forum threads, but here they are again.

The wood trestle was the first scene that I completed when I built phase 1.  The bridge was built after the landscape so it follows the natural contours of the land instead of the other way around.  The rails on the trestle are hand-laid on wood ties and the granite cliff and the rocks are all hand-carved plaster.  I was very encouraged by how nice the scene turned out- especially since this was my first attempt to model a railroad in over 30 years.

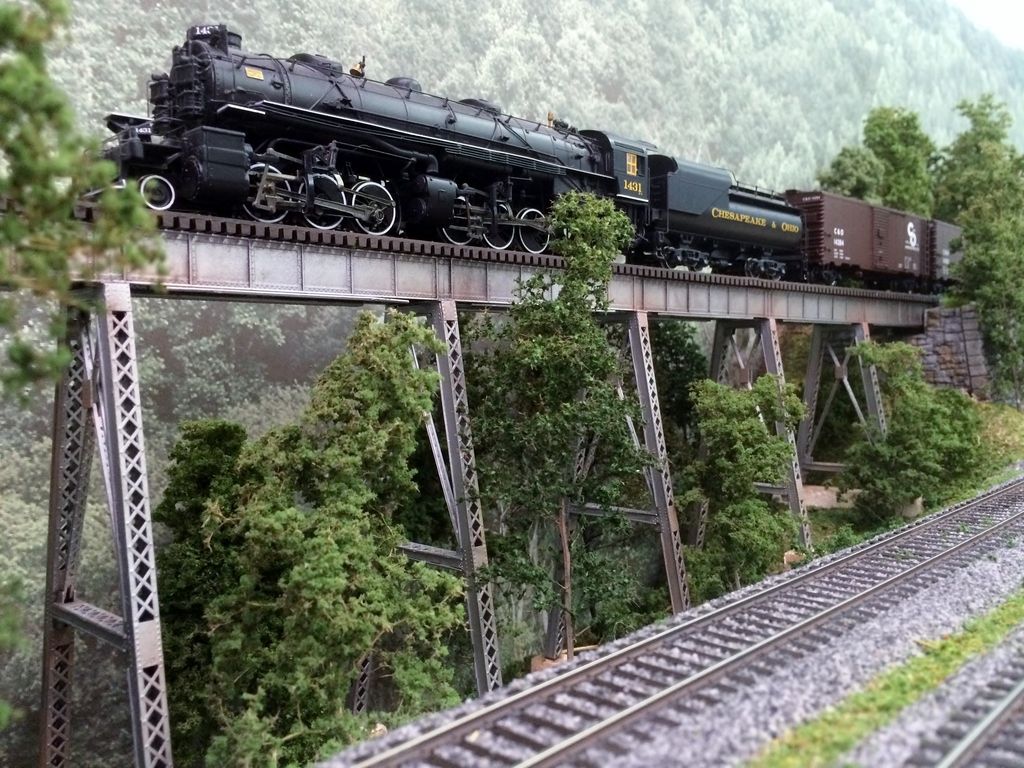
The viaduct is an ME kit that I just finished and dressed out during the past few weeks.  A relatively quick project.

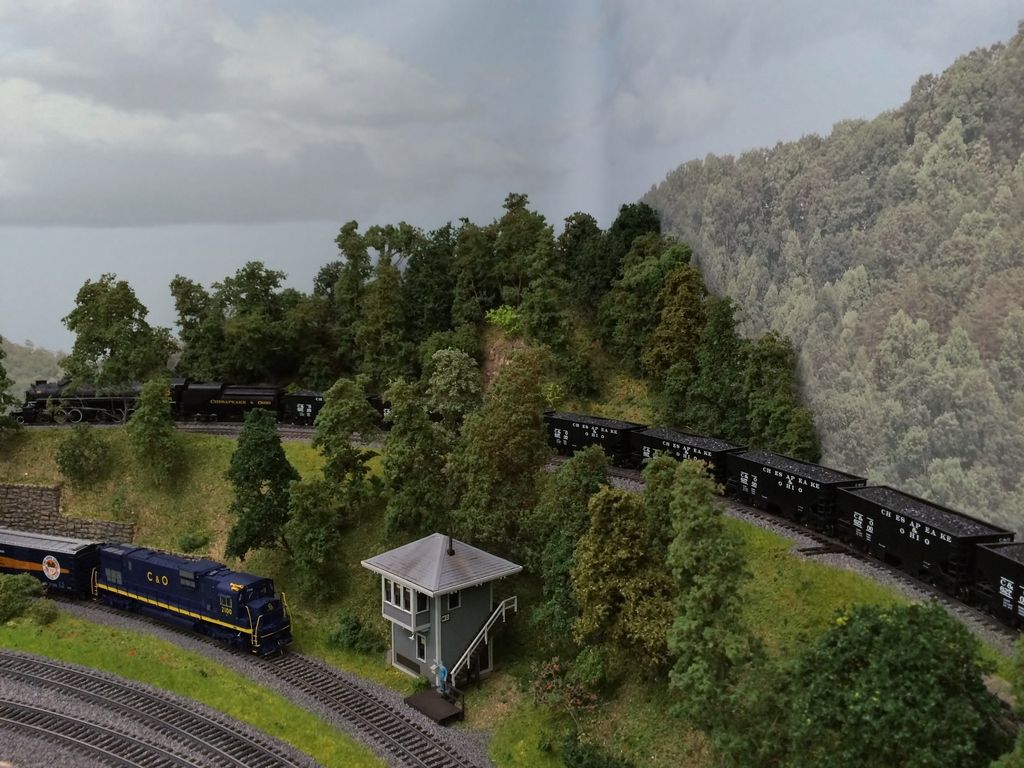
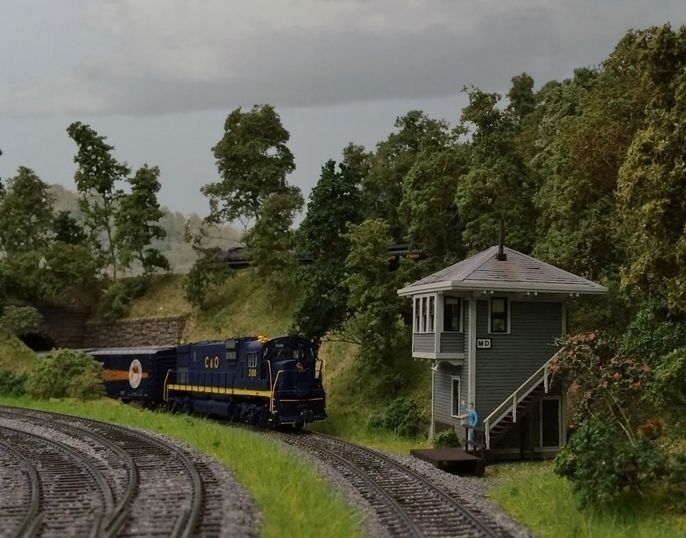
Here is the upper left-hand corner of the layout, essentially completed.  The area is relatively simple but as I had hoped it lends itself to some really nice close-in photos.

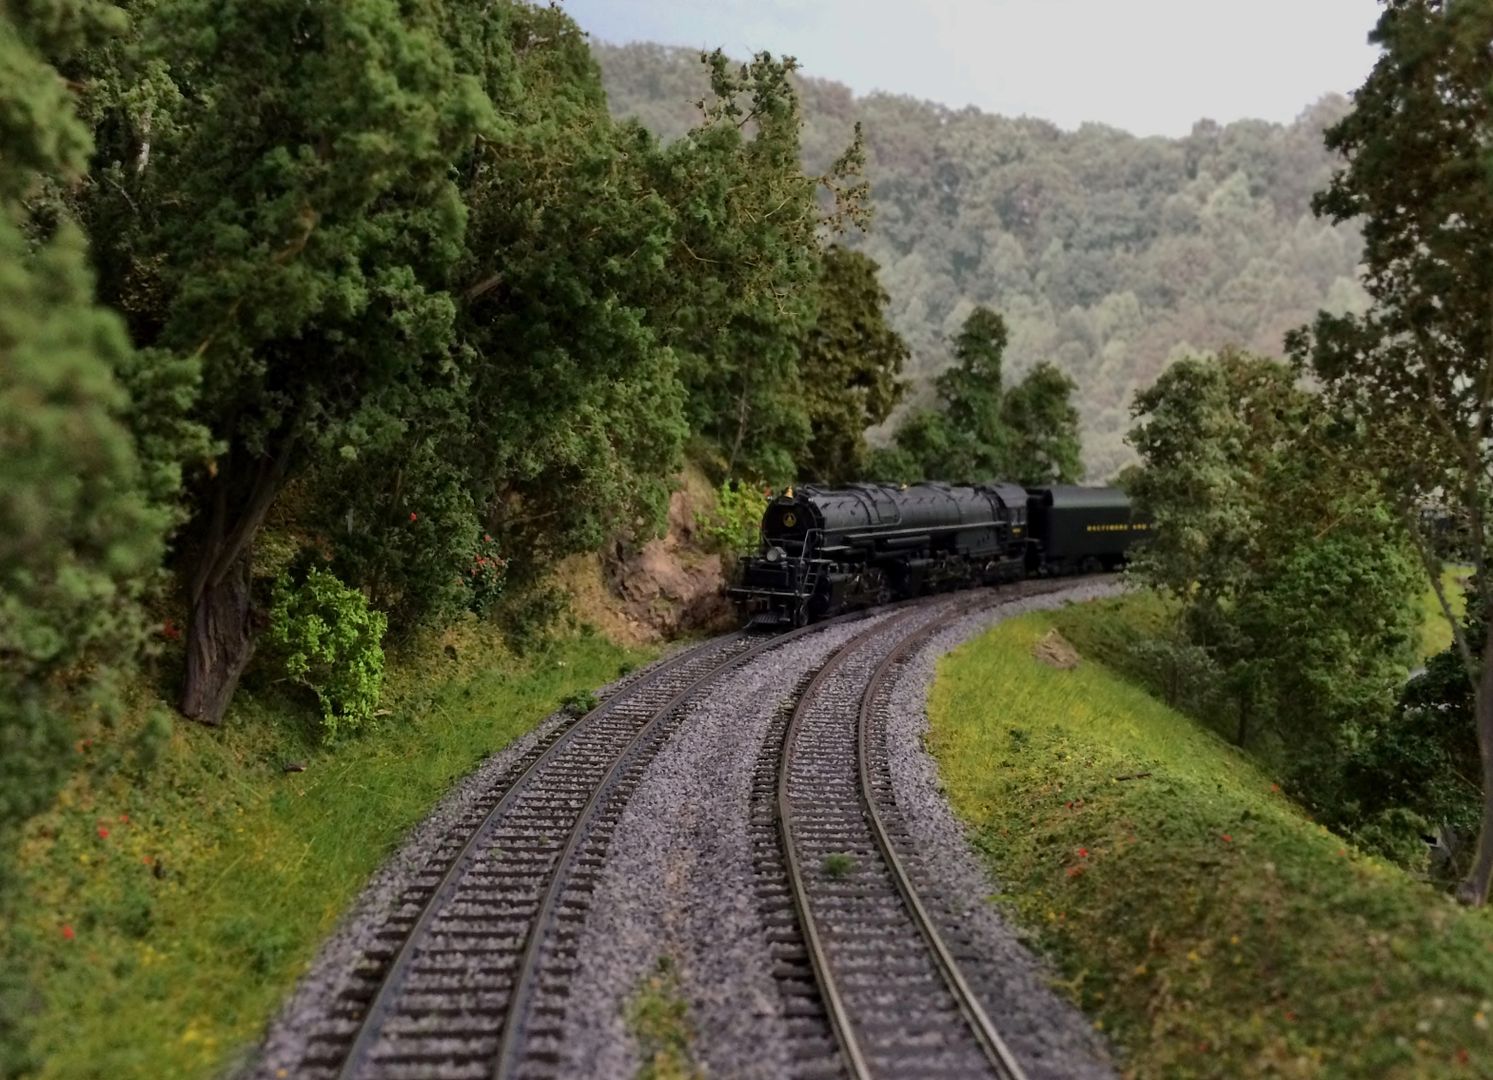
So far, so good... yes I can model, and my trains run nicely, and my locos pull the grades without problems, and my turnouts are reliable with no derailing issues anywhere.

But still a long, long way to go until the layout is finished.  Pull the camera back and here is what we see.

Hmm, I've gotten a lot better at making trees since the trestle scene was built, and the foreground still needs to be finished.  And my tortoise is showing!

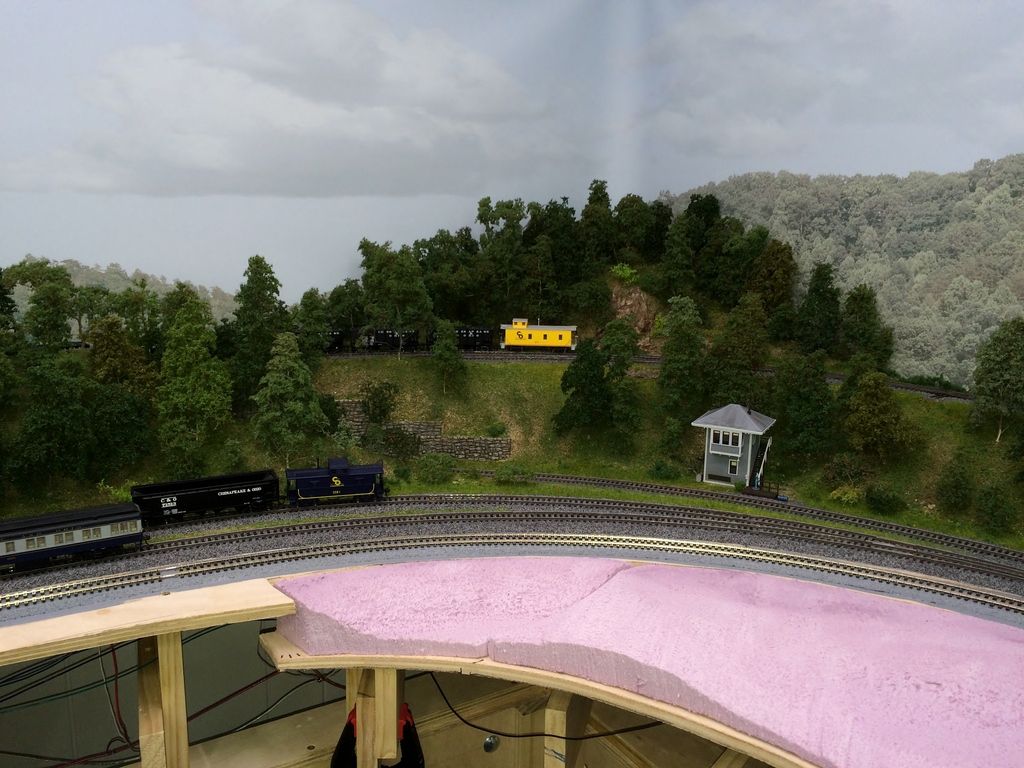
A lot of pink land in front of the corner scene and viaduct.  And who needs facia anyway...

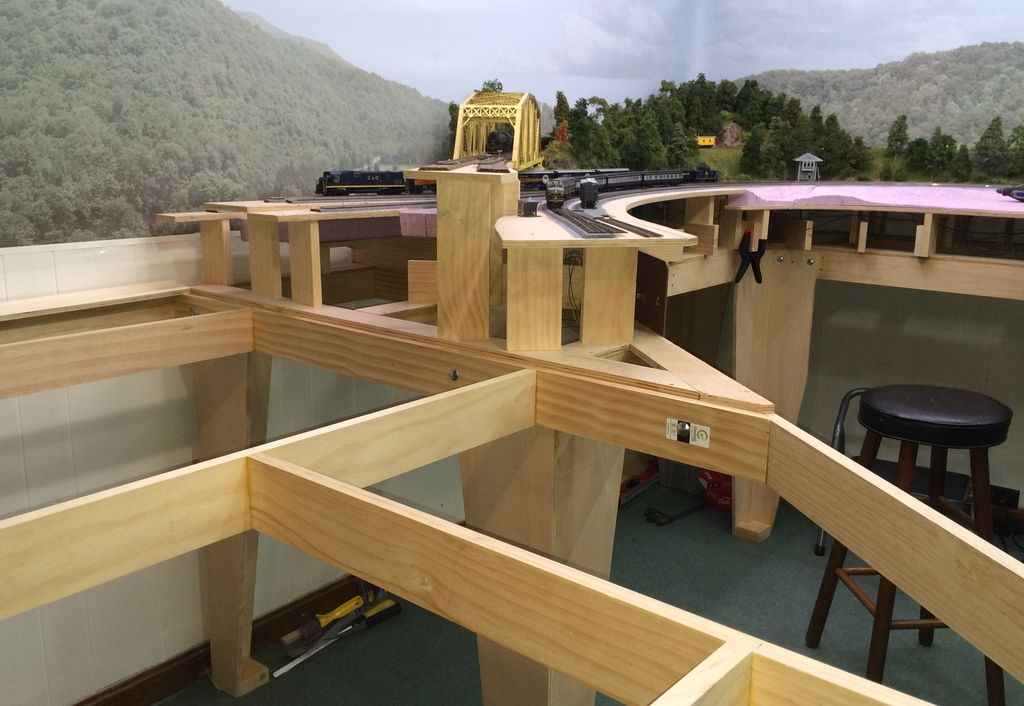
...and nothing but construction area past the truss bridge.

Yes, my benchwork is rather complex, heavy, and not cheap.  I've been accused many times of over-engineering and over-building, but strong and reliable has served me well in all of my hobbies.  So why mess with success?

Done for now, hope you guys don't mind me sharing this way.  I plan to post new pics here as I work along.

_________________________________________________________________________________

Huntington Junction - freelance based on the C&O and B&O in coal country before the merger

- Walt

For pics of my railroad and more:  http://www.wkhobbies.com/model-railroad/

Reply 0
Rick Sutton

Don't mind?

Are you kidding? We eat this stuff up! Looks great and please keep it coming.

Reply 0
Michael Whiteman

Nice work

on your layout shows everywhere.  Especially like the backdrop scenery behind the trestles.  Keep the pictures coming please.

Reply 0
okiebogs

Looks Fantastic!

Keep up the good work and please keep sharing pictures!

Alex Bogaski

"I've never been to heaven, but I've been to Oklahoma"

Reply 0
Virginian and Lake Erie

Great job Walt. Another

Great job Walt. Another interesting factoid about your EM1, toward the end of steam some of them were based out of Benwood, WV just a couple hundred miles north of Huntington, there may have been some there as well not sure. So it is not what I would call a big stretch if they were not. Thanks for sharing your layout photos. There is no such thing as doing too good a job, worst thing that can happen is it will last longer than expected, that's gotta be tough to live with.

Reply 0
HObbyguy

Thanks guys

Thanks guys.

I purchased the backdrop during construction of phase 1.  No regrets on making the investment early since it has allowed me to design the terrain to match the folds in the hills.  But still learning as I go how to blend it in.

There is a method to the madness to the benchwork.  I have some sidings laid down directly on foam but I think ply subroadbed is much better suited to all the track elevation changes.  And the ease of mounting tortoises directly under ply is another big plus.  But foam has become my preferred method for building terrain because of the ease of planting trees in it- important when modeling woodlands.  Carving and shaping is more work than plaster hardshell but I think it is worth it.

I design the benchwork frames in Autocad, overlaying the track plan from XtrackCad to make sure I have cross supports in good locations.  Then build the frame using wood screws and glue, and attach the legs with carriage bolts.  I glue down plywood strips to the top of the supports to form my "L's" and this allows me to mount cross-beams wherever I want by just screwing them in from the bottom.  Then risers to support the subroadbed.  The end result is absolutely rock solid.

But all of this is just more history.

I'll be focusing on completing phase 3 benchwork and scenic'ing behind the truss bridge during the coming months.  The bridge is easily removable so I can access the area for maintenance, but reach is a consideration for the build.  Better to get as much done back there as I can before building up the next phase too far.


_________________________________________________________________________________

Huntington Junction - freelance based on the C&O and B&O in coal country before the merger

- Walt

For pics of my railroad and more:  http://www.wkhobbies.com/model-railroad/

Reply 0
HObbyguy

Benchwork progress- hidden track install

This weekend I concentrated on getting the hidden track at the rear of phase 3 in place.  The benchwork frame has a big open area so that I can stand up and access the track as needed.  To me benchwork and laying down track is "less than exciting" but I'll document it anyway.  I remember searching through threads to see what others were doing before starting my layout, and maybe it might help somebody out there.

I printed out the XtrackCad sheets for the area, taped them together, and transferred the roadbed outline to ply using carbon paper.  I marked off where to cut and then went outside and cut the subroadbed sections out, and then laid them in place on a few temporary cross-supports.

At this point its a matter of clamping risers in place and trimming the ends of the new subroadbed to meet the existing sections.  Then I play around with it a good bit to locate the cross supports and position risers to get the desired grades.  I use a lot of clamps and when satisfied then cut the final pieces and screw everything together.  When I first started the layout I set the risers "by the math" to get my grades and it worked out OK, but the digital level makes it easy to get almost perfect results.  The section that the level is sitting on is at 2.5% grade.  It will flatten out a bit as it exits the tunnel to a more gradual 1.5% grade.  The track behind is also rising back to the "base" level but the grade is only around 1%.

Almost a shame that this track has to be hidden- it flows very nicely.  You can almost see the vertical easement from level under the bridge to the grade.  And all the curves have easements as well.  I've got one more section of subroadbed to go back here (for the reverse loop) which is why the cross supports extend a bit beyond the edge of the bench.

Next weekend- buy some more ply and 1x4's, and repeat the process to continue running the tracks to the front.

Question- I never had a bunch of hidden track like this.  Is it even worth gluing it down?  Right now the track is held in place with spikes.  Seems like leaving it this way would allow some "give" for expansion, and make maintenance a lot easier if there are any problems.  But would the spikes would hold in the cork OK over time?

_________________________________________________________________________________

Huntington Junction - freelance based on the C&O and B&O in coal country before the merger

- Walt

For pics of my railroad and more:  http://www.wkhobbies.com/model-railroad/

Reply 0
Virginian and Lake Erie

I know track nails held in

I know track nails held in cork for more than 10 years with no issues.

Reply 0
ctxmf74

 "But would the spikes would

Quote:

 "But would the spikes would hold in the cork OK over time?"

Cork is not know for great fastener holding power, if the nails go thru the cork into wooden roadbed they'd be a lot more secure. For hidden track I'd glue down the cork ,then set the flextrack in acrylic caulking ,not a heavy layer just enough to hold it well. If you think you might want to salvage the flextrack a couple of lines under each rail should be enough, or even  dots of caulking spaced every couple of inches.Cauking will eliminate the problem of nail creep and trying to drive them to the correct pressure without bending the ties down in the middle...... .DaveB

Reply 0
BandOShortline107

Would you mind if I used this

Would you mind if I used this plan for myself?  Due to the fact it seems you have captured pretty much everything I was looking for, however; could not put down on paper.   

Reply 0
HObbyguy

Anyone is welcome

Anyone is welcome to use all or part of my plan.  Have fun with it!  Heck, I'll even email the XtrackCad file to anyone interested.

I am sure improvements can be made.  For example more sidings would be nice.  But very happy with it so far.  No problems with big steam, 6-axle trucks, or long passenger cars.  The grades are all very reasonable.  And plenty of scene building opportunities considering the relatively small footprint.

Check out my latest blog post for progress on completing phase 3.

_________________________________________________________________________________

Huntington Junction - freelance based on the C&O and B&O in coal country before the merger

- Walt

For pics of my railroad and more:  http://www.wkhobbies.com/model-railroad/

Reply 0
pschmidt700

Really nice, Walt!

Looks like a great layout to just relax and watch trains roll through beautiful scenery.

Reply 0
BandOShortline107

My Goal

For me personally I am happy because my two youngest sons, ages 5 and 7 years old.  Have become very interested in trains.  Especially when I had a decent sized layout set up in our last house.  Now I am trying to start over and not have the same issues I had with the previous layout (i/e grades, to tight of radius, and so on). 

My goals seem much the same as yours when it comes to building a layout.  Something that I can run my larger equipment (i/e 2 alleghanys and walthers heavyweights) and the ability to run two or more trains at the same time.  Lord know the boys like running their own trains and pushing the buttons for the bells and whistles.   If you could email me the layout plan for Xtrackcad and the file for the bench work that would be fantastic.  I think this one is going to take quite a bit of time, but in the end it will be well worth it.  

My email address is markbarrett107@gmail.com.   Thanks a a lot Walt.  By the way my 7 year old told me last night at the dinner table when he is an adult and it is my time to pass on he will take over my train layout and make it bigger.   One could only hope their children enjoy some of the same hobbies and interests.  

Reply 0
HObbyguy

Sharing layout plans

Sure Mark I'll send the files on to you.  The XtrackCad file is clean.  The benchwork file is in Autocad and it is a "working file" (scaled and accurate but not that clean) but I can send it on to you as a reference.

The turnouts are all Walthers/Shinohara code 83.  Mostly #8's with some #6's, and a few 28/32 curved.  There is also a #10 snuck in there.  Good for smooth operation with bigger rolling stock.  In addition to the big locos I have a set of lighted Con-Cor 65' heavyweight passenger cars that really look good on the layout.  I have some 85' cars too.  They track fine but don't look as good on some of the tighter curves.

Look at the plan carefully- the two "loops" cross over (red track) at the horseshoe so it is not possible to run two trains on separate loops hands-off.  The common track does make it interesting with two operators though.  For hands-off operation I set the turnouts for a double-loop without the crossover.  Doing that allows two or three trains to chase each other around the countryside with minimal intervention since it takes about 4 minutes to complete the circuit even running at a pretty good clip.

Have fun and feel free to modify and make it better!

_________________________________________________________________________________

Huntington Junction - freelance based on the C&O and B&O in coal country before the merger

- Walt

For pics of my railroad and more:  http://www.wkhobbies.com/model-railroad/

Reply 0
BandOShortline107

Thanks Walt

Once I really get going on it I will update you on the progress.  I just wish the warmer weather would show up here in Maryland to distract me from the basement and my none existant layout.   However then the exterior honey do lists will really kick in.   If I have any question I will just shoot them your way.  Thanks again.

Mark

Reply 0
musgrovejb

Nice!

Nice work!

Joe

Modeling Missouri Pacific Railroad's Central Division, Fort Smith, Arkansas

https://youtube.com/playlist?list=PLENIMVXBDQCrKbhMvsed6kBC8p40GwtxQ


Reply 0
Reply