"Caldwell Boulevard" is the name I christened upon my latest scenic diorama that will be used for photographing some of my monthly weathered model projects for The Weathering Shop. The name "Caldwell" for this project happened to come from a jazz artists last name. I was trying to imagine names for this diorama when it was nearing completion. I just so happened to be listening to smooth jazz artist Bobby Caldwell when the final stages of production of this diorama were coming about. I thought to myself that "Caldwell Boulevard" sounded legitimate. So here's a salute to Bobby Caldwell....(photo intense initial post)...
As most of my modeling goes, I try to conserve on expenditure during production. This diorama was no exception. The purpose of this thread I am posting is to give somewhat of a documented overview on the construction and "bringing to life" of Caldwell Boulevard. As a side note: I work in a wholesale food commodities warehouse in Southern Oregon and believe it or not, plenty of odds and ends from the store where I work can be employed in such such projects.
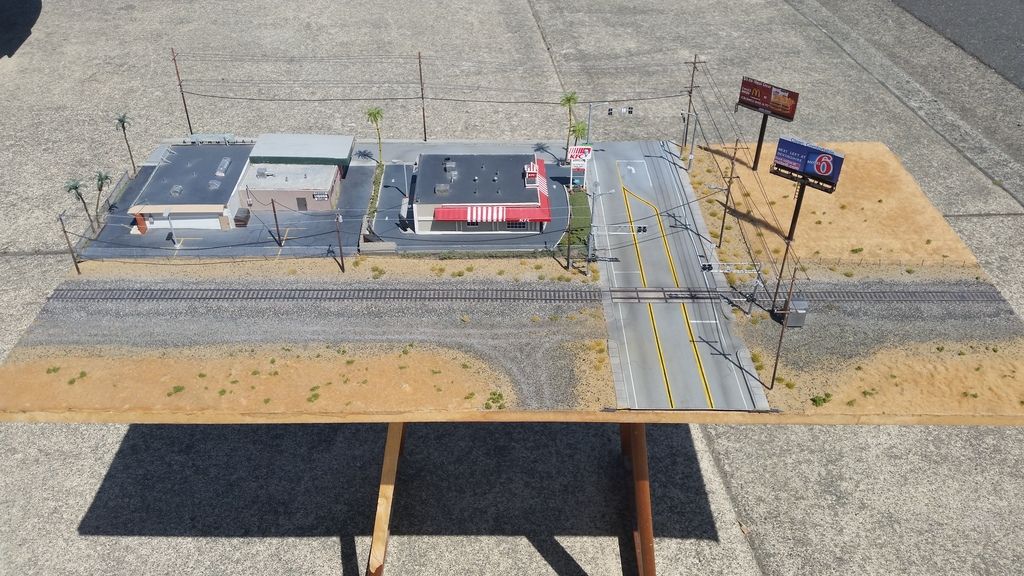
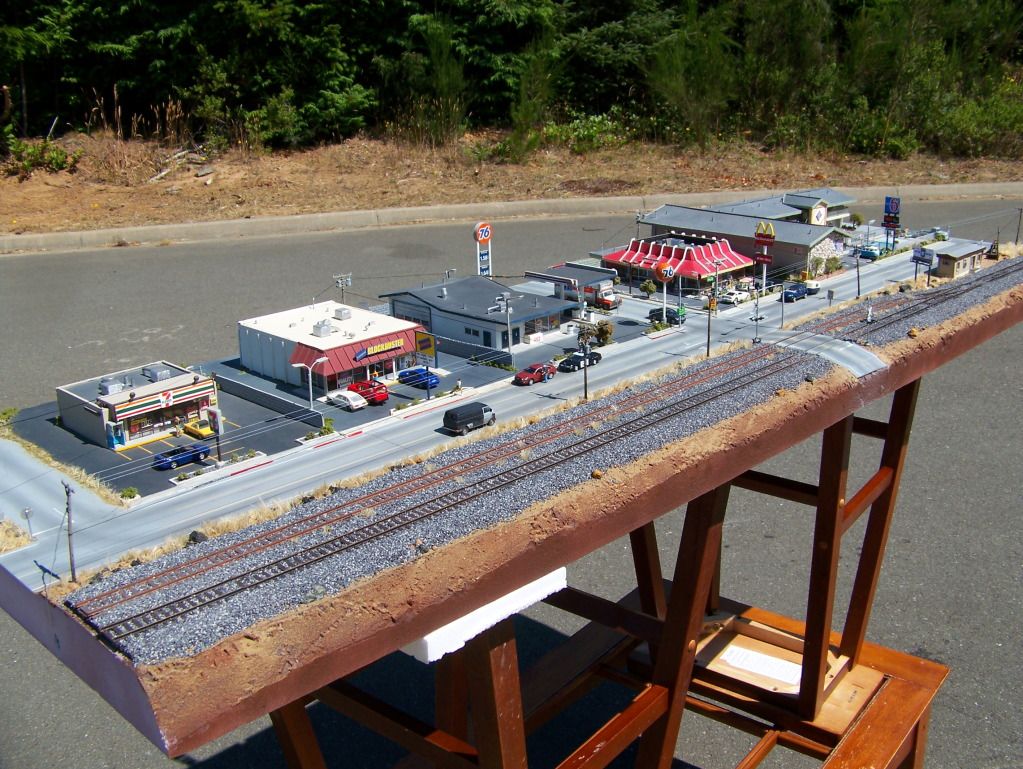
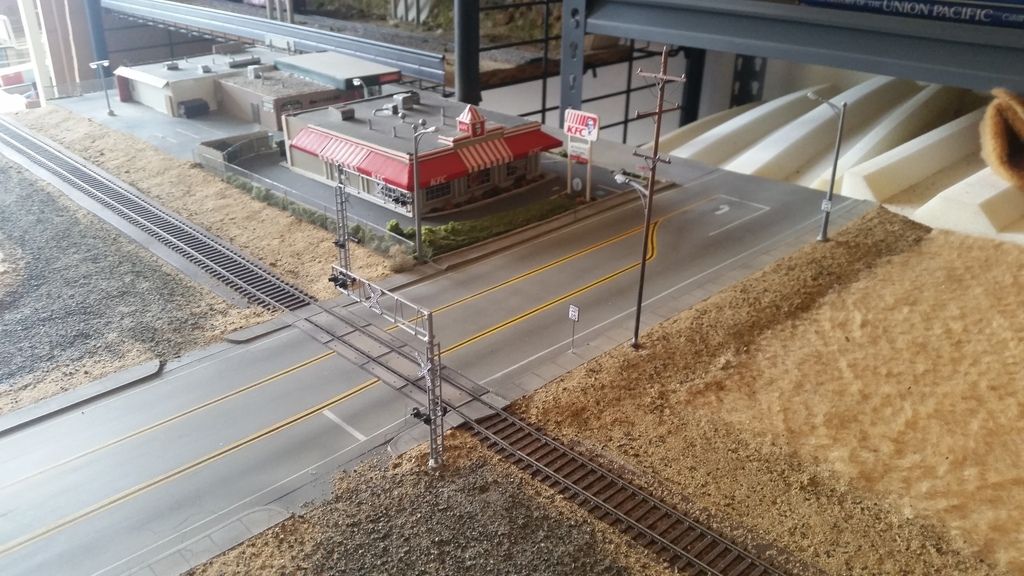
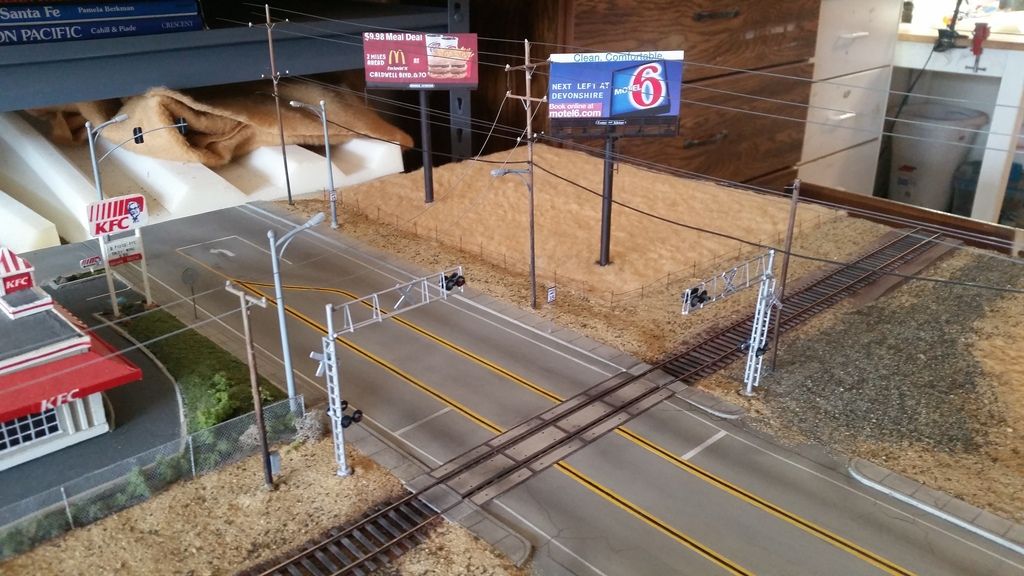
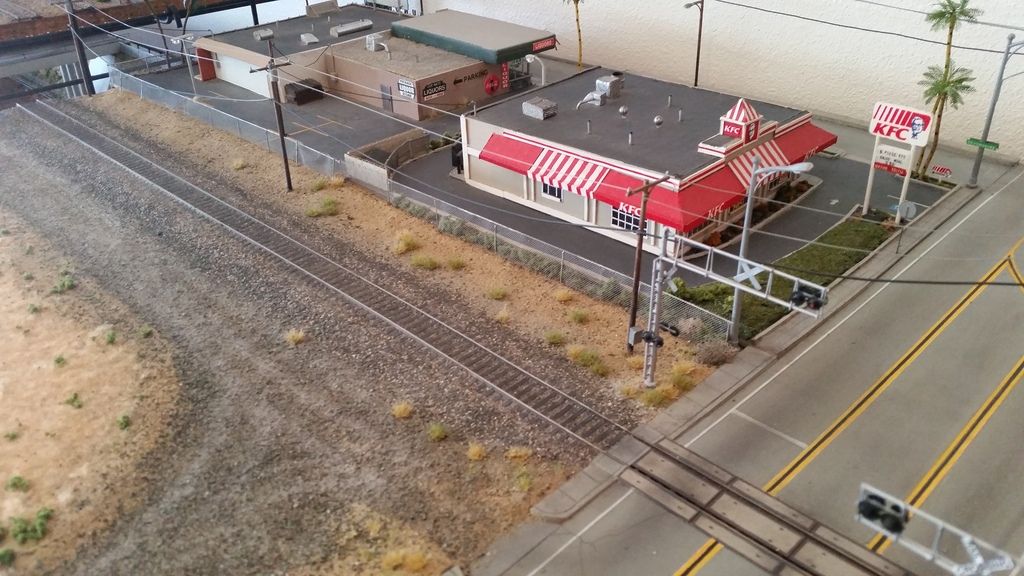
I had envisioned a railroad crossing of a wide boulevard or 4 lane type ave. set in along a busy right of way on the north / south Central Valley corridor in California, complete with franchise type businesses along the thoroughfare. I also wanted to emphasize on multiple overhead power lines and cables. Also, background advertisement billboards as we see so often. The right of way would have a gravel easement and foreground service road to round off the somewhat desolate scene. All of this I would attempt to create with minimum cost for supplies and details.
To begin,...I had created quite few scratch built contemporary franchise business type buildings about 10 years ago that were to be part of a layout that never came to fruition. I stored the buildings that were fabricated out of plexiglass and other common household items. Some of these structures can be seen in another diorama of mine called,"Hwy 89"...
The last few scratch built buildings that I still had in storage included a motel, a liquor store / laundromat combo and a Kentucky Fried Chicken....
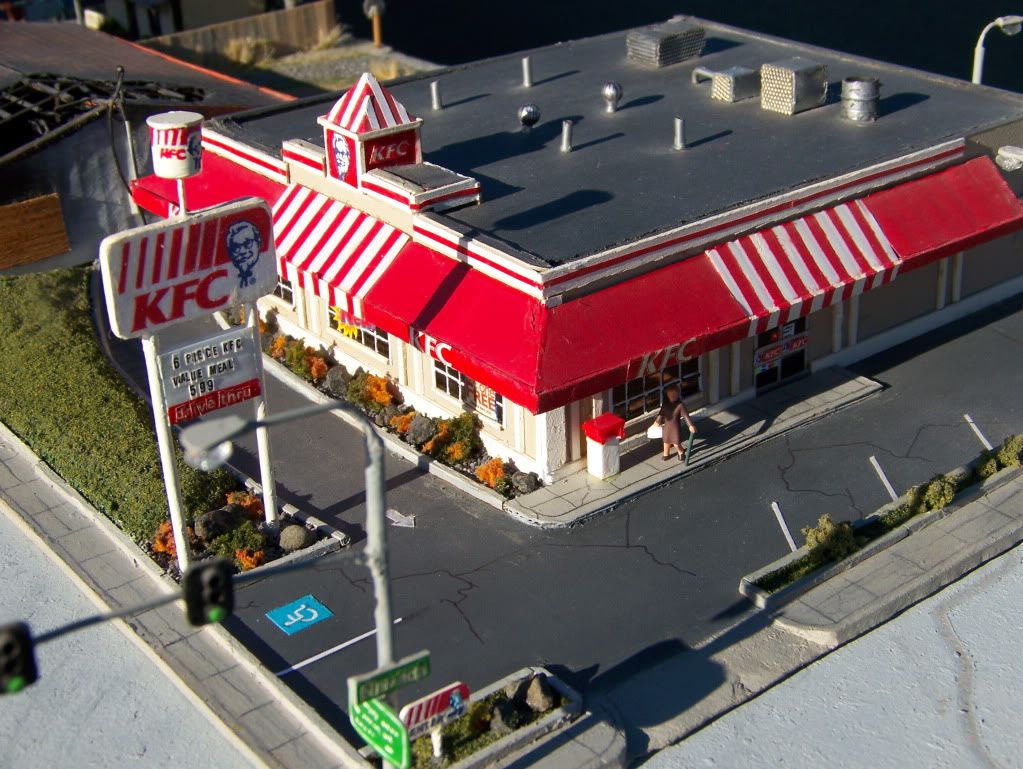
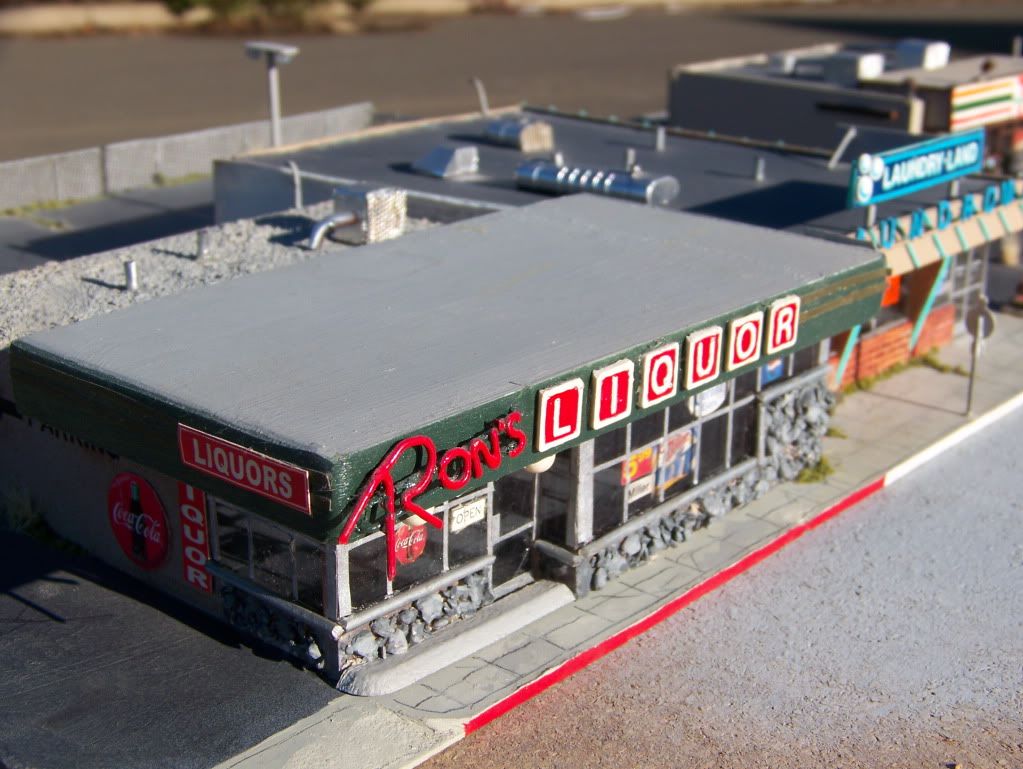
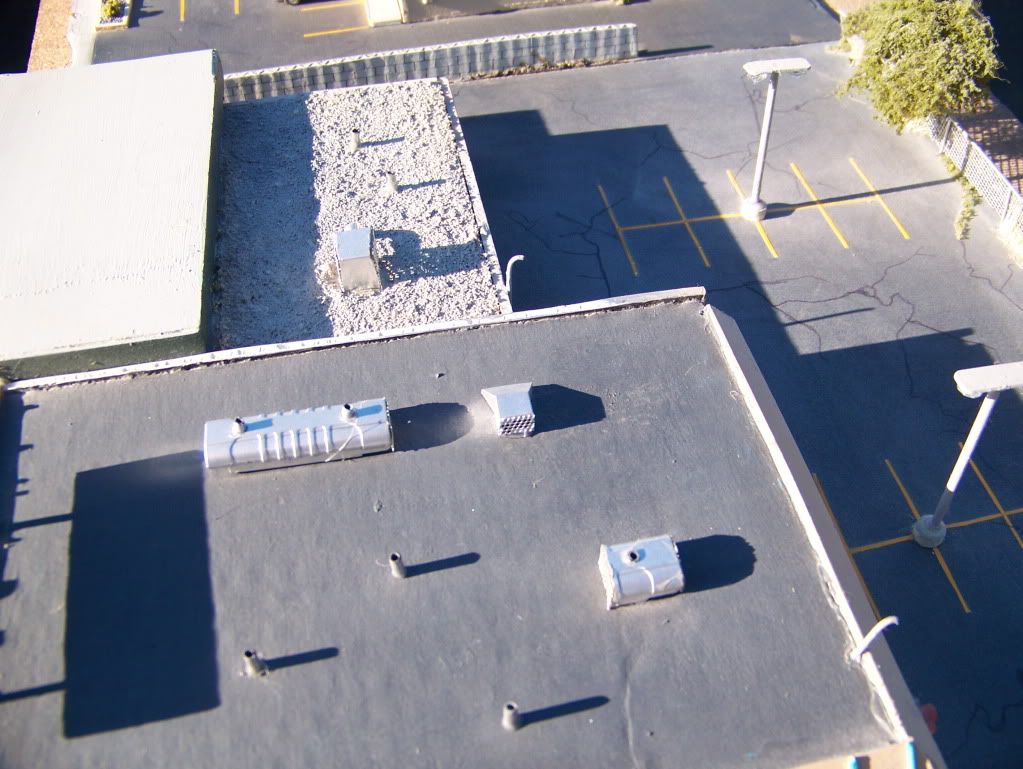
I would utilize the KFC and the liquor store for this project, however, being slightly displeased with the inferior quality of their construction from earlier times,.I would reverse them in a space away from foreground view with the parking lots and sides dominating the background.
Now, on to construction of the diorama.
I began with a thick compressed shelf or pallet type board that I had cut to a measurement of approximately 2'X3.5" wide...
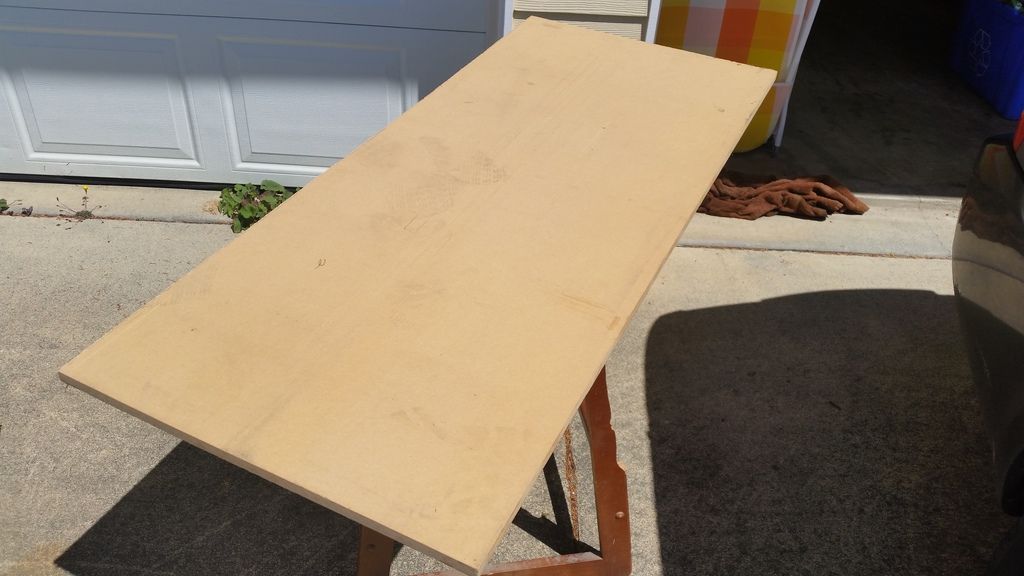
The reason that I opted for this type of "heavy" base over extruded foam board is,..I live along the Oregon coast headlands and the winds here can gust up to 60 m.p.h. at times without warning, (rain or shine). I have learned through trial and error not to construct anything that might fly off in the wind while photographing.
After I have the base board cut, I pencil in the blueprint of where I would place the right of way,..all working around the buildings that would occupy the extreme background of the scene. Once the penciled in design was complete, I measured the black foam board that I purchased at the store for like $1 and some change..
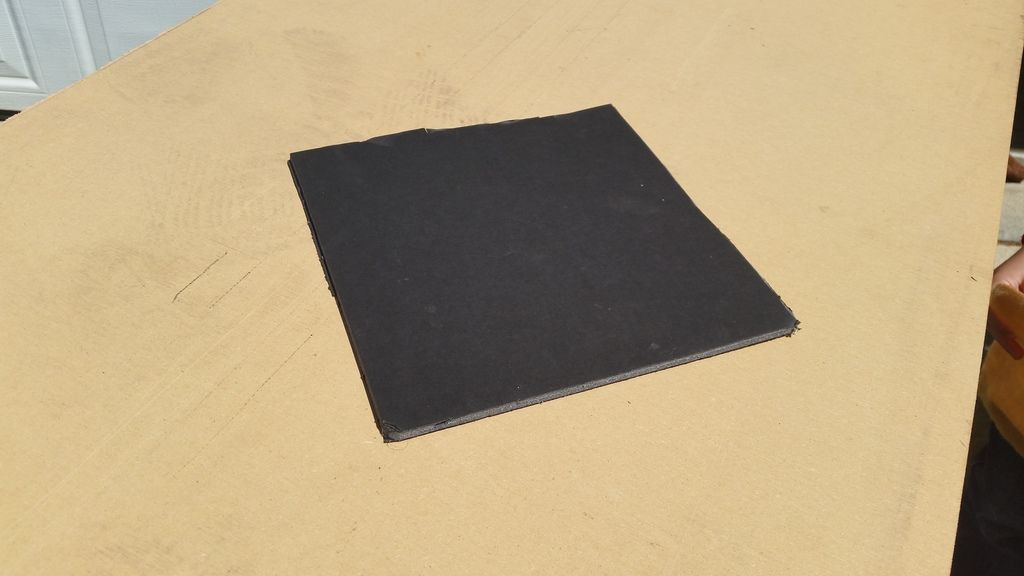
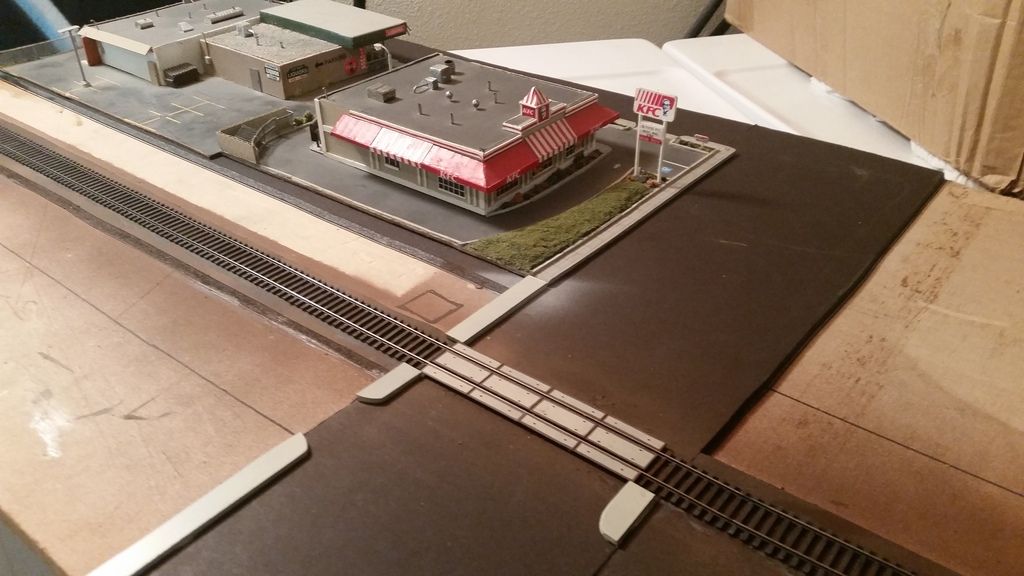
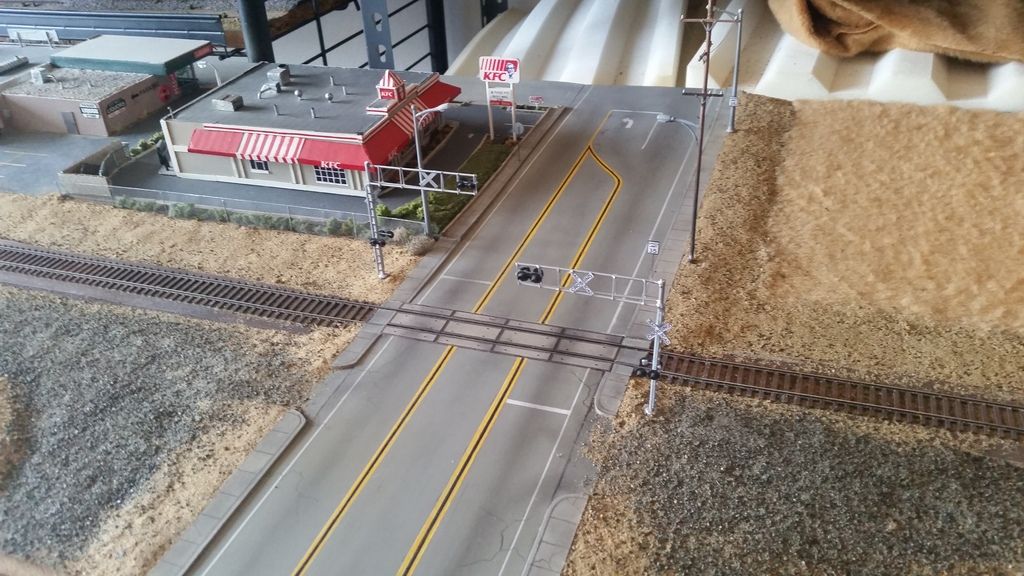
This foam board would be cut to accommodate as an entire base for not only the road bed, but it would be cut to size and be used to raise the structures and boulevard all to the same height, leaving only the road shoulders and R.O.W. as recessed areas. The road bed was measured first to support 2 lengths of Micro engineering code 70 rail. Once the roadbed and rails were set, I could return and start to cut and measure the foam board for everything else that would stand at the same level. As soon as all the foam board foundation and structures were glued set, I weathered and cemented a BLMA concrete grade crossing pad into place. Then with some soft plastic sign planks that had a thickness of app. 1/16th of an inch and that were being discarded from my place of work,..
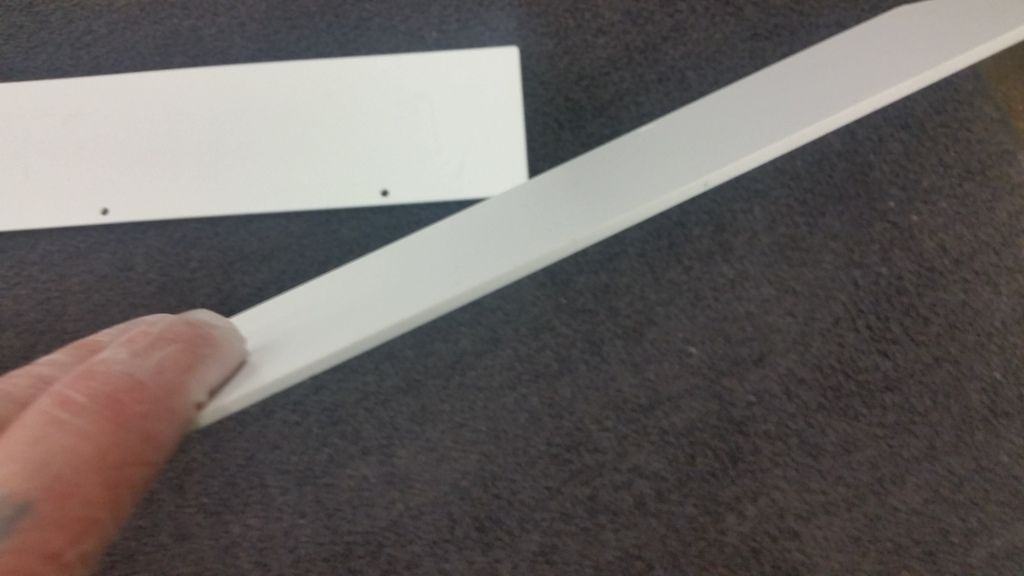
I cut , painted the sidewalk sections with a mix of three aerosol paint colors. 1. An almond color flat enamel 2. A light gray primer, 3. A camouflage beige color...all flat enamels. I penciled in expansion seams and random cracks before I positioned the raised sidewalks that would run the depth of the scene and glued them into place...
With about 2 days allowed for all set objects to dry solid, I could then continue.
My next move would be to lay the boulevard asphalt. This was done by using a thin poly type plastic that again, was a discard from where I work and are used as pallet "slip sheets"...
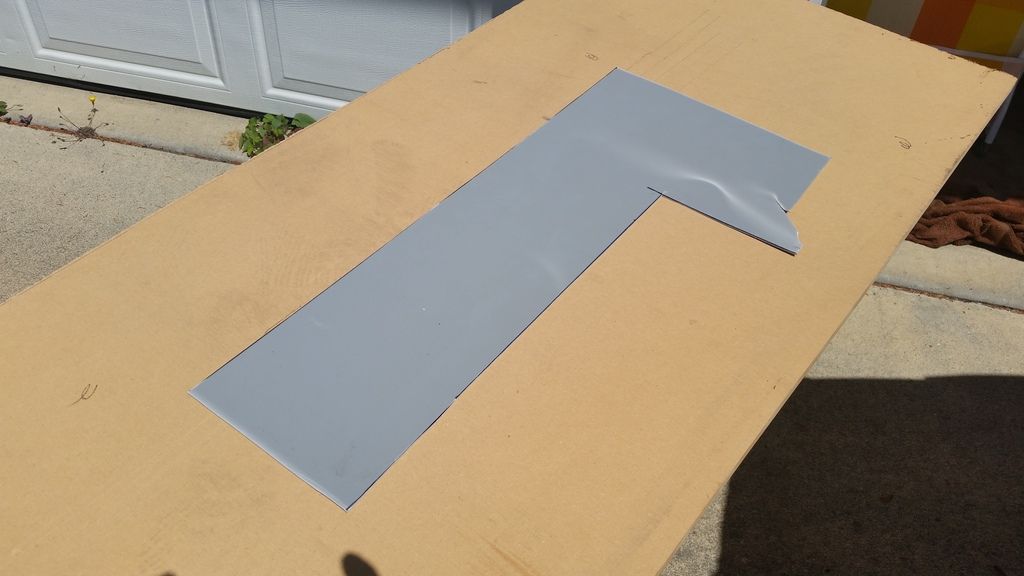
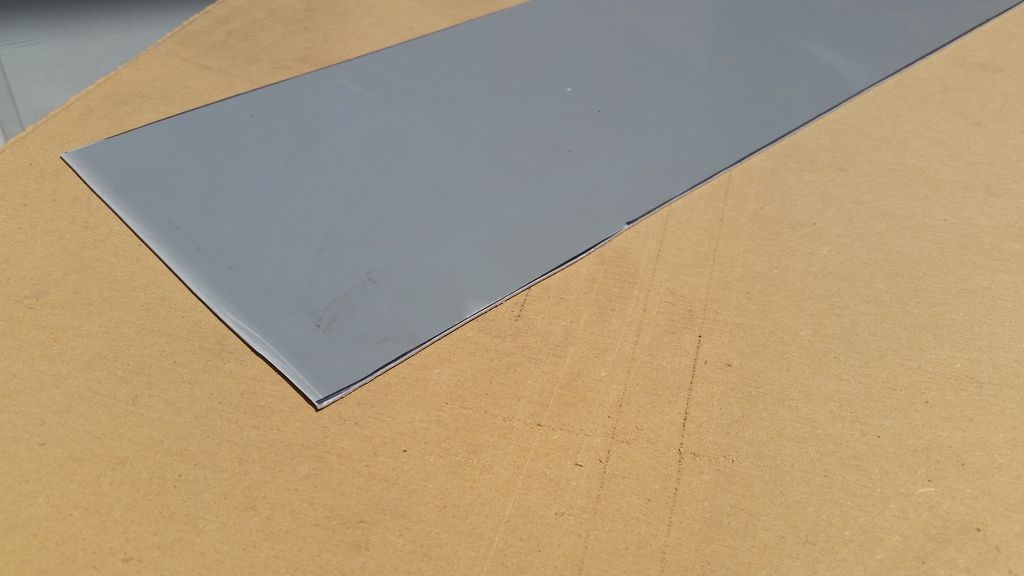
I cut the gray plastic to the correct dimensions that would fit in snugly between the raised concrete sidewalks and before the cut plastic road was cemented with a Hogar style adhesive cement, I sprayed it with 2 colors of flat enamel, 1. gray primer and 2. camouflage beige (light mistings on the latter). Once dry,..it was cemented into place, I then striped the fog lines and median dividers and weathered the lanes with a dark shade of charcoal gray pastel powders. I even cut and formed some black foam board segments to replicate shoulder slopes and an incline drive onto the service road and added chain link fences along the rear property lines with mesh from bridal vale (the name of the material escapes me?)..."tule"...is that correct?...

To simulate foreground and background dead grass, I went to the local fabric store and again, for soft dollars, I bought a yard or so of a material known as "Honey Plush" felt...
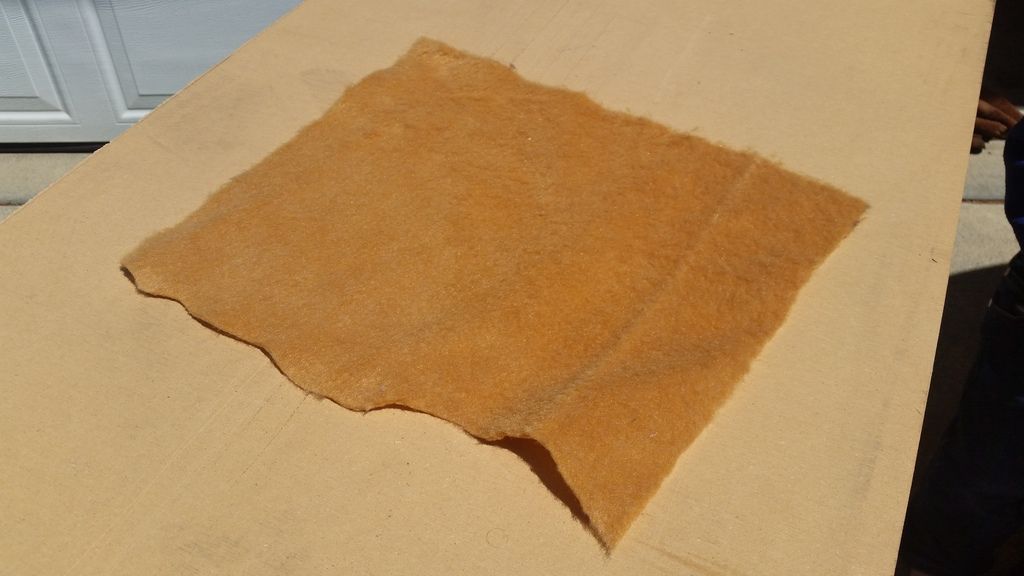
When back combed or teased against it's normal wave and misted with Dull - Cote* to knock down fiber sheen, plus a slight sprinkling or pinches of Woodland Scenics clump foliage, the stuff becomes a superb facsimile for simulating fields of late summer grass. This stuff should NOT be confused with fake fur, (which has longer fibers). * Thanks Joe Fugate for Siskiyou line inspiration years ago with your fake fur blends*. One might observe in the picture above of the road in place, the cut sections of plush felt placed into position.
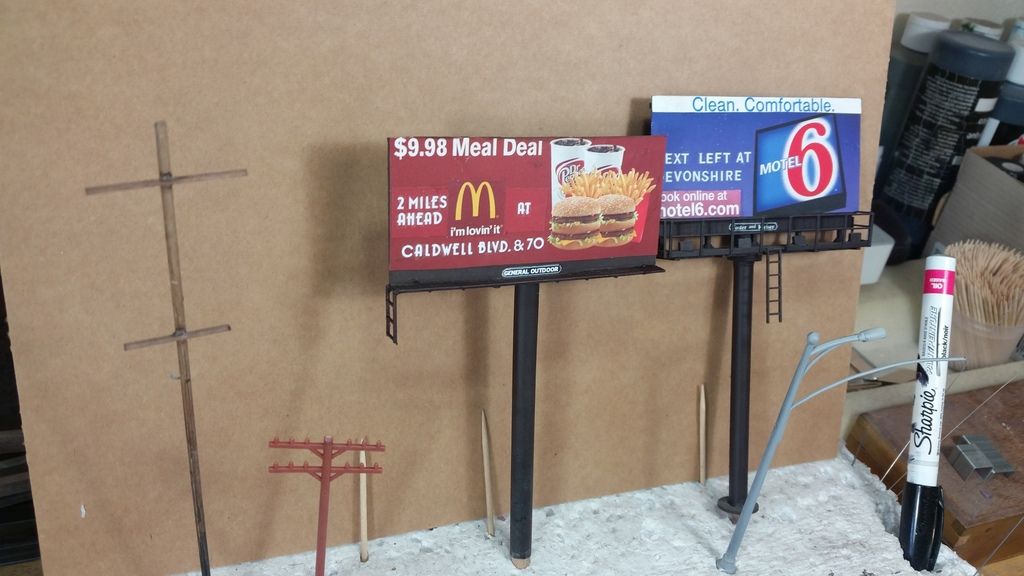
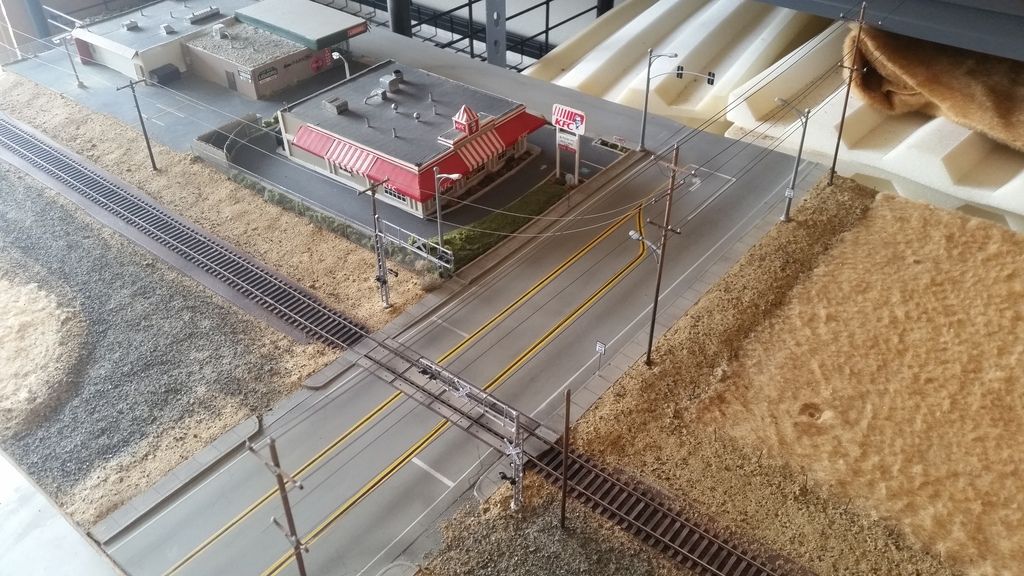
With the diorama starting to take some form and all the aforementioned features firmly cemented into place, I took some time away from the main project itself and hit the workbench to create some scratch built details and build a couple of detail items from Blair line, BLMA etc. I brought home from my work (again) some wooden skewers that I hand crafted with cross arms , supports and insulators, that would serve as multi phase power poles. I stained the skewer poles with diluted mixes of sienna and black acrylic craft paint, added plastic insulators and used common office staples to fabricate cross arm bracing. I crafted 6 poles in this fashion and for the lines along the R.O.W. that would serve the railroad and the service to the franchises..I painted up some old plastic poles that I had laying around in a junk drawer. I built and painted a Blair Line billboard and scratch built another and fitted each with my own designed ads. I even scratch built 2 cantilevered crossings signals to save cost. After all,...I would not need operating signals for a diorama. Finally, for next to nothing in cost, I purchased some street lamps that I modified and painted and when all was complete, my workbench was littered with detail items that would be applied to bring the diorama to life at a later juncture of the build...
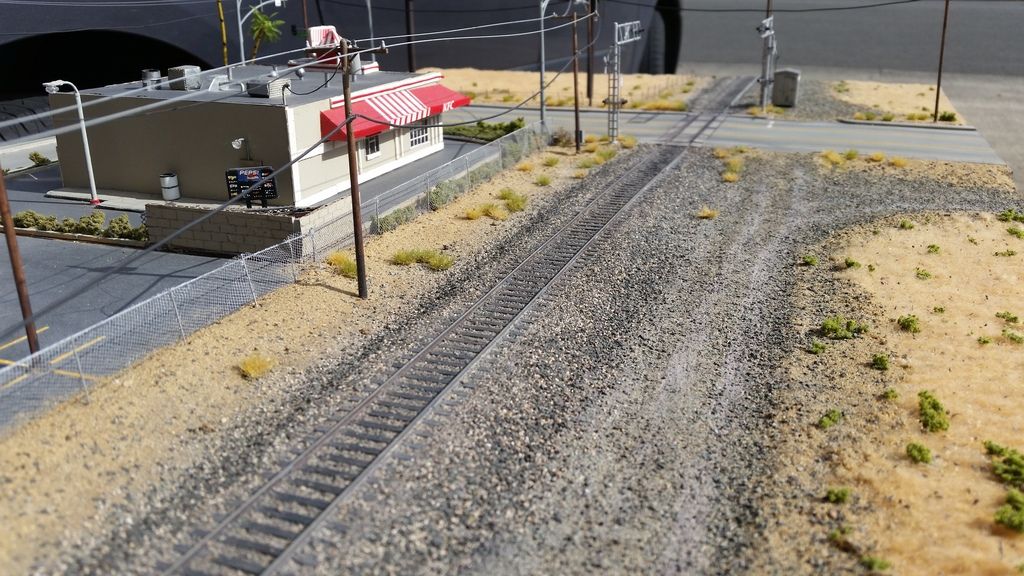
Now that all was taking shape on the diorama, I painted bare areas where soil and earth would be present with a dark brown mix with beige acrylic craft paint. While the paint was still wet, I sifted in some local sand that can be picked up here by the bucket loads...anywhere. When the sand/ paint mixed dried, I re sifted on multiple layers of the local sand and went to work cementing it into place with the obligatory "wet water/ diluted white glue". It took 2 additional days for all of the sand to dry as hard as stone. I then sifted an extra fine layer of a gray powder aggregate (similar to grout). This would be distributed along the foreground r.o.w. on either side of the boulevard. When I sealed it as well with the "white glue" mix and it had dried,..I sprinkled in a couple of layers of a more coarse mix of of fine sifted gravel that might resemble just that...gravel in 1/87 scale. With all set and dried,..I could begin with detailing the diorama by setting the power poles and crossing signals...
Placed a traffic signal and started stringing the real , scale wire lines and cables...
Set the highway billboards and created a scale barbed wire fence around the background field
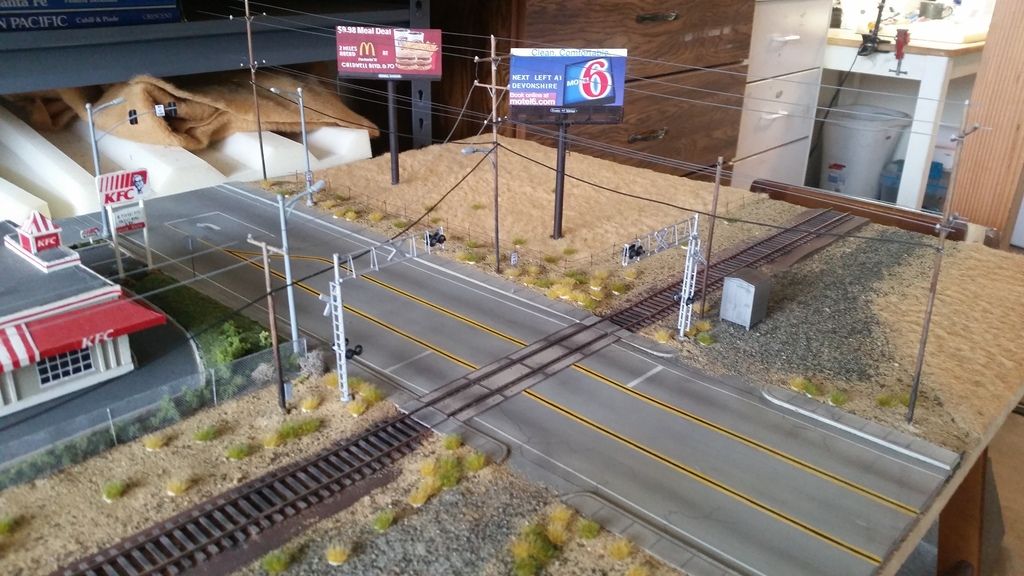
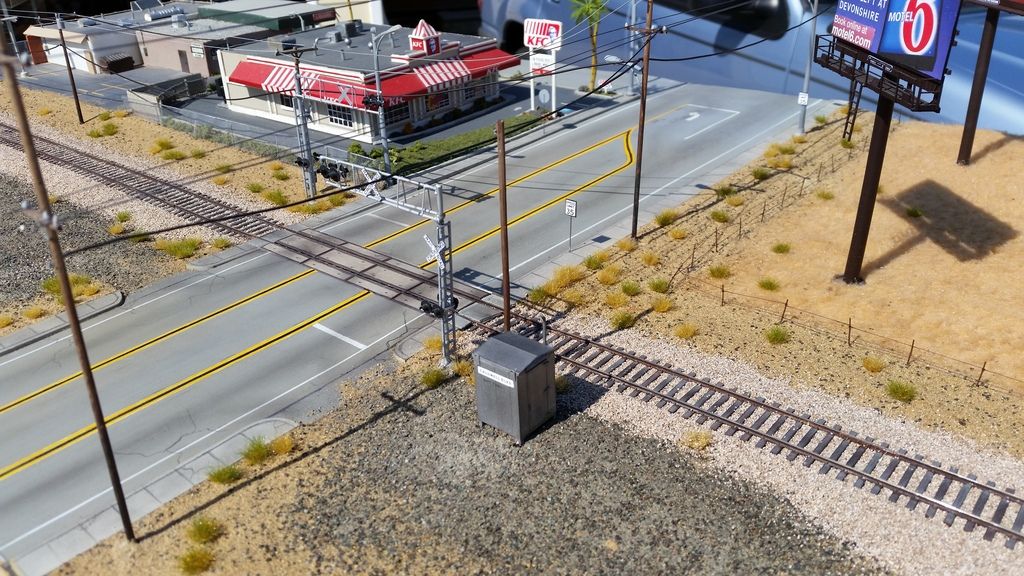
Next came the sporadic placement of various hues of Silfor grass tufts and the adding of the BLMA electric box and service pole next to it...
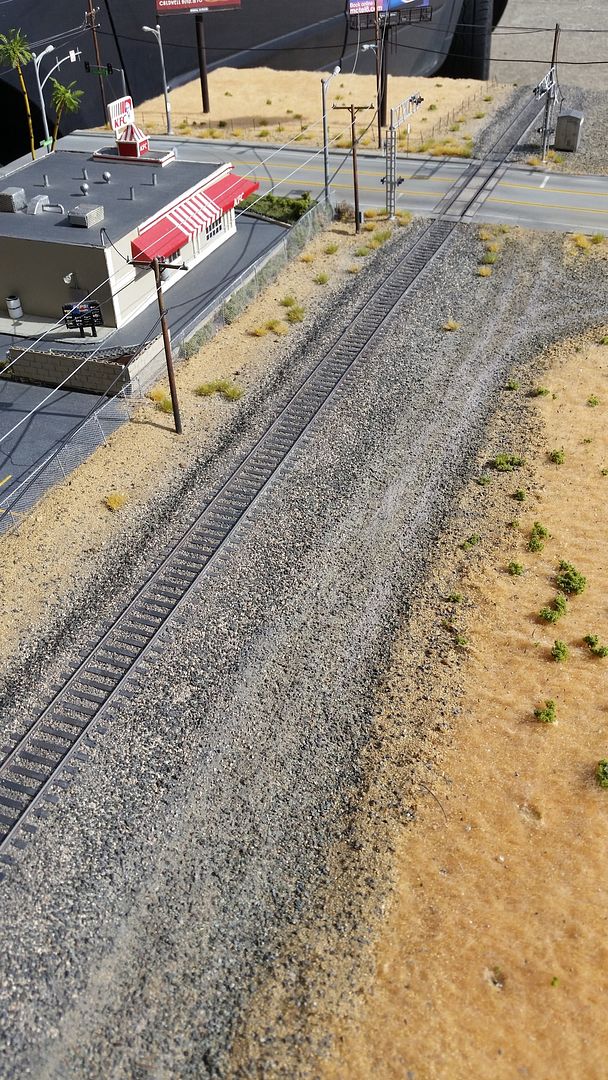
Everything was gliding along smoothly up to this point in the project. All was in place and i was generally satisfied with it's progressive outcome. BUT THEN...I had ordered some 1/87 scale Arizona rock and mineral ballast that looked in the website photo as a matching color that I had desired to simulate Southern Pacific type ballast. When the ordered ballast arrived in the mail, It was decent enough looking in the bag. I then poured, spread, brushed it all into place upon the rails, between the ties along the right of way. When I misted the simulated ballast with wet water to begin the process of cementing it into place, the color of it changed drastically. It wound up as a very bleached looking gravel that one may find in the deep south or Northeast. I was shocked and slightly disappointed...

" What to do now"? I panicked! I started making phone calls to a couple of close friends in the hobby,..Jeff Meyer and Kevin Packard. both of these guys have created some EXCEPTIONAL dioramas and I needed their advice and opinions about what I might do to rectify the color issue with the ballast. Both of them suggested after seeing texted photographs to apply diluted acrylic washes of a dark gray or black. I kind of balked at this thought. Even though the ballast was rock hard dry, I still had reservations that I might disrupt or dislodge the set particles with multiple washes. I went ahead with their suggestions and for certain, the color tone was much more acceptable, however it looked very splotchy and I was still uneasy with it. Instead of peeling up the existing track work and ballast that I had previously laid, I opted to mix a local basalt type rock into an ultra fine grain that I mixed with the remaining Arizona surplus that I had on hand...
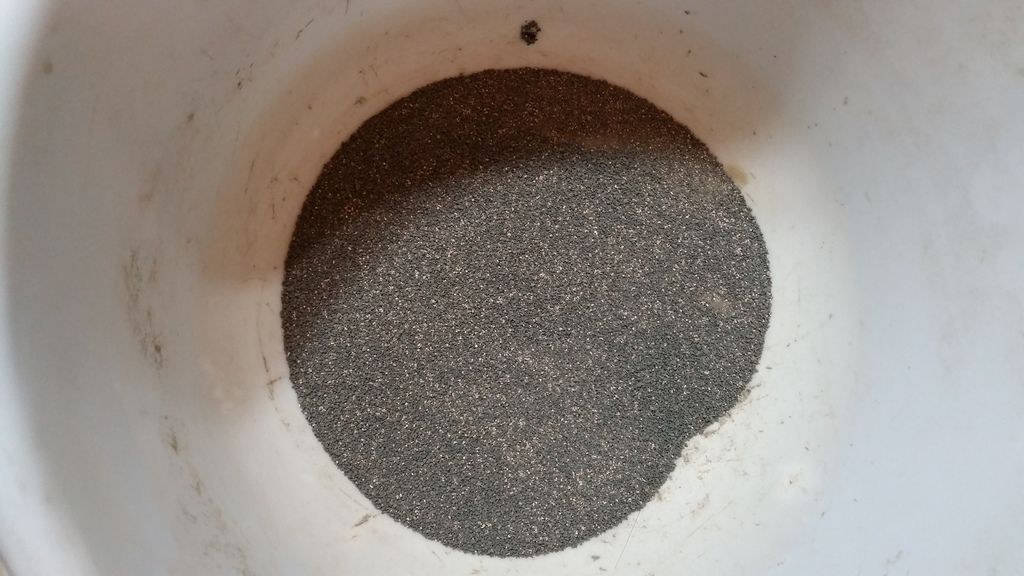
Call it a "happy accident" if you will, but I was incredibly pleased with the fresh new layer of ballast that I had applied and brushed directly over the botched layer...
After all of the new ballast was set with wet water, diluted white glue and had dried thoroughly, I added tire tracks in the gravel with pastel powder...*thanks for that idea Jeff Meyer*. and I started my process of fine tuning the whole scene with added details..i.e. service lines to business, Woodland scenics clump foliage, street signs, power pole guy lines etc. etc....

After about a week to let all the detail features and the whole diorama set up, the total time (in incremented sessions) took approximately 3 weeks , just shy of one month from start to finish and the cost efficient diorama became ready for taking photos of my weathered freight cars and locomotives for my monthly target at The Weathering Shop!
"Caldwell Boulevard"...


Any questions or comments are welcome!
Gary Christensen