Backdrops, Fascia, Lighting...
15 Minutes a Day:
In the course of the last year I listened to a podcast featuring Bob Fallowfield and his Galt Subdivision, a beautiful CP themed layout. Bob's railroad is nearly if not fully finished and detailed and a good amount of the podcast's discussion centered on this anomaly: a finished model railroad! Bob's secret to progress is always aiming for at least 15 minutes of progress each day. With time, these smaller amount of time build into something significant, and this principle has been foundational in guiding my efforts thus far. Most times I will work for at least 45 minutes on a project, sometimes up to a couple of hours either in one sitting or multiple 15-20 minute chunks throughout the day. It is not magic, more a matter of having a vision and sticking to it, but Fallowfield's Fifteen have worked!
Fascia and Backdrops:
With limited time in general to work on this railroad a major priority has always been achieving a "finished" look and feel even if the railroad itself is not technically fishined. Major elements in the visual completion include the painting of backdrops and installation of fascia. With the completion of trackwork on the mainline I could now start "finishing" the upper level of the railroad. I began with backdrop painting. This process has been well documented throughout my blog postings and a timelapse video of that project can be found
. I have now completed the backdrops for the entirety of the railroad, save for one small stretch.
Concurrently, I began to install the fascia on the upper level starting with the layout entrance. Given my benchwork construction, this was not a straightforward installation, but involved a good deal of fitting and fiddling. Nevertheless when this area is completed fully with paint and terrain it will provide a unique entrance to the railroad.

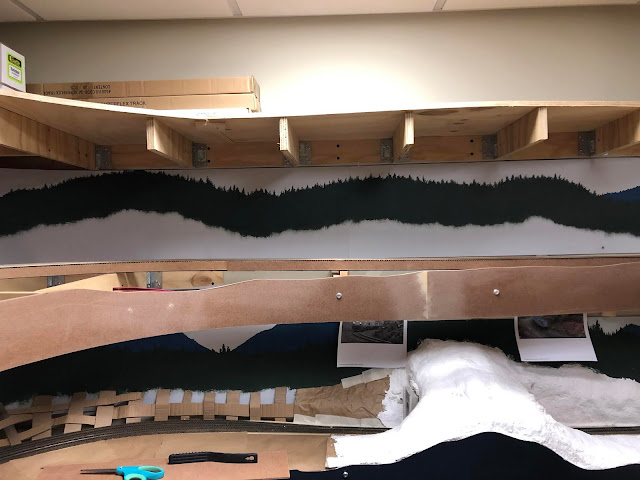
Beginning efforts on the fascia near the entrance to the railroad. The major challenge was incorporating the middle level duck-under as it sits in the middle of a tunnel.

My solution for the tunnel and duck-under situation can be seen above. This setup allows for the scenes to be viewed from the inside of the tunnel should one choose.

Both fascia and backdrop progress can be seen in the above photo.

Backdrops painted at Cascade Summit. With the terrain "horizon" painted I have begun to start visualizing the dramatic mountain scenery that will be featured on this upper level.

Fascia and backdrops at the west end of Fields. This scene is very deep with almost 24" of railroad between the fascia and backdrop. The upper level fascia helps to separate the two levels of the railroad.
Fields above and Westfir below with Klamath Falls staging at the top.
Lighting:
Time has allowed for the start of terrain work to begin on the lower level. In the coming weeks I will begin completing the terrain, rockwork, gravel, dirt, and roads on the lower level. I felt that it was necessary to first install the between deck LED lighting in order to achieve the correct colors and not work in shadows.
I am using LED strip lights from MicroMark and a 12V DC power supply. Installation of these lights has been very painless. I've mounted the lights onto foamboard strips and in turn mounted those to the underside of the benchwork. The light is even and bright, illuminating the layout in a very pleasant and natural way.

Lights installed under Fields illuminating Tunnel 22 at Westfir.

Installation of the lights was a quick process. The above photo shows the lights on the foamboard strips mounted on the underside of the upper level benchwork.

Photo showing how the combination of fascia and lights contributes to the finished look of the railroad.

Westfir illuminated and ready for the start of scenery. Future posts will detail my scenery efforts on this stretch of railroad.
More to come in the next few weeks. I hope everyone is safe and sound in these trying times. More than ever I am thankful for this community!