I'm afraid this post must start on a bit of a sad note. A couple of years ago, I used a 3D printed cab and scratchbuilt water tank to convert a Bachmann On30 2-6-0 to a 2-6-2 saddle tank engine. Although it looked good, it didn't run as well as I would have liked. A few weeks ago, I took it apart to try to tune it up, and add a currentkeeper to improve power pickup. Unfortunately during this, it took an accidental express trip to concrete junction. Most of the damage was to the body, and I did try to repair it. Unfortunately, my efforts were not successful.
As such, I decided to build another no. 8. Given that the original mechanism hadn't been running properly even before the accident, I decided to start completely from scratch. However, the new no. 8 would be a similar design to the original.
I started out with the mechanism from a Bachmann HO scale 2-6-2 Prairie, identical to the one I'd previously used for my Pebble River Mining #28 side-tank engine. I've found that this is a reliable, robust mechanism. Most of my approach to this build was the same as what I did for #28.

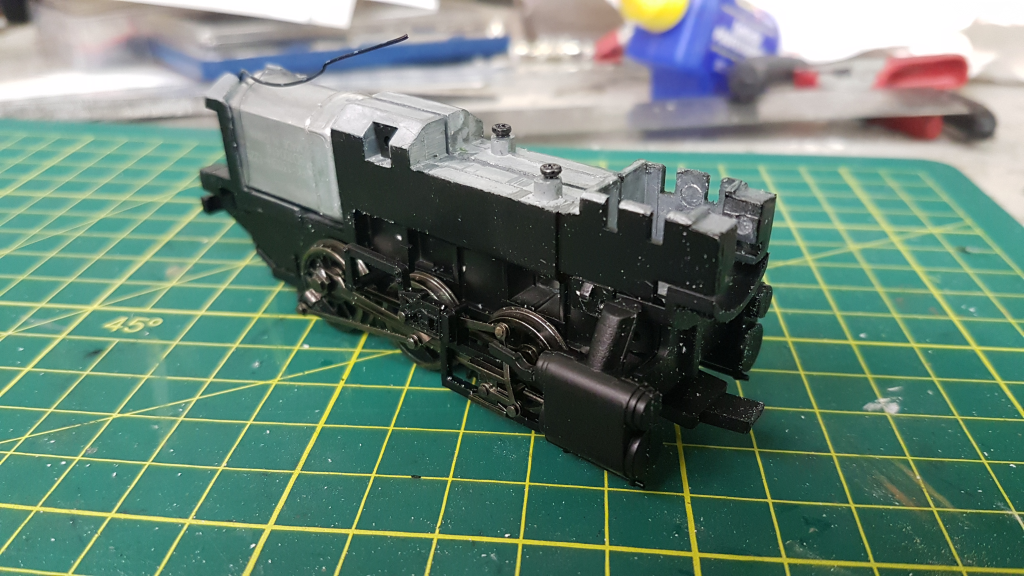
I started by cutting some 1.5mm styrene to fit around the chassis, then added a dropped cab floor at the rear. I then added brass bar around the edges of the main footplate, to reinforce it.
Following this, I found the PVC pipe I'd used for the tank of the original no. 8 and cut another piece of it to length. After cutting it in half lengthwise, I sanded it smooth and glued some 4mm x 4mm styrene strips onto the bottom of it. Once this was dry, I cut some 0.25mm styrene sheet to size and glued it around the tank. After the styrene sheet had dried, I cut some 0.5mm styrene and glued it across the front of the tank. Once it had dried, I trimmed it and filed it to match the curve of the tank.
With the tank done, I positioned it and glued it in place, level with the front of the footplate. On #28, I had just used a screw into part of the existing chassis to hold the front of the body in place. However, this resulted in a gap where the curve of the boiler/smokebox should have been. For this model, I cut a section of the pipe that I'd be using for the smokebox and cut it in half. I then filed it down and glued it under the front of the footplate. This fits over the HO scale smokebox support on the chassis, and holds the body in place at the front.
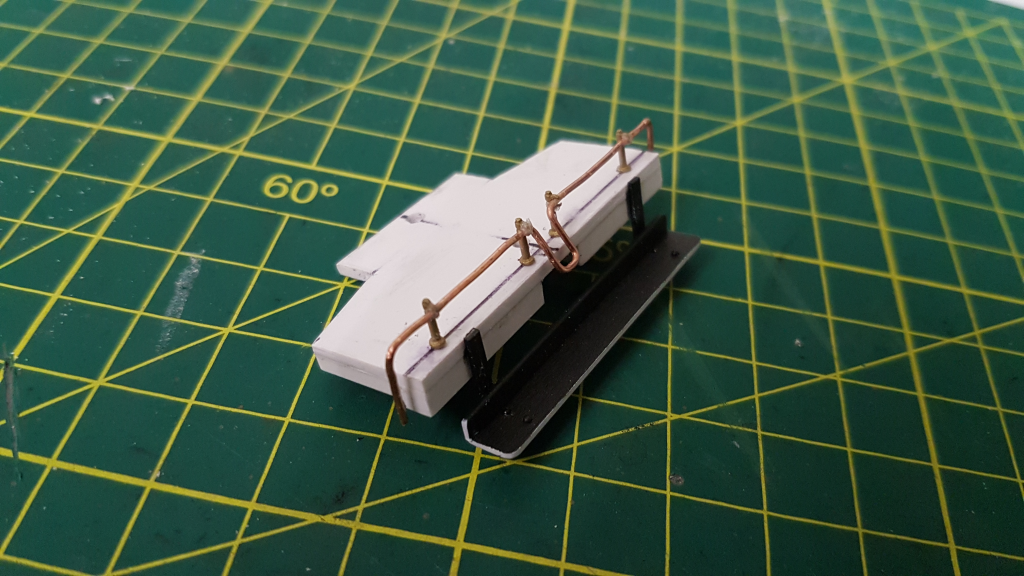
While this was drying, I made the pilot deck. Again, I cut the shape out of 1.5mm styrene. This time, the edging under it was made from 2mm x 2mm styrene strip. The stanchions for the coupler lift bar were brass parts I had in my parts box. The bar itself was made from 0.8mm copper wire bent to shape. For the pilots themselves, I used some spare Climax ones I found in my parts box.
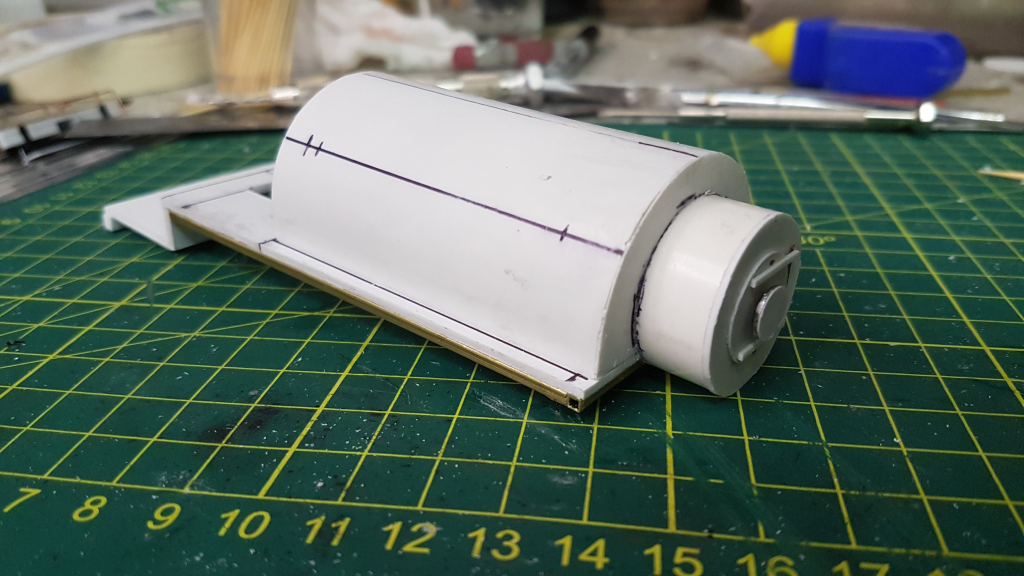
With the tank dry, I built a smokebox out of some PVC pipe. The smokebox door was made from 1mm styrene, with a smaller circle of 0.5mm styrene on the front of it. The numberboard was made from a nail, a washer and some 0.25mm styrene. Styrene strips and some 0.5mm copper wire were used to make the hinge.
I then turned my attention to the chassis. As with #28, I replaced the axle in the original lead truck with one from a spare On30 Forney leading truck. On #28, I'd used the original rear truck from the HO scale model. However, I wanted the truck on this model to be longer. I had a trailing truck left over from when I'd kitbashed my #9 into a tender engine, so I used this. The frame of this is etched brass, which was rather lightweight. So I added part of a fishing sinker just in front of the wheels, to provide some weight.
At the front of the chassis, just in front of the cylinders, is the support for the pilot deck. This was made from a section of 4x4mm styrene strip, filed to match the angle of the support for the original pilot deck. I did perform a test-fit of the pilot deck with a coupler installed, against a HO scale coupler height gauge. To make it correct, I had to add a small bit of styrene at the front of the support.
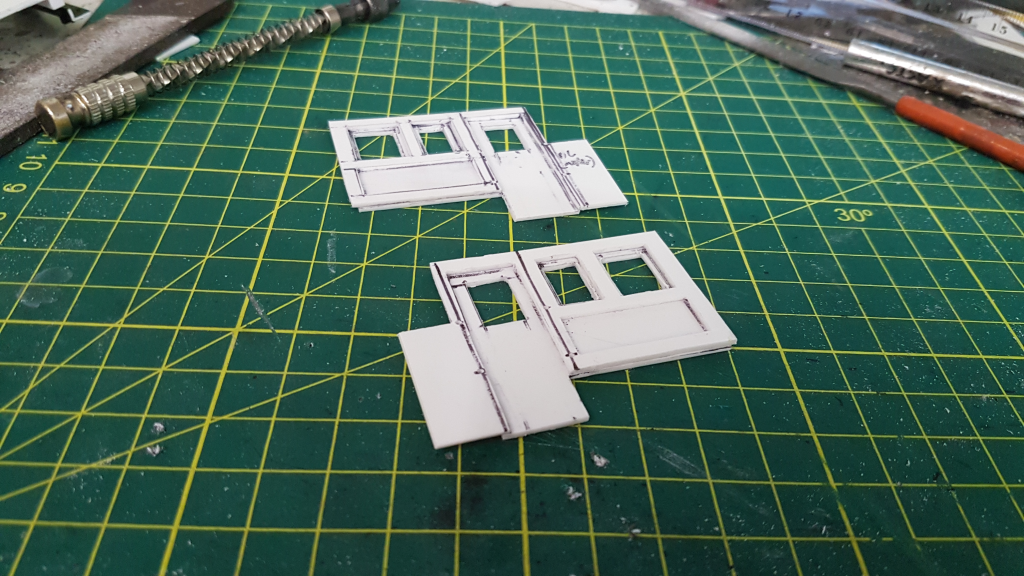
My next step was to build the cab. I cut four side pieces out of 1mm styrene, two for each side. On each side, one piece had openings cut for the windows, door and a side panel. The second piece had openings cut for the glass in the doors and windows. The second piece was also cut short, 1mm back from where the front and rear walls were to go.
After gluing each pair of sides together, I marked out and drilled holes for the handrails. I then filed the edges to match, to ensure the cab would be square when the end walls were added.
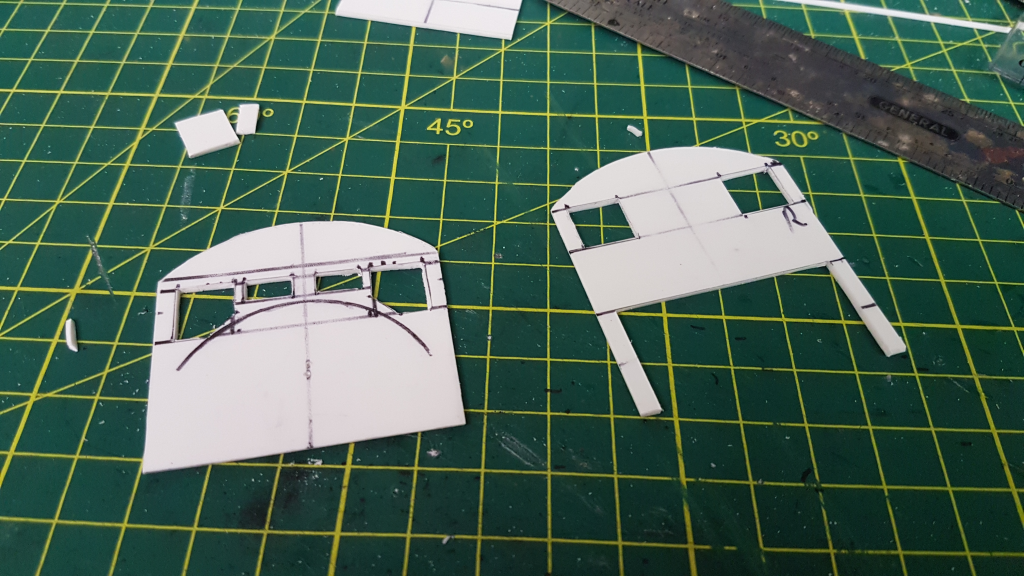
The front and rear cab walls were also cut from 1mm styrene. To cut the curve of the roof, I used a compass with a knife blade mounted where the pencil would usually go. This was the same tool I used to cut the circles of styrene for the smokebox door. It took a few tries to get it right. As well as the windows, I also cut out a gap in the bottom of the rear wall to accommodate the speaker. As with all my tank engine kitbashes, the speaker will be mounted in the fuel bunker, with the sound coming out via the side windows of the cab.
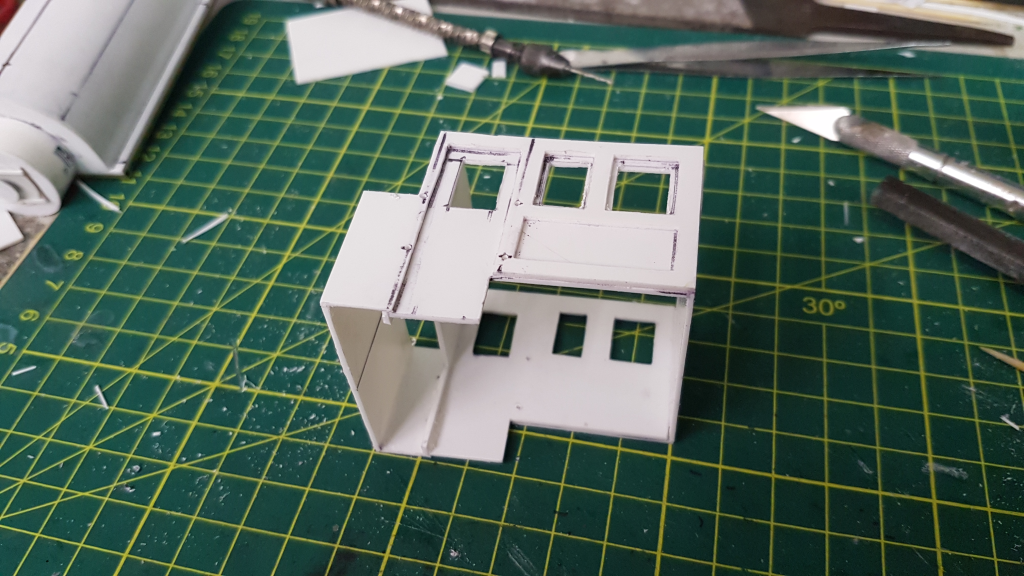
I glued the end walls in place, using the ends of the inner side walls to line them up. I then used 1.5x0.25mm strips to form external framing around the end windows.
I then put the cab in place, and marked where it should fit. Following this, I put two short sections of 3.2x3.2mm styrene strip at the front corners, level with the bottom of the cab. At the rear, I used 1.5mm styrene to provide a 'floor' for the fuel bunker. Once these had dried, I put the cab in place, and drilled holes at each corner for mounting screws. This will allow the cab to be removable in future, should it be needed.
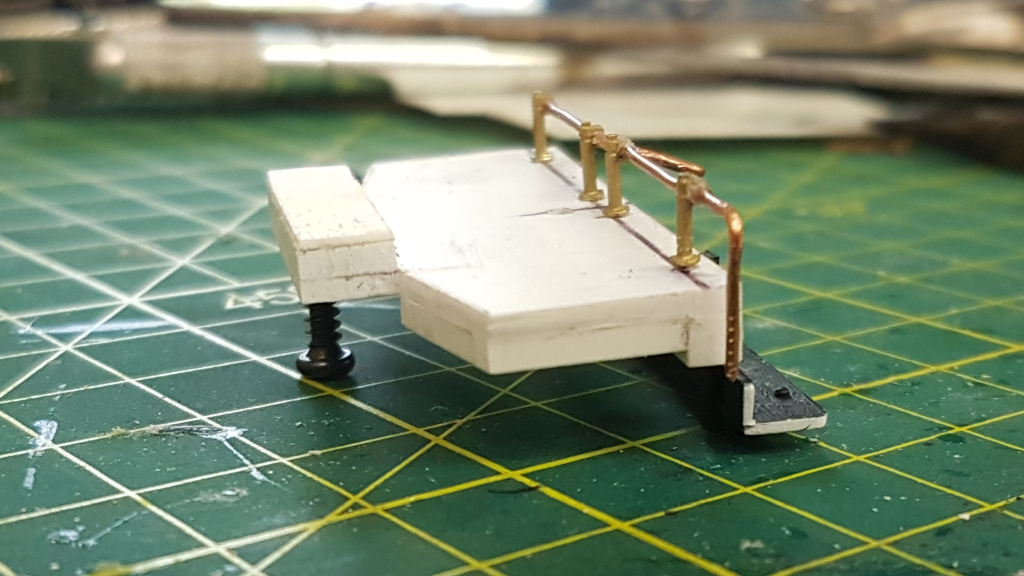
At the rear of the pilot deck, I'd drilled a hole for a M2.5x12mm screw to hold the deck in place. However, it protruded through. In order to conceal it, I glued three lengths of 2x2mm styrene at the rear, with some 0.25mm on top to provide a smooth surface. This was then partially drilled out to accommodate the screw.

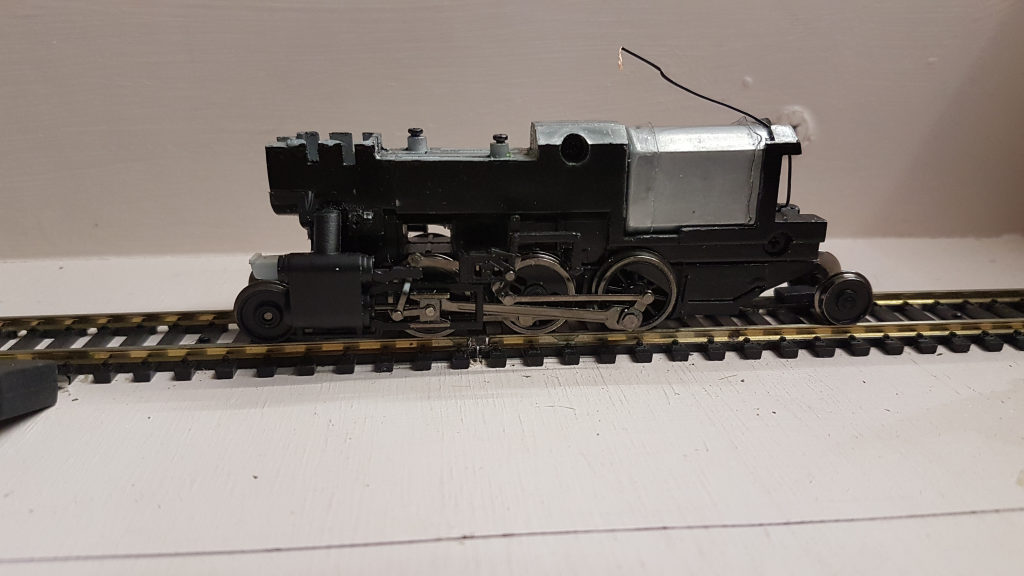
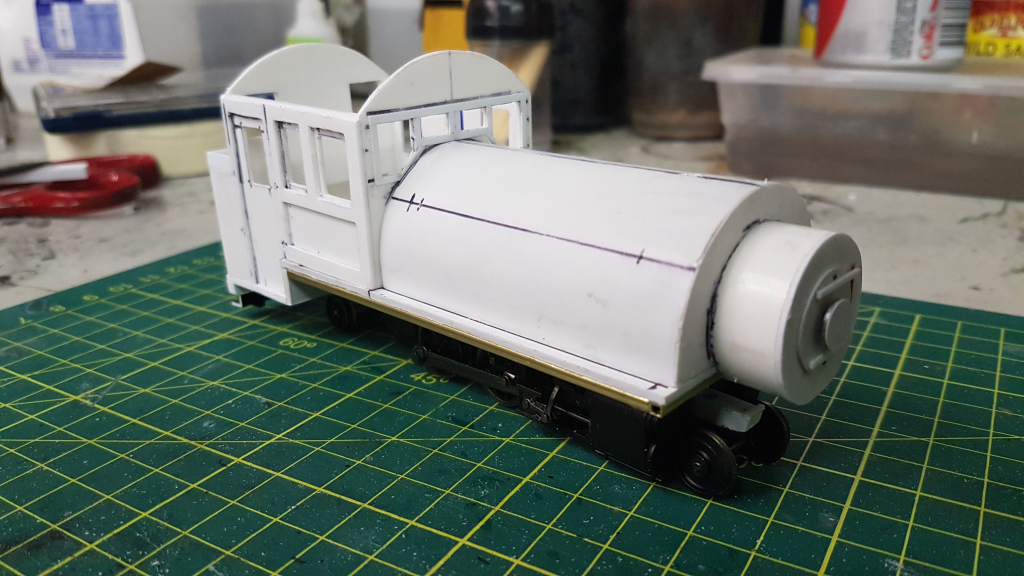
After adding handrails made with 0.8mm copper wire, I performed a test fit of the various parts. Something about it seemed a little off, but it took me a day or two to put my finger on it. The smokebox was way too long.
 Public Domain Image
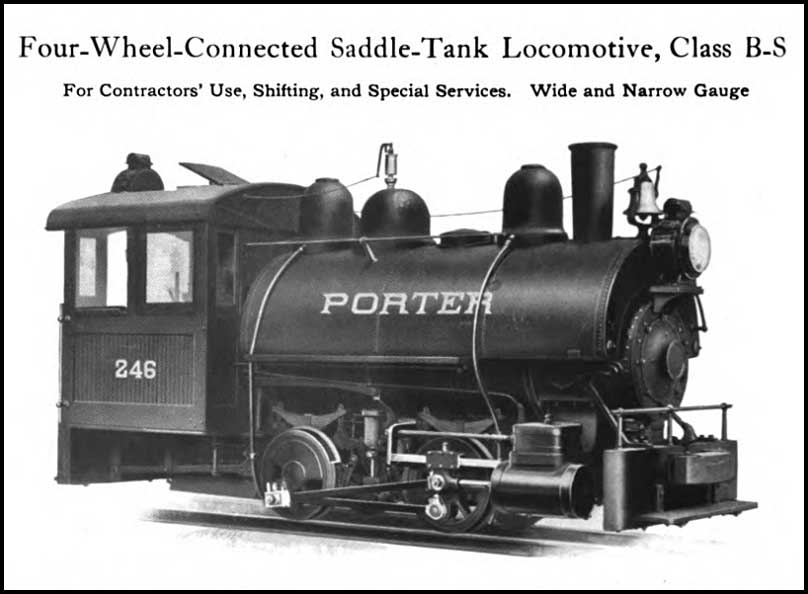
I'd meant for it to look like a Porter-style engine, with a long saddle over the boiler.
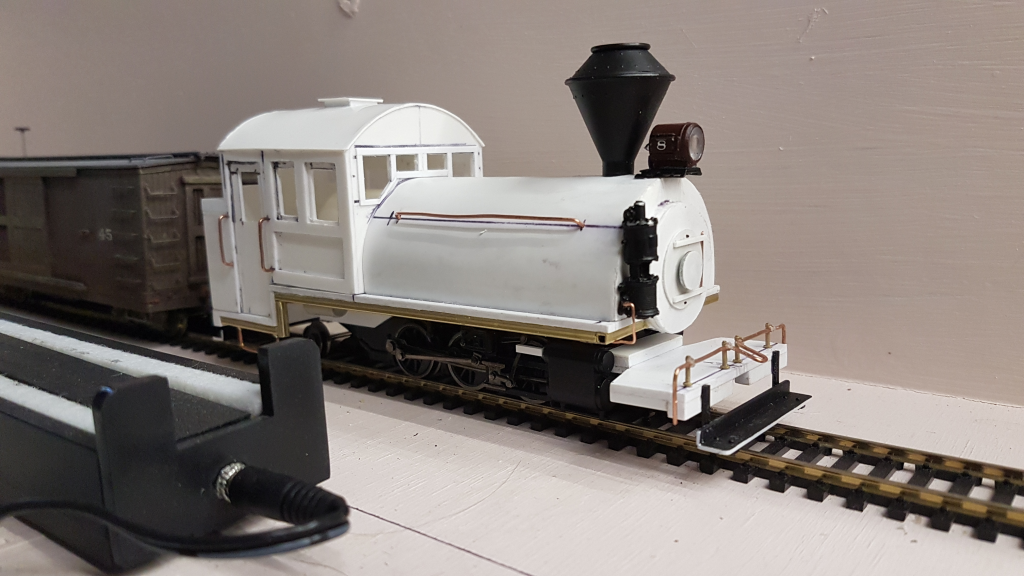
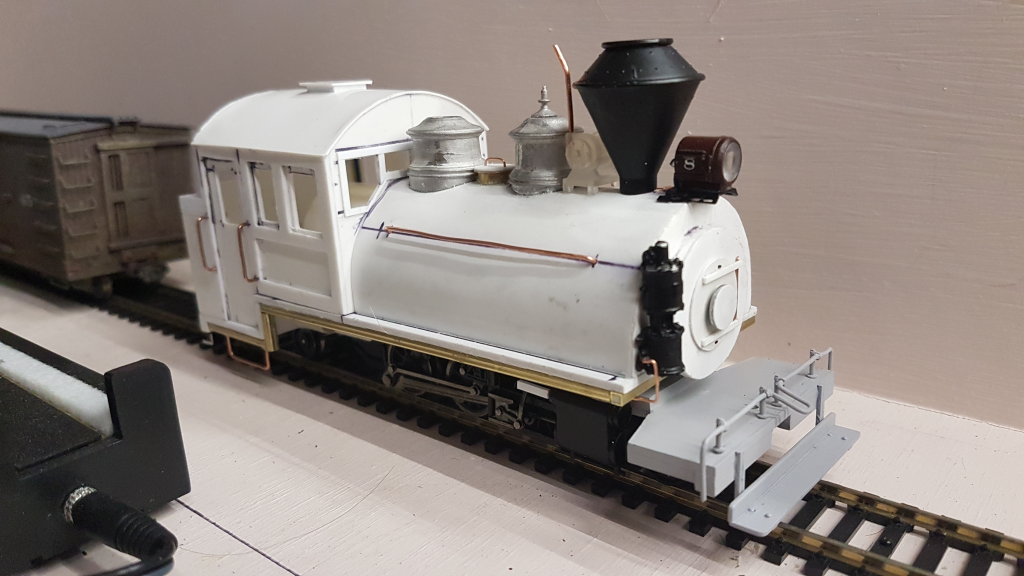
As such, I decided to shorten the firebox. After removing it from the model, I trimmed it back and filed it flat. It was then glued back in place. I also had to replace the smokestack, as the original one had gotten slightly damaged when I removed the smokebox. To mount the headlight, I used some spare details I found in my parts box.
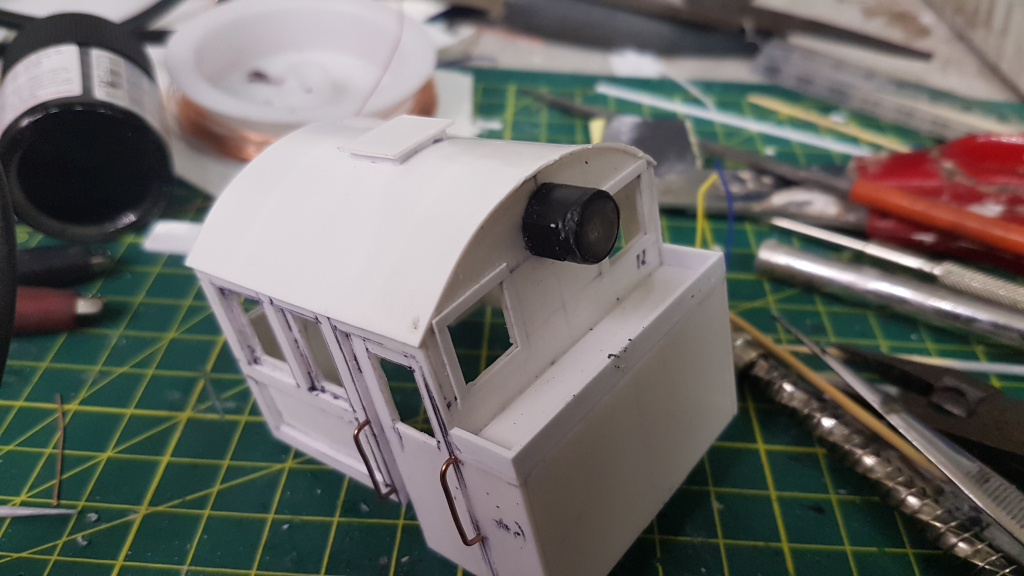
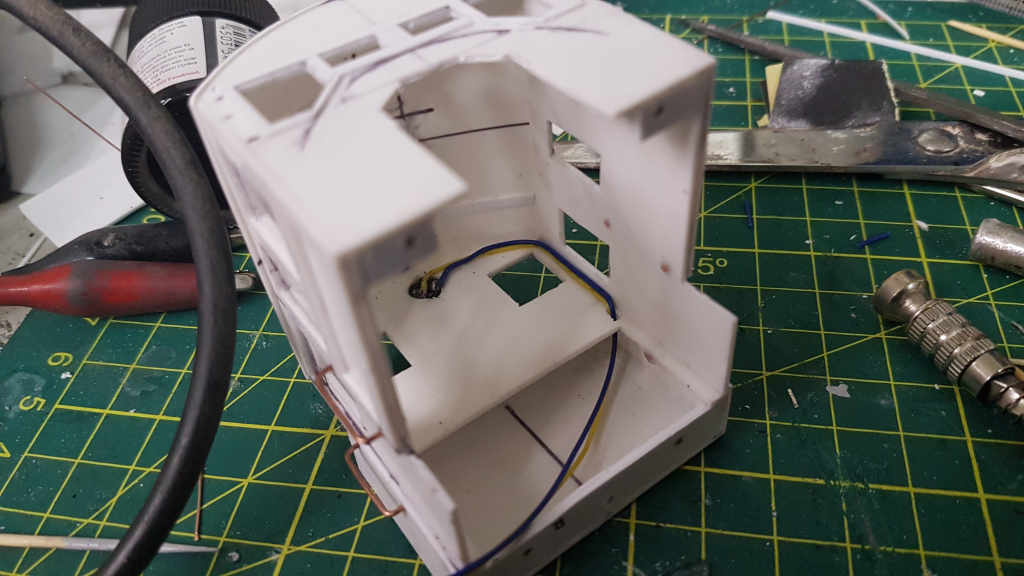
My next step was to recover the headlight from the rear of the original no. 8's cab, and install it on the back of the new one. I ran the wires down beside where the speaker will be going.
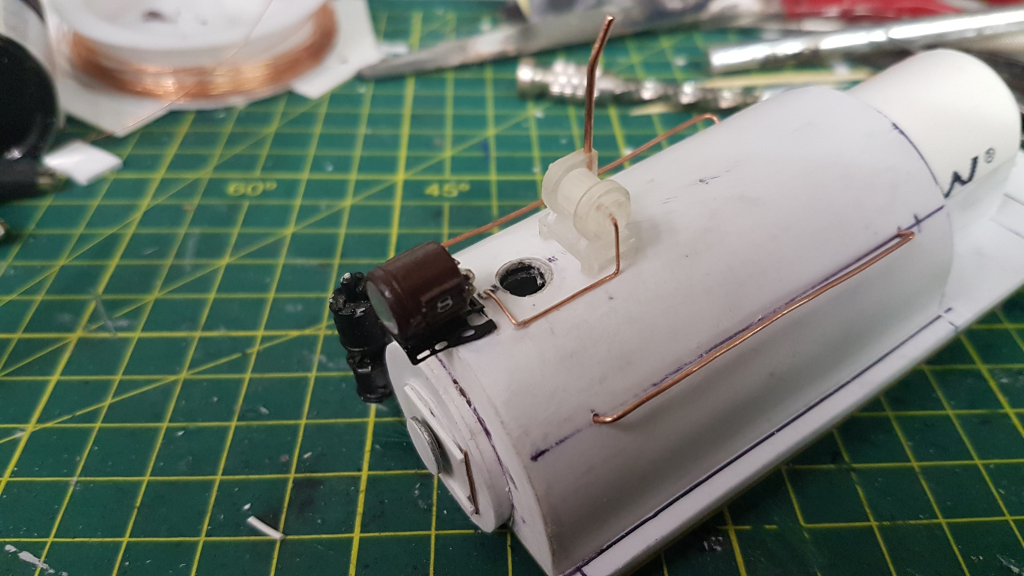
With the major components in place, I started adding details. The generator is a 3D-printed one I'd ordered from Shapeways. They come in 3-packs, and I was looking at adding them to some of my engines that didn't already have them. I used 1mm copper wire to form the generator's stack. For the steam pipe into it, I used 0.5mm copper wire bent to shape.
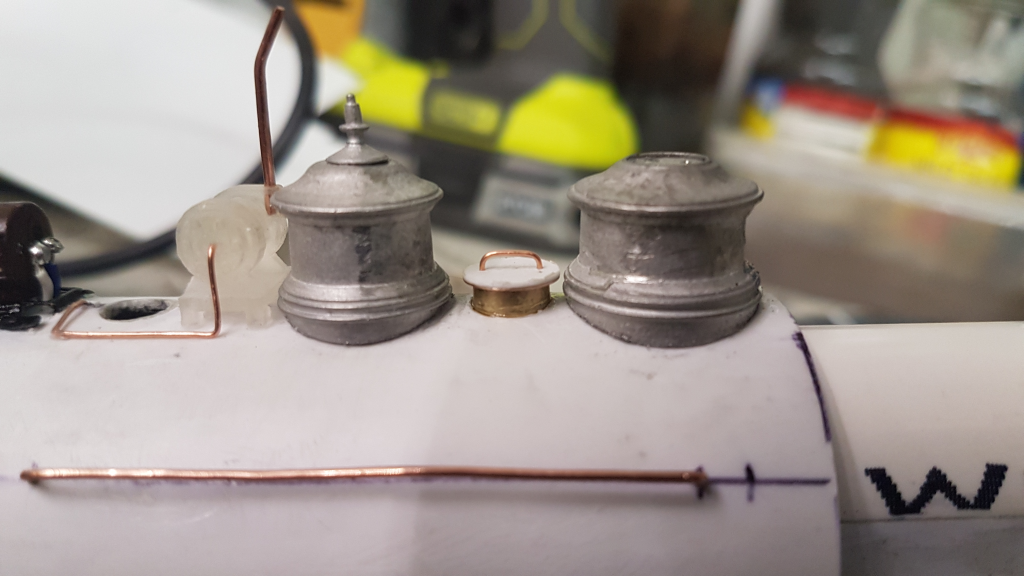
The domes were white metal castings, which I sanded out to fit the boiler. To make the water hatch, I started with a washer. This had 0.25mm styrene glued to it, and the handle on top was made from 0.5mm copper wire. Once this had dried, it was glued in place on the end of some brass tubing. This was then mounted in a hole cut into the top of the tank.
Before painting it, I performed another test fit. At this point, I discovered that the pilot deck was uneven horizontally. Some filing of the styrene support fixed this up.
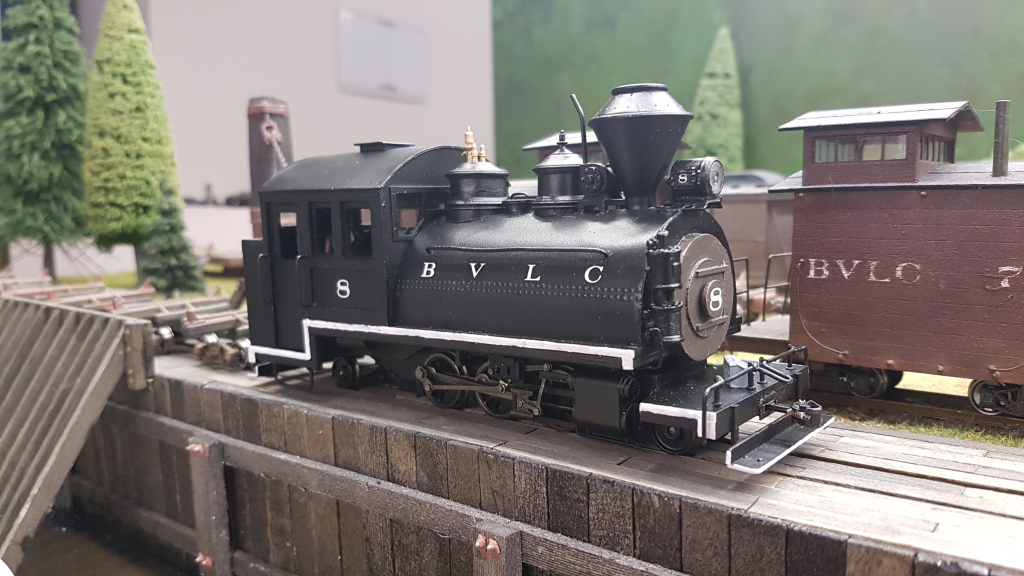
After adding some rivet decals, I painted and lettered the model. A TSU-2200 decoder was installed along with a keep-alive module. After being programmed, it was ready to go into service. Here it is in action: