Perhaps there is no harder problem for railway modellers than shingles. First of all, because we tend to have a bird's eye view, they are right up front and centre. Secondly, it takes a team of workers about a week to re-roof even a modest building. So, while you could install individual shingles, it will drive you cuckoo. Even if you do install individual shingles, you'll never get them as straight as the real ones.
For decades, modellers have used strips of shingles, which are a great improvement over individual shingles, but still pretty tedious. So, I was hoping that the Cricut would be able to solve this problem for me, and it seems that it will.
Shingles were the real reason why I developed the technique for clapboard siding that I used elsewhere on the roundhouse. The universal response when I try to explain how I do the clapboard siding is one of perplexity: they know I'm not lying because they're holding the sample, but they can't imagine how it's done. So, I've shot a series of photos demonstrating the shingles in the hope that you'll be able to take what I've done and improve on it.
I'm using three layers for shingles with a 6" reveal. The prototype would only have effectively about two layers, but that would mean only a 3.5 mm strip in HO, cut half-way through; this would be too fragile to handle, I think. So, I went with three layers, and it seems to work.
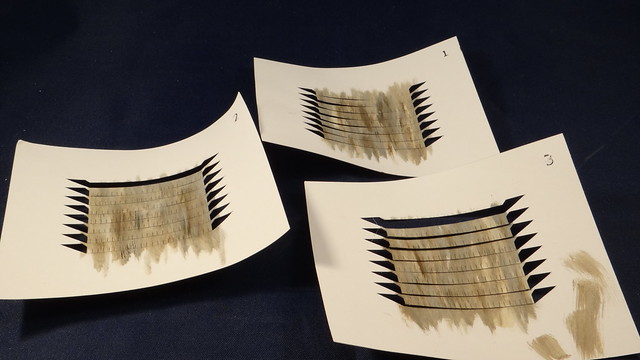
The shingles are cut in strips in each layer. The shapes at the ends of the rows enable the layers to nestle together. Note the numbers in the corners enable me to figure out the order of the layers.
The first step is to fold all the strips so they're perpendicular. This is easy to do if you start at the top and work down the page, flipping each row with a knife blade. Maybe people with long fingernails could use them, but I use a knife.
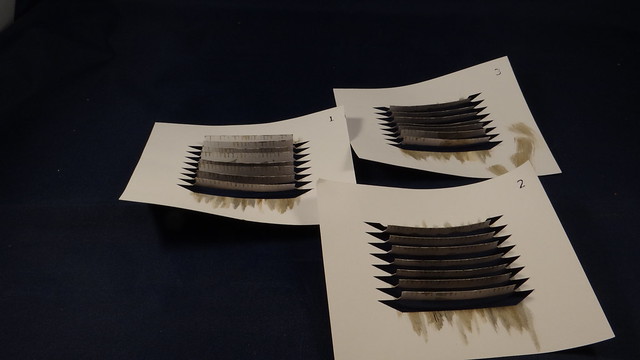
Next I stack the layers, being careful to get the strips in the right order. If there's a flaw, it is in the weight of the paper, which makes this step a little like trying to get a live octopus into a tin can, only less inky. Once everything is stacked, and the strips are in the right order, I carefully align the edges of the pages and glue them together (staples might work, but glue definitely does).

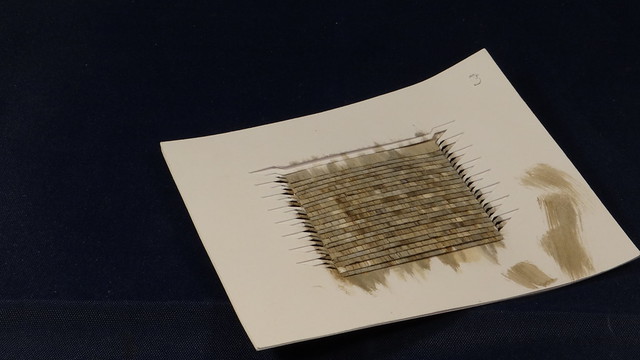
Once the glue has dried, I can remove the clamps and fold the shingle strips back down flat again. If the edges weren't perfectly aligned, when the sheets were glued, there will now be a pattern of wide and narrow rows. Notice that the second row from the bottom tore when I was trying to get the octopus into the can; I can fix one or two rows by eye easily enough.
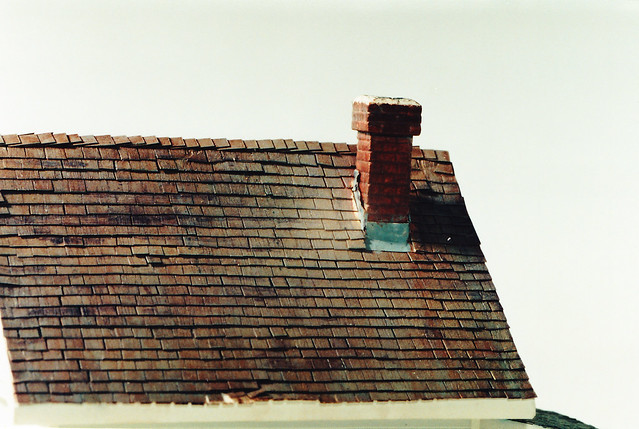
I glued the shingles to the roof sheathing, which I also cut and scribed on the Cricut. There were a few minor adjustments to make when the glue was still wet, and then I left it under a box of magazines to ensure it dried flat. After the glue dried, I cut off the surrounding support sheets, leaving only the shingles, and then touched up the edges.
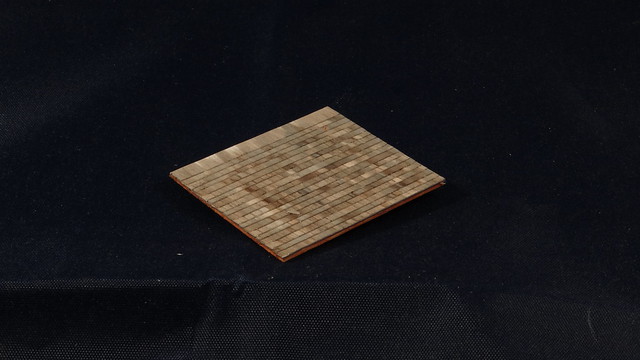
I really like the colour variation in shingles that I achieved in about five minutes with this method. Indeed, I've gone overboard here, and there are some definite patterns visible, which I would have to correct.
Fortunately, I won't be correcting this roof because true to form, I'm going to have to do this process again as I forgot to include enough material for the eaves! Well, that only means that I have another piece of model to hand around in my clinic at the Railway Modellers' Meet of British Columbia.
Rene Gourley
Modelling Pembroke, Ontario in Proto:87
Read my MRH blog
Read my Wordpress blog